
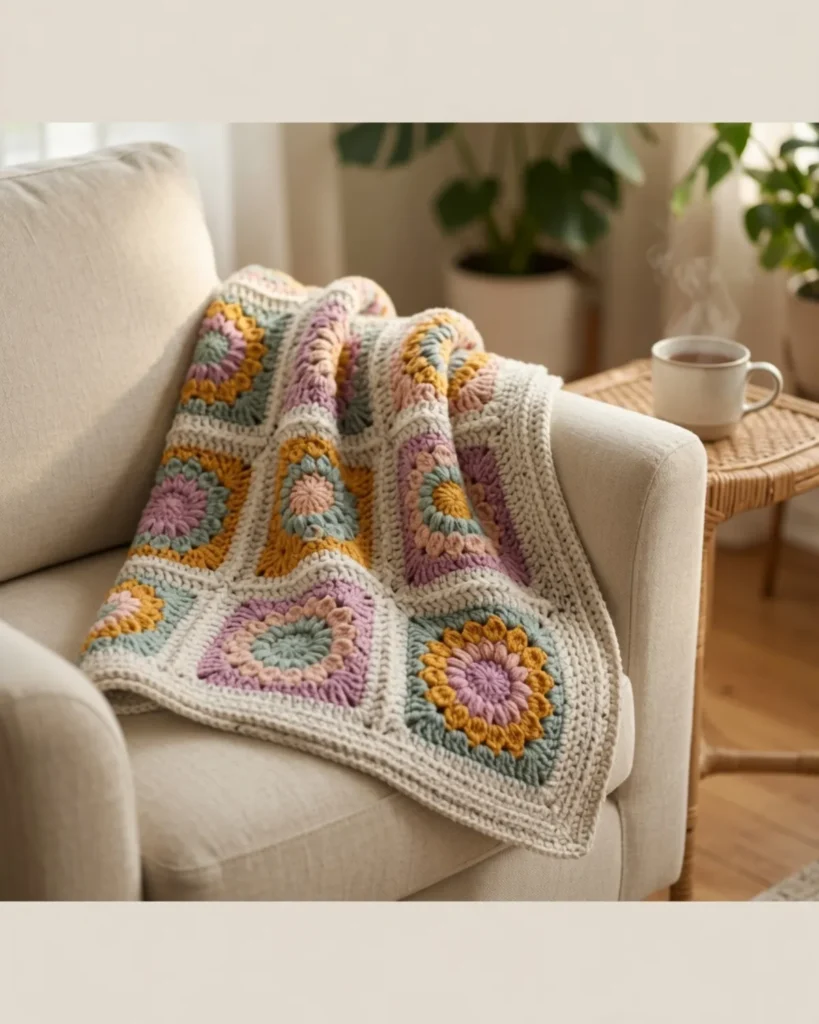
There’s a special kind of joy that comes from stacking up a pile of colorful granny squares, watching a blanket slowly take shape one block at a time. This sunburst granny square blanket brings together bright pink, purple, yellow, and blue in a cheerful, floral-inspired design that feels like spring in yarn form.
This is a lightweight lap blanket — worsted weight yarn keeps it cozy without being heavy, making it perfect for those transitional evenings when a heavy throw feels like too much but you still want something to snuggle under. The project comes together from 48 individually crocheted squares in 24 different color combinations, joined together with a neutral border that lets the colors pop.
This pattern is best suited for confident beginners and up — while none of the individual stitches are complicated, the project does involve some special stitches (puff stitch, cluster, and partial cluster) along with a join-as-you-go technique, so a little crochet experience will help things go smoothly.
Materials Needed
- Hook: 4.5mm
- Tools: Scissors and tapestry needle
- Yarn: #4 worsted weight yarn in 5 colors
- Pink (2 skeins)
- Purple (2 skeins)
- Yellow (2 skeins)
- Blue (2 skeins)
- White/neutral for the border (3 skeins)
- Yarn alternatives: Any soft, washable worsted weight yarn works well for this project if you’d like to substitute your own colors or brand.
Pattern note: This pattern uses US crochet terminology.
Gauge: One completed 4-round square measures approximately 5″ (not including the optional 5th round).
Finished size: Approximately 40″ x 55″
A Note on Hook Size
A smaller hook than is typically called for with worsted weight yarn is used here intentionally — it creates a tighter, less “holey” look to the squares and border. Feel free to size up if you prefer a more open look, but keep in mind that will affect both your yarn quantities and your finished blanket dimensions.
Special Stitches
See the full step-by-step tutorial if you’d like extra visual guidance working through this pattern.
Puff Stitch: Yarn over and insert into stitch, YO and pull up a loop (3 loops on hook). YO and insert into stitch, YO and pull up a loop (5 loops on hook). Repeat once more (7 loops on hook). YO and pull through all 7 loops on the hook. Chain 1 to lock it in place. This completes one puff stitch.
Partial Cluster: Yarn over and pull up a loop, then pull through 2 stitches (not all). Repeat twice more until you have 4 stitches on the hook. Pull through all 4 loops then chain 2.
Cluster: Yarn over and insert into the stitch, then pull up a loop, then pull through 2 stitches (not all). Repeat three more times until you have 5 stitches on the hook. Pull through all 5 loops then chain 2.
Pattern Instructions: The Sunburst Square

Round 1: In a magic ring, Ch 3 and 15 DC. Slip stitch to the top of the first DC, not the Ch 3. Fasten off. (16 total stitches)
Round 2: Attach new yarn in any DC, then draw up a long Ch 1 and puff stitch in same space. Puff Stitch around in each DC. Slip stitch to the first Ch 1 space, not beginning puff stitch. Fasten off. (16 puff stitches made)
Round 3: Attach new yarn in any Ch 1 space, then Ch 2, and partial cluster (4 loops on hook) in same space. Regular cluster stitch in next space and each space around. Slip stitch to the top of the first Ch 2 space, not first cluster. Fasten off. (16 cluster stitches made)
Round 4: Attach new yarn in any Ch 2 space, then (Ch 3, 2 Tr, Ch 2, 3 Tr), all in same space. In next space 3 DC. Next space, 3 HDC, then 3 DC in the following space. Next space, corner stitch: 3 Tr, Ch 2, 3 Tr. Repeat until you finish the last 3 DC section, then follow the instructions below for a seamless look to finish off your square.
Note: Only use the optional 5th round below if you are NOT using the continuous join-as-you-go method to join the squares.
Optional Round 5 (produces a solid double crochet border): In any DC, attach yarn with a standing double crochet stitch. Double crochet in every stitch until you reach a corner space, then (2 DC, Ch 2, 2 DC) in the same space. Continue to DC in each stitch along the next side, making sure not to miss the first stitch after a corner. Repeat all the way around until the last stitch, then slip stitch to the first DC. Fasten off and weave in ends.
Seaming Method
Instead of joining the blocks directly edge to edge, this design uses an inner border (or “sashing,” to borrow a quilting term) between each square for a more finished, cohesive look.
To create that solid border between blocks, a continuous join-as-you-go (CJAYG) method is used. If you’d prefer not to use a JAYG technique, you can recreate the same look by working the optional Round 5 above, then joining your squares with a back-and-forth slip stitch seam for a zig-zag effect.
Color Guide
The colors below are listed in order from Round 1 to Round 4 for each square. For example, Row 1, Square 1 reads: R1: pink, R2: yellow, R3: purple, R4: blue. The blanket layout is 6 squares wide and 8 squares long — 48 squares total.
Row 1
- pink, yellow, purple, blue
- yellow, pink, blue, purple
- yellow, purple, pink, blue
- purple, pink, blue, yellow
- yellow, purple, blue, pink
- pink, blue, purple, yellow
Row 2 7. purple, blue, yellow, pink 8. blue, purple, pink, yellow 9. pink, blue, yellow, purple 10. blue, yellow, purple, pink 11. purple, yellow, pink, blue 12. blue, pink, yellow, purple
Row 3 13. pink, purple, yellow, blue 14. yellow, blue, pink, purple 15. yellow, pink, purple, blue 16. purple, blue, pink, yellow 17. yellow, blue, purple, pink 18. purple, pink, yellow, blue
Row 4 19. purple, yellow, blue, pink 20. blue, pink, purple, yellow 21. pink, yellow, blue, purple 22. blue, purple, yellow, pink 23. blue, yellow, pink, purple 24. pink, purple, blue, yellow
Row 5 25. pink, blue, purple, yellow 26. yellow, purple, blue, pink 27. purple, yellow, pink, blue 28. pink, purple, blue, yellow 29. yellow, pink, purple, blue 30. purple, blue, yellow, pink
Row 6 31. purple, pink, yellow, blue 32. blue, yellow, pink, purple 33. yellow, blue, purple, pink 34. blue, pink, yellow, purple 35. blue, purple, pink, yellow 36. pink, yellow, blue, purple
Row 7 37. yellow, blue, pink, purple 38. purple, pink, blue, yellow 39. yellow, purple, pink, blue 40. purple, yellow, blue, pink 41. yellow, pink, blue, purple 42. blue, yellow, purple, pink
Row 8 43. blue, purple, yellow, pink 44. pink, yellow, purple, blue 45. blue, pink, purple, yellow 46. pink, blue, yellow, purple 47. purple, blue, pink, yellow 48. pink, purple, yellow, blue
Tip: Print out the numbered list above (or make yourself a simple grid) and cross off each square as you finish it — with 48 squares to track, it makes a big difference.
Square Placement & Layout
Lay your finished squares out in the order listed above, working row by row, so your color pattern flows correctly across the finished blanket.
Joining the Squares
Once your squares are complete and arranged in the correct order, it’s time to join them. You have two options here:
If you completed the optional Round 5: join your squares with a back-and-forth slip stitch seam to create a zig-zag look.
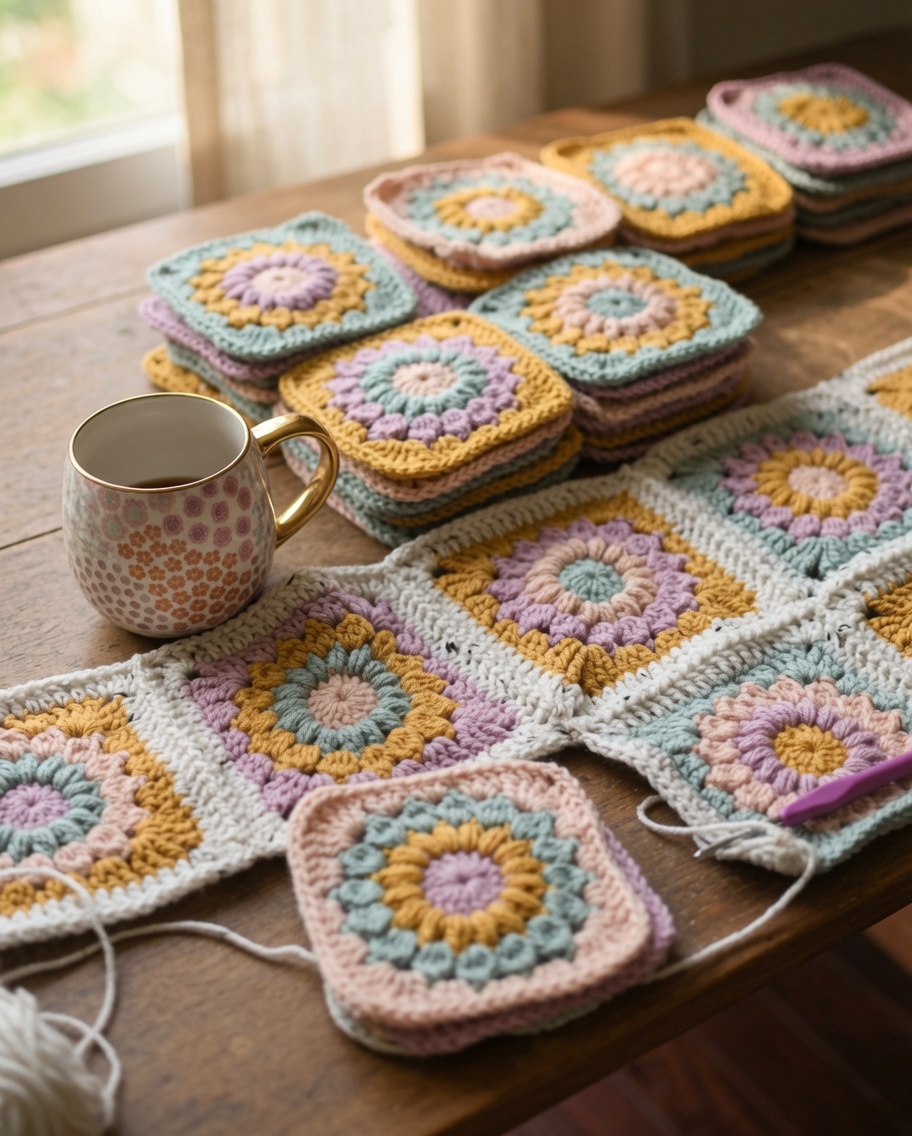
If you’re using the continuous join-as-you-go (CJAYG) method: stack your squares in order to keep track of placement as you work. Starting at Row 1, stack your squares from right to left, with Square 6 on top of the stack. Labeling each stack with a small note is an easy way to stay organized as you go.
Work the continuous join-as-you-go across all squares until everything is connected. Once you reach the end, slip stitch to the beginning, chain 1, and move on to the border.
This join method has a bit of a learning curve if you’ve never tried it before — it’s well worth watching a tutorial video or two before diving in so you get a feel for the motion.
Working the Border
Round 1: Single crochet in every stitch until you reach a corner space, then work (SC 2, Ch 2, SC 2) all in the same space. Continue this way around all sides. When you reach the end of the round, slip stitch to the first SC.
Rounds 2-3: Ch 1, SC in the first stitch, and continue around the same as before — but for these two rounds, SC in the back loop only. This creates a subtle ridged texture along the border.
Once all three rounds are complete, finish with an invisible fasten off for the cleanest possible edge, then weave in your ends.
Tips for Success
- Keep your tension consistent across all 48 squares — since they’re worked over several sessions, it’s easy for gauge to drift without noticing.
- If you’re new to the join-as-you-go method, practice on a couple of scrap squares first before committing to your full blanket.
- Steaming your finished squares lightly before joining can help square up any edges that curled while stitching.
- Want a bigger throw-sized blanket? Simply crochet additional sets of the 24 color combinations until you reach your desired size.
Frequently Asked Questions
Is this a good pattern for beginners? It’s a great project for an ambitious beginner, though it may not be the best choice for a very first blanket, since working through 48 squares takes some time and patience. If you’re looking for something quicker, a simple one-row-repeat stitch pattern is a gentler place to start.
What size will my blanket be if I use fewer squares? A smaller grid than the full 6×8 layout works well for smaller projects like baby blankets — just keep in mind that the sashing and border add extra width and length beyond the raw square measurements, so your finished piece will run a bit larger than a simple multiplication of the square size would suggest.
Do I need to block my squares before joining them? Blocking isn’t required, but lightly steaming your squares before joining can help even out any curling or uneven edges.
Can I use different yarn colors than the ones listed? Absolutely — the pattern works with any 4 main colors plus a neutral border color. Choose a palette that suits your space or the recipient of the blanket.
More Cozy Crochet Patterns
If you enjoyed making this blanket, here are a few more cozy projects worth adding to your queue:
- Elegant Winter Scarf Crochet Pattern — a beautiful textured scarf for the colder months
- Crochet Cable Scarf Pattern — a classic cabled design with a cozy, knit-like look
- Color Block Crochet Super Scarf Pattern — another great way to play with color combinations
- Simple Crochet Scarf Pattern — an easy, relaxing project for beginners
- Easy Fall Crochet Scarf Pattern — another approachable, quick-to-finish accessory
Conclusion
Congratulations on finishing your Sunburst Granny Square Blanket! Between the cheerful color palette, textured stitch work, and satisfying seamless join, this blanket makes a beautiful lap throw for spring evenings or a thoughtful handmade gift. Share your finished blanket in the comments below!
