
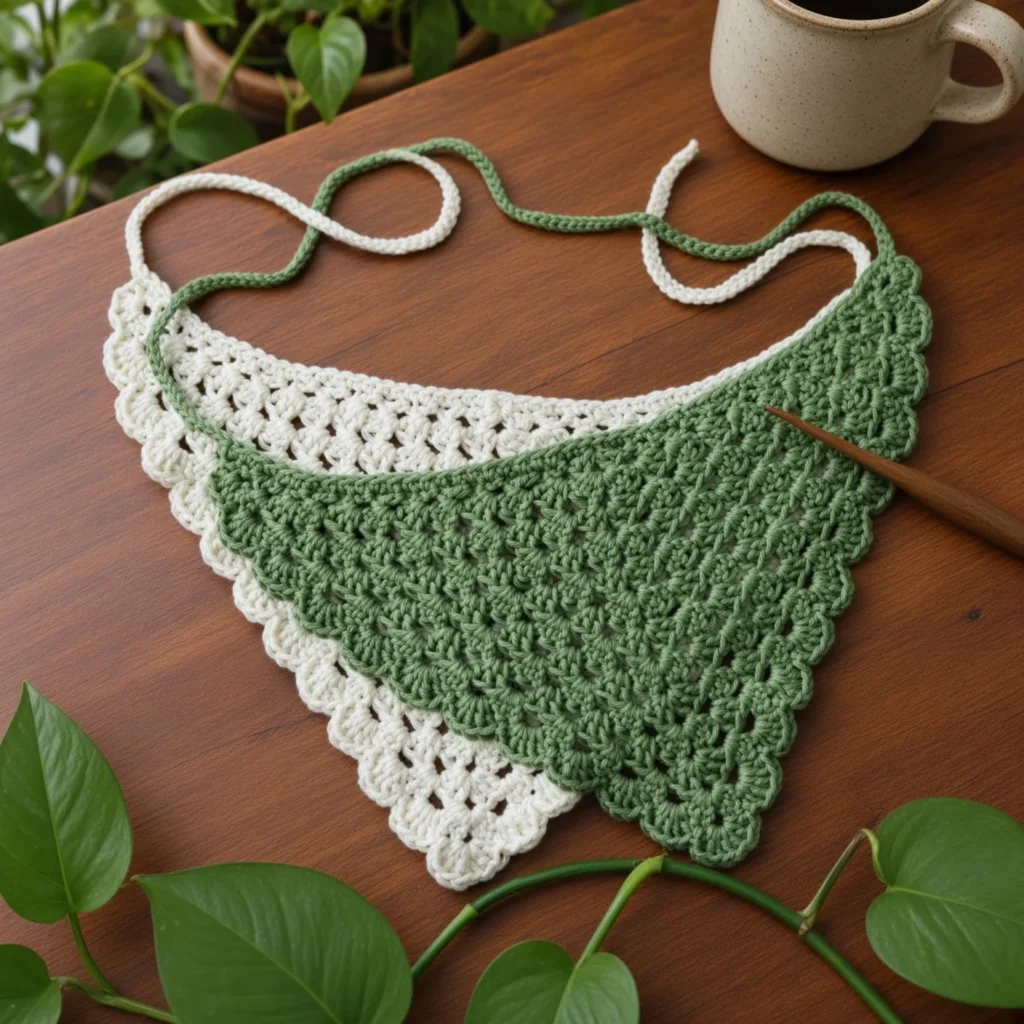
Crochet bandanas are having a major moment, and it’s easy to see why! They are the perfect boho-chic accessory for summer festivals, beach days, or just keeping your hair out of your face on a breezy afternoon.
This Granny Crochet Bandana pattern takes the classic, rhythmic granny stitch we all know and love and transforms it into a beautiful, wearable triangle. It features a delicate scalloped edge and long, comfortable slip-stitch ties that won’t bulk up under your hair.
Whether you are heading to a farmer’s market or just crocheting your summer wardrobe, this easy pattern is sure to become a go-to favorite!
Watch the Video Tutorial
Prefer to learn visually? Follow along with this step-by-step video tutorial to see exactly how to work the granny stitch triangle, the scalloped border, and the smooth ties.
Pattern Information
- Skill Level: Easy
- Yarn Weight: Worsted weight (Size 4)
- Pattern Written in: US Terms
Materials Needed
- 1 skein of worsted weight cotton yarn (The sample was made using “I Love This Yarn” from Hobby Lobby. You should only need one ball!)
- Crochet Hook: 5 mm (H/8)
- Tapestry needle (for weaving in ends)
- Sharp scissors
Finished Size
- Bandana: Approx. 16” across and 8.5” tall
- Ties: Approx. 13.5” long each
- Note: I didn’t do a gauge swatch for this pattern, as the sizing is easily customizable!
Abbreviations
- Ch – Chain stitch
- St – Stitch
- Sp – Space
- Sl st – Slip stitch
- Dc – Double crochet
- FO – Finish off: Cut the yarn, leaving a tail of 5 or 6 inches. Pull the loop on your hook until the yarn end comes through and pull gently to tighten.
- Rep – Repeat
Special Stitches: How to Make a Magic Ring
(Right-handed instructions; if you are left-handed, wrap in the opposite direction)
- Pinch the yarn tail between the thumb and index finger of your left hand with the end of the yarn pointing down. Wrap the yarn around your two fingers, going clockwise.
- Wrap all the way around and cross the yarn over on the back of your fingers in an “X” shape. Hold the end of the working yarn in place with your ring finger.
- Insert your crochet hook under the loop closest to your fingertips on the back side of your fingers. Grab the other yarn loop and pull it through.
- Twist the crochet hook toward you and upward. This will twist the loop of yarn onto the hook into a lowercase cursive “e” shape.
- Insert the hook under the farthest back loop on the back of your fingers again, and pull the loop through the loop on your hook. This makes your first chain. You will make 2 more chains to complete the chain 3 needed in Row 1.
Pattern Notes
- The beginning Chain 3 counts as a stitch at the beginning of each row.
- Custom Sizing: You can easily add an extra row (or more) to make this bandana larger, or stop earlier to make it smaller to fit a child. The pattern as written fits an average-sized adult woman’s head.
- There are two options for how to start Row 1 below. Only do one of them! If you opt for the chain 4 option, you’ll have a small hole at the very tip, but because there are decorative holes throughout the bandana, it will blend in just fine.
Granny Crochet Bandana Pattern
Row 1 (Choose One Option)
Option A: Magic Ring Make a magic ring, ch 3 (counts as first st), (2 dc, ch 1, 3 dc) in the ring. Pull the short end of the yarn to tighten. Turn.
Option B: Chain 4 Attach yarn to your hook with a slip knot, ch 4 (counts as starting ring + first st), (2 dc, ch 1, 3 dc) in the first chain (the 4th chain from your hook). Turn.
Row 2
Ch 3, dc into the same st, (3 dc, ch 1, 3 dc) in the corner sp, 2 dc in the top of the beginning ch-3. Turn.
Row 3
Ch 3, dc into the same st, 3 dc in the next sp, (3 dc, ch 1, 3 dc) in the corner sp, 3 dc in the next sp, 2 dc in the top of the beginning ch-3. Turn.
Rows 4 – 12
Ch 3, dc into the same st, 3 dc in each sp along the first side, (3 dc, ch 1, 3 dc) in the corner sp, 3 dc in each sp along the second side, 2 dc in the top of the beginning ch-3. Turn.
Leave your yarn attached for the next part.
Scalloped Edge
Ch 1, sk the first dc, sl st into the next dc.
- Make 3 dc in the first sp.
- Sl st into the center dc of the next 3 dc cluster.
- *Make 5 dc in the next sp, sl st in the center dc of the next cluster; repeat from * to the corner space.
- Work 7 dc in the corner sp.
- Sl st to the center dc of the next cluster.
- *Make 5 dc in the next sp, sl st in the center dc of the next cluster; repeat from * to the last space.
- Make 3 dc in the last space, sl st in the last st (this is the stitch right before the ch-3 turning chain).
Leave your yarn attached for the next part.
Ties & Front Edge
First Tie: Chain 61. Skip the first ch, sl st into the 2nd ch from your hook and into each remaining ch (60 sl sts total). Sl st into the same stitch that the strap started on.
Front Edge: Single crochet 46 times evenly along the straight front edge of the bandana. (Your last sc will be in the last stitch right before the scallops begin).
Second Tie: Chain 61. Skip the first ch, sl st into the 2nd ch from your hook and into each remaining ch. Sl st into the same stitch that the strap started on.
FO, weave in all your ends, and wear it proudly!

More Free Crochet Bandana Patterns You’ll Love
If you had fun making this granny stitch bandana, you’ll definitely want to add a few more of these stylish accessories to your collection. Check out these other free patterns from the blog:
- Modern Crochet Bandana Pattern That Feels Fresh & Minimal: If you prefer a sleeker, cleaner look without the traditional granny holes, this minimalist bandana pattern is exactly what you need.
- Boho Lace Floral Crochet Bandana Pattern: Take your boho style to the next level with this gorgeous, lacey bandana featuring delicate floral details.
- Daisy Granny Square Hair Kerchief Pattern: Love the granny square aesthetic? This hair kerchief starts with a beautiful 3D daisy square and transforms into a stunning wearable piece.
- 18 Free Crochet Bandana Patterns for Beginners: Can’t get enough? This massive roundup features 18 different designs, ensuring you’ll never run out of bandana inspiration!
Happy Crocheting! Don’t forget to pin this pattern for later!
