
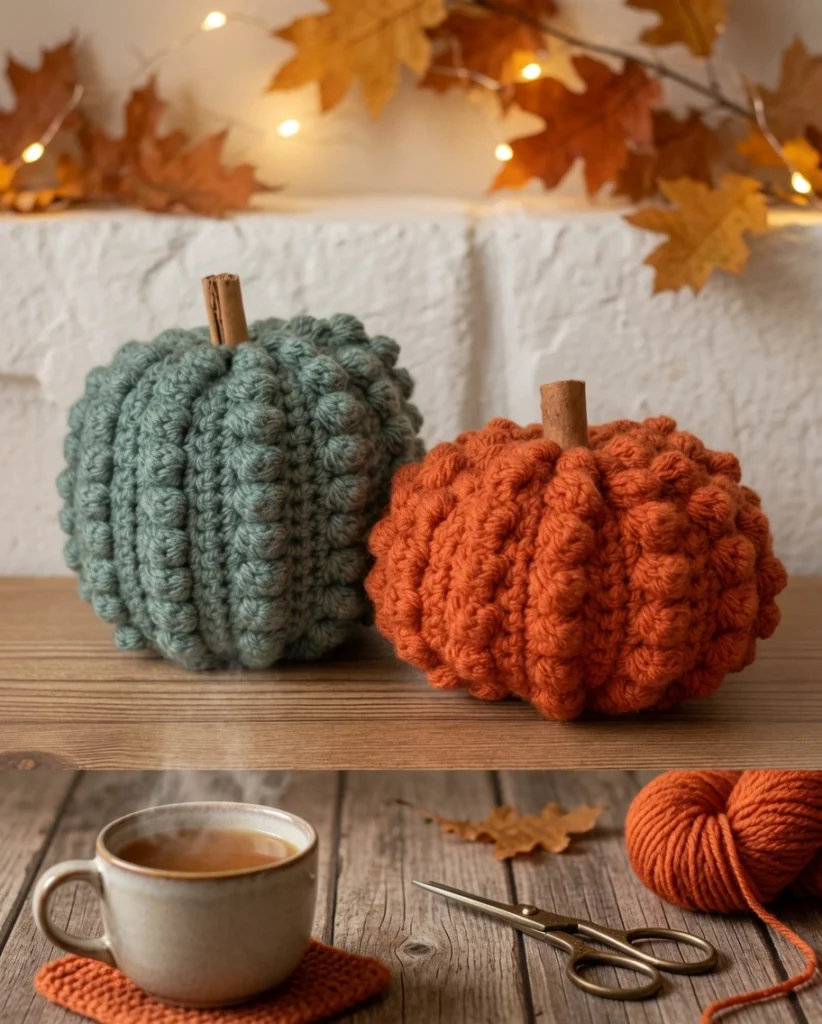
Fall is all about cozy textures, warm colors, and bringing a touch of the harvest indoors. These Bobble Stitch Pumpkins are the absolute perfect project to get your home ready for autumn. Unlike traditional amigurumi pumpkins that are worked in the round, these clever pumpkins are made by crocheting a flat, heavily textured rectangle and then cinching it together. The result is a beautifully plump, deeply textured pumpkin that looks incredibly impressive but is surprisingly simple to make.
Because you are working in rows rather than a continuous spiral, this is a fantastic project for beginners who want to practice their bobble stitches. Plus, the pattern is highly customizable. By changing your starting chain count and the number of rows you repeat, you can create anything from tiny tabletop favors to large statement pieces for your front porch.
Materials Needed
To get that perfect chunky, ridged texture, you will want to use a nice medium weight yarn.
- Medium weight yarn in desired colors (samples made in Loops and Threads Impeccable in Green Lagoon, and Pumpkin)
- G crochet hook
- Polyfil stuffing
- Yarn needle
- Cinnamon stick, dowel, or stick
Finished Sizes
This pattern gives you the framework to make two different pumpkin shapes:
- Green Pumpkin – approximately 5″ tall and 5″ in diameter
- Orange Pumpkin – approximately 4″ tall and 6″ in diameter
Pattern Instructions
This pattern uses USA crochet terminology
Note: Begin with an even number of chains. The pumpkin is worked flat in rows and then cinched together during assembly.
Green started with 26 ch (25 stitches in each row + 1 turning ch, each bobble row has 12 bobbles) Orange started with 20 ch (19 stitches in each row + 1 turning ch, each bobble row has 9 bobbles)
Row 1: sc in second ch from hook and each stitch across
Row 2: ch 1, turn, sc in first stitch, [bobble in next stitch, sc in next] repeat to end
Row 3: ch 1, turn, sc in each st
Row 4: ch 1, turn, sc in each st
Row 5: ch 1, turn, sc in each st
Repeat rows 2-5 until you have the size you want, ending with a row 4, you should have 2 single crochet rows at the end and 1 at the beginning and when they are stitched together you will have the 3 rows of single crochet that are in between the bobble rows.
Green has 48 rows (12 repeats) Orange has 56 rows (14 repeats) Finish off and cut yarn leaving a long tail for sewing
Assembly
Bringing your pumpkin to life is where the magic happens!

Bring the two short ends together and stitch together to make a circle
Weave the yarn around the bottom edge, like a running stitch, and pull tight to cinch closed. The bobbles make it really thick and it may not close completely so just get it as close as you can. Stitch in place to secure, and you can kind of stitch across to close up the opening even more if you want. Tie off yarn and cut.
With a new length of yarn repeat the same process along the top, but before you cinch it closed fill the pumpkin with stuffing. Cinch it up with a small opening in the middle big enough to insert your stem, and tie it off, tucking the ends into the pumpkin to hide.
Push the cinnamon stick/dowel/stick into the center of the pumpkin to make the stem.
Tips
The most important part of this pattern is getting your tension right on the bobble stitches. If your bobbles are too loose, the pumpkin will look sloppy; if they are too tight, the fabric will pucker. Keep your bobbles snug and consistent.
Using a real cinnamon stick for the stem is a brilliant trick because it releases a subtle, spicy autumn scent that makes your decor feel extra cozy. If you love working with 3D textures like this, you will absolutely adore the Enchanted Rose Granny Square, which uses a similar pop-out effect to create stunning floral motifs.
These pumpkins also look beautiful paired with other seasonal makes. Try hanging a Crochet Bunting Pattern above your mantle and placing a few of these pumpkins below it for a complete fall display. If you want to practice your texture stitches even more, the Butterfly Granny Square is another fantastic, beginner-friendly project to add to your queue.
FAQ
How do I make a bobble stitch? To make a standard bobble stitch, yarn over, insert your hook into the stitch, pull up a loop, yarn over, and pull through two loops (leaving 2 loops on your hook). You will repeat this (yarn over, insert, pull up, yarn over, pull through two) a total of 4 times in the same stitch until you have 5 loops on your hook. Then, yarn over and pull through all 5 loops at once to close the bobble!
Why won’t my bottom close completely? Because bobble stitches push the fabric forward, they create a lot of bulk. It is completely normal for the cinched bottom to leave a small hole. The pattern solves this by having you stitch across the opening to cinch it up as much as possible.
Can I use chunky yarn to make a giant pumpkin? Absolutely! Just keep in mind that if you change your yarn weight, you will also need to go up a hook size (like a K or L hook). The overall shape will remain the same, but your stitch counts will be much lower to achieve a similar diameter.
Conclusion
Congratulations on your new bobble stitch pumpkins! These squishy, textured gourds make the perfect cozy addition to your fall home decor. Share your finished pumpkins in the comments below!

1 thought on “Bobble Stitch Pumpkins Pattern”