
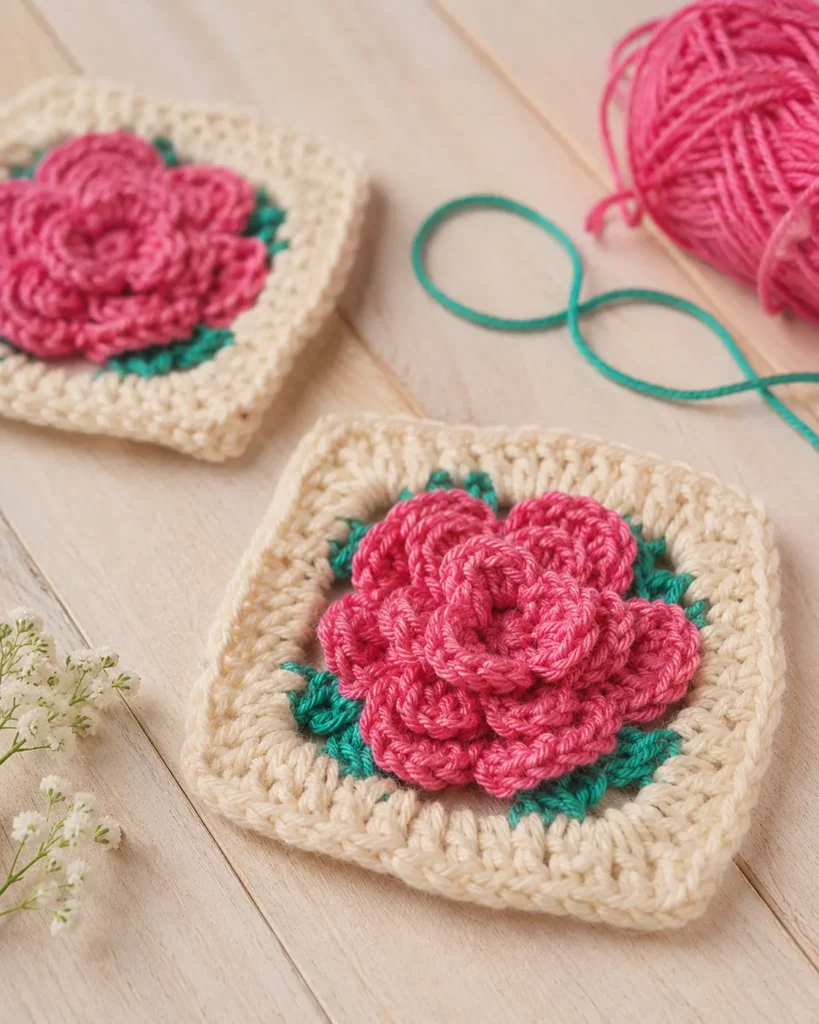
There is something undeniably magical about a rose. It is the queen of flowers, and when you add a crochet hook and a bit of yarn to the mix, you get a stunning 3D effect that truly pops.
This pattern creates a raised, textured rose sitting proudly in the center of a classic granny square. It is perfect for adding a touch of romance to blankets, tote bags, cardigans, or even a sweet Valentine’s Day pillow.
The Perfect Addition to Your Garden
This floral square joins my collection of nature-inspired crochet projects. If you love this, be sure to check out my Daisy Granny Square free crochet pattern for another fresh take on a classic motif.
Materials You Will Need
-
Yarn:
-
Color A (Rose): DK / Light Worsted weight yarn (approx. 10 meters)
-
Color B (Leaves): DK weight yarn in Green (approx. 3 meters)
-
Color C (Background): DK weight yarn in Cream or White (approx. 5 meters)
-
-
Hook: 3.5mm crochet hook (or size matching your chosen yarn)
-
Notions: Yarn needle, scissors, stitch marker
Finished Size
Approximately 4 x 4 inches (10 x 10 cm)
Gauge
Approx. 19 dc stitches x 10 rows = 4×4 inches (10cm). Gauge is not critical for this project, but consistency helps if making multiple squares.
Stitch Guide (US Terms)
-
ch – chain
-
sl st – slip stitch
-
sc – single crochet
-
hdc – half double crochet
-
dc – double crochet
-
dc cluster – double crochet cluster (see special stitches)
-
inc – increase (work 2 stitches in the same space)
-
BLO – back loop only
-
FLO – front loop only
Special Stitch: Double Crochet Cluster (dc-cl)
Yarn over, insert hook into stitch, pull up loop, yarn over pull through first 2 loops (2 loops on hook).
Yarn over, insert hook into same stitch, pull up loop, yarn over pull through 2 loops (3 loops on hook).
Yarn over, insert hook into same stitch, pull up loop, yarn over pull through 2 loops (4 loops on hook).
Yarn over and pull through all 4 loops on hook.

Instructions
Note: The rose petals are worked in layers. We will work into the Front Loops for the petals and the Back Loops for the base.
Round 1: The Center
Make a magic circle.
Row 1: Ch 1, work 6 sc into the circle. Sl st into the front loop only of the first sc to join. (6 sc)
Do not fasten off.
Round 2: First Petal Layer (Small Petals)
We are working in FRONT LOOPS ONLY of Round 1.
*(Sc, hdc, dc) in the first st, (hdc, sc, sl st) in the second st. *
Repeat from * to * two more times. You will have 3 small petals.
Total: 3 petals.
Round 3: Preparing for Layer 2
We are working in the BACK LOOPS of Round 1.
Work 2 sc into each of the 6 back loops around. (12 sc).
Sl st into the front loop of the first sc to join.
Round 4: Second Petal Layer (Medium Petals)
We are working in FRONT LOOPS ONLY of Round 3.
*(Sc, hdc, dc) in the first st, (hdc, sc, sl st) in the second st. *
Repeat from * to * five more times. You will have 6 medium petals.
Fasten off Color A. Weave in ends.
Round 5: Preparing for Layer 3
We are working in the BACK LOOPS of Round 3.
Work 2 sc into each of the 12 back loops. (24 sc).
Sl st into the front loop of the first sc to join.
Round 6: Third Petal Layer (Large Petals)
We are working in FRONT LOOPS ONLY of Round 5.
*(Sc, hdc) in the first st, dc inc in the next st, dc inc in the next st, (hdc, sc, sl st) in the third st. *
Repeat from * to * five more times. You will have 6 large petals.
Fasten off. Weave in ends.
Round 7: The Leaf Base (Green)
Turn your square over so the Right Side (the rose bump) is facing away from you.
We are working in the BACK LOOPS of Round 5 (these are the loops right behind the large petals).
-
Attach Color B (Green) to any stitch.
-
Ch 2 (counts as first half of a dc-cl). Complete a dc-cl in the same stitch.
-
Ch 3.
-
Work a dc-cl in the same stitch.
-
Ch 5, skip 5 stitches.
-
[Work a dc-cl in the next st, ch 3, dc-cl in the same st], ch 5, skip 5 stitches.
-
Repeat from * to * two more times (you should have 4 corners in total).
-
Sl st to the top of the first dc-cl to join.
Fasten off Color B.
Round 8: Squaring Off (Cream)
-
Attach Color C to any ch-3 space from the previous round.
-
Ch 3 (counts as first dc).
-
In that same ch-3 space work: (Dc, ch 3, 2 dc). (This is your corner)
-
Dc in the next stitch.
-
Work 5 dc in the next ch-5 space.
-
Dc in the next stitch.
-
In the next ch-3 space work: (2 dc, ch 3, 2 dc). (Corner made)
-
Dc in the next st, 5 dc in the next ch-5 sp, dc in the next st.
-
Repeat from ** to ** two more times.
-
Sl st to the top of the first ch-3 to join.
Fasten off. Weave in all ends.
Finishing
Lightly block your square to help the petals pop and the edges lie flat.
Tips for Success
-
Count your Back Loops: It is easy to miss a stitch when working into the back loops on Rounds 3 and 5. Place a stitch marker in your first stitch to help you keep track.
-
Let the Rose Breathe: Do not be afraid to gently fluff the petals with your fingers when you are finished. The 3D effect looks best when the layers are slightly separated.
-
Color Play: While a classic red or pink rose is beautiful, try this with a lavender yarn and white background for a vintage vibe, or a bright yellow center with orange petals for a sunflower effect.
Show Off Your Work!
I absolutely love seeing your finished projects. If you make this Enchanted Rose Granny Square, please tag me on social media and use the hashtag #CraftedAndCherished so I can see your blooming garden.
Pin this pattern to your Crochet Boards to save it for later!
Looking for more inspiration? If you enjoyed this 3D square, you might love the fun textures in my Cluster Crochet Granny Square Pattern. For those cozy winter months, a warm Textured Crochet Beanie is always a good idea.
Happy Crocheting!
– Stephanie
