
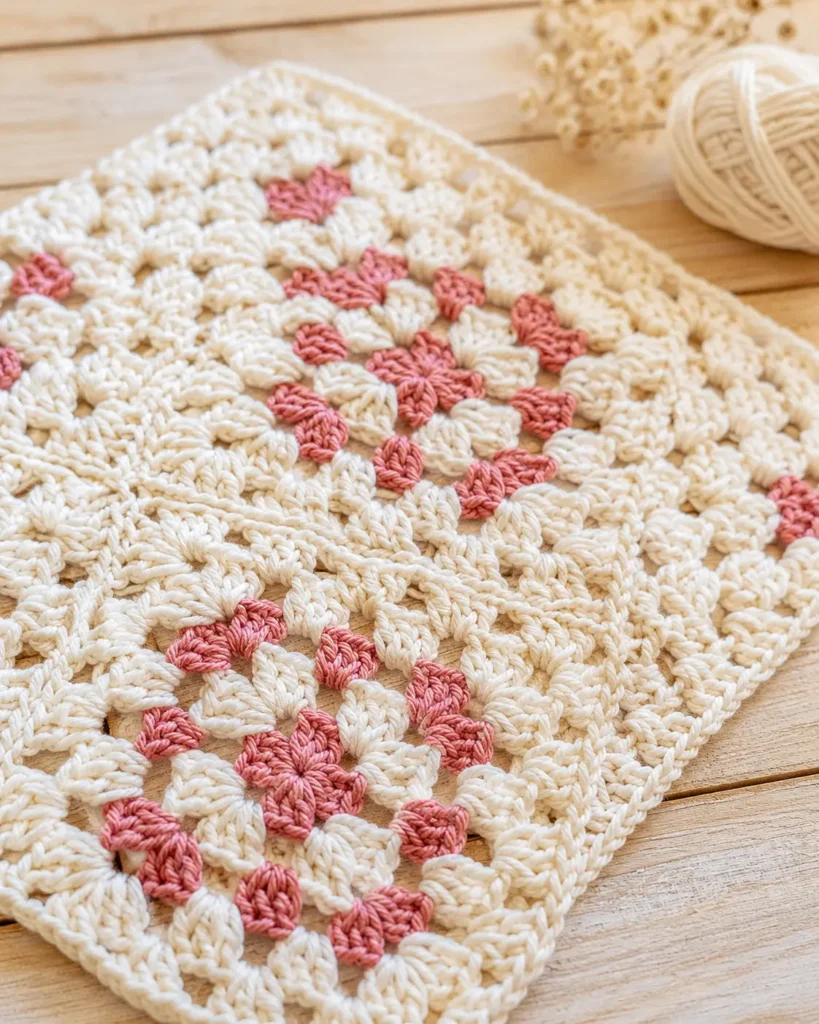
There’s a moment in every granny square project when you realise the joining method will make or break the whole thing. You can crochet the most beautiful squares in the world, but if the seams are bulky, mismatched, or visually distracting, the finished piece loses that polished, handcrafted quality you worked so hard to achieve.
The good news? A seamless join is easier than it looks — and once you master it, you’ll use it on every single granny square project you make.
In this tutorial, I’m walking you through one of the most effective techniques for joining granny squares with an almost invisible finish. It adds zero bulk, maintains the drape of your fabric, and works beautifully on everything from garments to home décor.
Why Your Joining Method Matters
Most crocheters focus on perfecting their squares — and that’s absolutely worth doing. But the join is just as important. A thoughtful, clean seam:
- Keeps the fabric lightweight and flexible, especially important for wearable projects
- Lets the texture and colour of your squares take centre stage
- Creates a professional finish that looks intentional rather than patched together
- Holds the squares securely without puckering or pulling over time
This seamless technique is ideal for projects like granny square cardigans, lightweight throws, patchwork tote bags, cushion covers, and modern wearable crochet pieces. If you’ve been working on a crochet top or a summer boho top that incorporates square motifs, this join will give it that elevated, ready-to-wear finish.
What You’ll Learn in This Tutorial
- How to prepare your granny squares for joining
- How to align stitches accurately so the join sits evenly
- The step-by-step technique for an almost invisible seam
- Tips for maintaining stretch and drape throughout
- How to finish the join neatly so there are no loose ends in sight
Whether you’re a beginner trying your first granny square project or an experienced crocheter looking to refine your finishing skills, this method will serve you well.
Materials You’ll Need
- Your finished granny squares (blocked is best — see tip below)
- Yarn in the same weight as your squares
- Matching yarn colour to the final round of your squares (this is the key to invisibility!)
- Scissors
- Tapestry needle
Pro tip: Block your granny squares before joining them. Blocking evens out the stitches, opens up the structure of the fabric, and ensures all your squares are the same size. This makes alignment much easier and gives a noticeably cleaner result. This is especially worth doing if you’re working on a garment — no one wants wavy seams on a crochet cardigan.
How to Prepare Your Granny Squares for Joining
Before you pick up your needle, a little preparation goes a long way.
1. Weave in all your ends on each individual square. Trying to do this after joining becomes very fiddly and risks distorting the seam.
2. Block your squares (wet or steam blocking, depending on your yarn fibre). Pin them to a foam mat or blocking board to the same measurements and let them dry fully. This step is optional but highly recommended for professional results.
3. Lay out your squares in the arrangement you want for your finished project. Take a photo of the layout for reference — it’s easy to lose track once you start joining, especially on larger projects like blankets.
4. Check your alignment. Hold two squares with their right sides facing each other (or right sides facing outward, depending on your chosen finish — more on this below). Match up the corner stitches and the stitches along the edge, making sure they line up evenly before you begin.
The Seamless Granny Square Join — Step by Step
This technique uses your tapestry needle and a length of matching yarn to sew the squares together through corresponding stitches. It creates a flat, flexible seam that sits on the back of the work and is practically invisible from the front.
Step 1: Thread your tapestry needle
Cut a length of yarn in the colour that matches the final round of your squares — roughly 1.5 times the length of the edge you’re joining. Thread your tapestry needle and leave a tail of about 15cm to weave in later.
Step 2: Position your squares
Hold your two squares with the wrong sides together (right sides facing outward). This is important: it keeps the seam on the inside of your work so it won’t be visible from the front.
Line up the stitches along the edge carefully. You should be able to see the posts of the stitches on both squares sitting parallel to each other.
Step 3: Begin the join
Starting at one corner, insert your needle through the back loop only of the first stitch on the front square, then through the back loop only of the corresponding stitch on the back square. Pull the yarn through gently, leaving your starting tail.
Step 4: Work along the edge
Continue inserting your needle through the back loops of each corresponding pair of stitches along the edge, pulling the yarn through with even tension. Don’t pull too tightly — you want the seam to have the same stretch and give as the rest of your fabric.
Aim for consistent tension throughout. Uneven tension is the most common reason a seam looks visible from the right side, so work slowly and check as you go.
Step 5: Handle the corners
At the corner stitch of each square, you’ll need to pass through both the corner stitch of one square and the corner stitch of the other. Work a stitch into the corner itself to keep the join secure and prevent gaps appearing at the junction point.
Step 6: Secure and finish
Once you reach the end of the edge, make a small finishing knot or work a couple of backstitches to secure the yarn. Weave in both your starting and ending tails neatly into the seam itself or into the body of the squares.
Tips for a Truly Invisible Join
Match your yarn perfectly. The single biggest factor in how seamless your join looks is yarn colour. Use yarn from the exact same dye lot as the final round of your squares wherever possible. Even a slight shade difference will catch the eye.
Use the same yarn weight. Don’t be tempted to use a thinner yarn for the join — it creates a different texture at the seam and can actually make it more visible.
Work in good light. Identifying the back loop of each stitch is much easier when you can see clearly. Natural daylight or a good craft lamp makes a huge difference.
Keep your tension consistent. If you find your tension varying, try holding the squares up against a flat surface as you work, or use blocking pins to hold them in position.
Join in rows, not all at once. For larger projects, join your squares into rows first (horizontally), then join the rows together (vertically). This keeps the work manageable and helps maintain alignment.
Which Projects Work Best with a Seamless Join?
This technique is particularly well-suited to:
- Crochet garments — the lightweight seam maintains drape and doesn’t add stiffness. Granny square cardigans and tops are ideal candidates. Take a look at this crochet summer tee top for inspiration on incorporating square motifs into wearables.
- Lightweight blankets and throws — especially those using fine or DK weight yarns where a heavier join would look out of place. If you’re new to blanket crochet, this easy textured crochet baby blanket is a wonderful starting point before progressing to granny square projects.
- Bags and accessories — the flat seam won’t create bulk inside a bag or along the strap of an accessory.
- Cushion covers — a clean finish on the front panel makes the whole cushion look polished.
Granny Square Patterns to Practice With
Before attempting a large joined project, it’s worth having some well-practised squares in your collection. Here are some patterns worth trying:
- Mastering the Basic Granny Square — the classic place to start if you’re new to granny squares or want a solid, even square to practice joining on.
- Granny Square Pattern with Diagram — ideal if you prefer visual references alongside written instructions.
- Daisy Granny Square Free Pattern — a beautiful floral motif that looks stunning joined with a seamless seam.
- Strawberry Granny Square — a fun and colourful option for practising with multi-colour squares.
- Cluster Crochet Granny Square — a textured square that benefits from a clean, invisible join so the stitch detail remains the focal point.
Common Mistakes to Avoid
Skipping the blocking step. Unblocked squares vary in size and shape, making alignment almost impossible. Even a quick wet block makes a noticeable difference.
Working through both loops. This join specifically uses the back loop only. Working through both loops creates a ridge that’s visible from the front.
Pulling the yarn too tight. Over-tensioning causes the seam to pucker and the join to pull at the corners of each square. Always work with an even, relaxed tension.
Joining with the wrong side of the work facing outward. Double-check your square orientation before you start. Once you’ve joined several squares the wrong way around, it’s a frustrating fix.
Using the wrong colour yarn. Even if the join technique is perfect, a contrasting yarn colour will make the seam stand out. This might be a deliberate design choice — but if you’re aiming for seamless, match the colour carefully.

Taking Your Crochet Further
Learning a clean joining technique is one of those skills that seems small but opens up an entirely new range of projects. Once you’re confident joining granny squares seamlessly, you’ll find yourself reaching for this method on everything from cosy crochet accessories to full crochet wearables.
Crochet is one of those crafts where the finishing really does make all the difference. The stitches, the yarn, the colour choices — they all matter. But so does the way you bring everything together at the end.
If you’re on a journey toward making more considered, slow fashion pieces — garments and homewares you’ve genuinely crafted with care — then mastering your joining techniques is a worthwhile investment of your time. You might also enjoy reading about slow living and the crochet journey, which explores why the process of making matters just as much as the finished object.
Final Thoughts
A seamless granny square join is one of those techniques that takes a little practice to master but pays dividends every time you use it. The key elements are simple: matching yarn, consistent tension, back loops only, and well-blocked squares. Get those four things right and your joins will look polished and professional every time.
Start with a small swatch — join just two or three squares before committing to a full project. This gives you a chance to dial in your tension and check the result from the right side before you’ve joined an entire blanket.
Happy stitching — and don’t forget to enjoy the process as much as the finished piece.
