
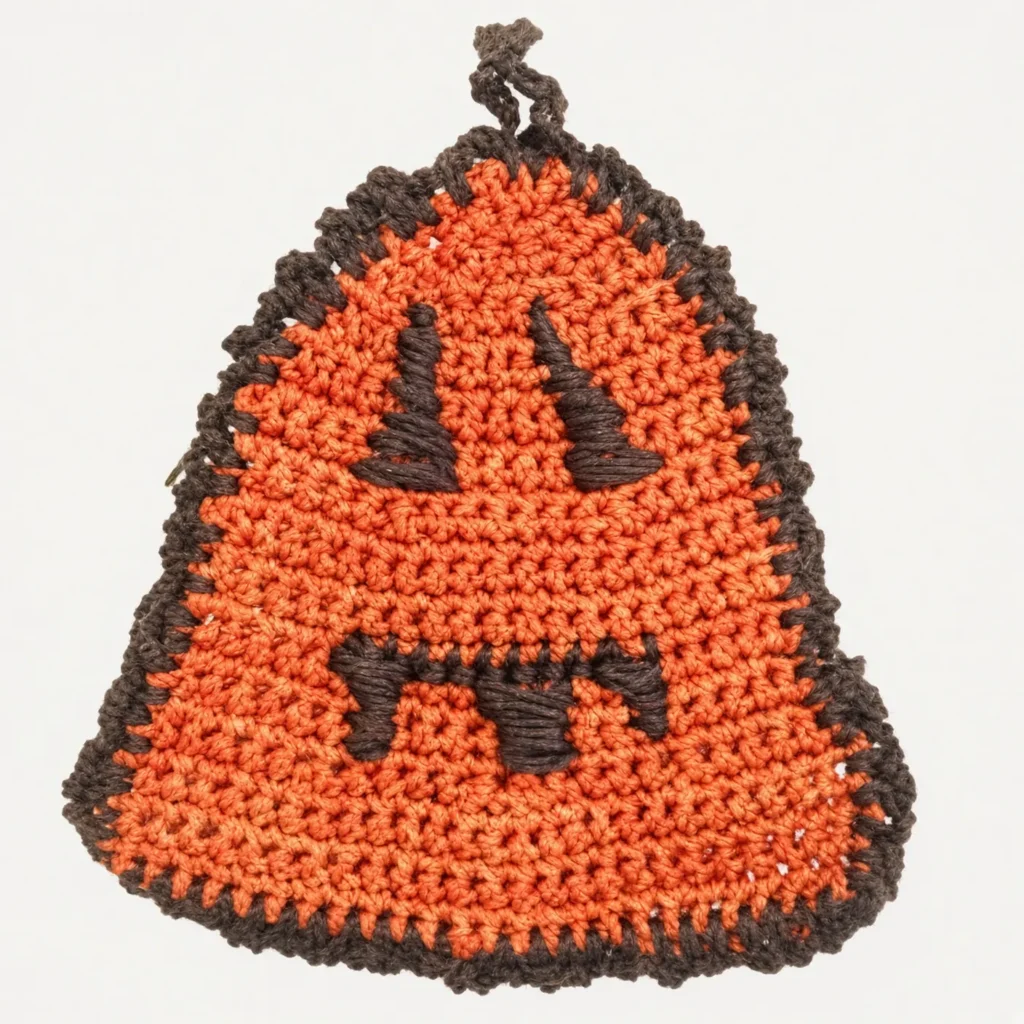
Are you looking for the perfect quick and easy Halloween crochet project? You are in the right place! This free crochet pumpkin pattern is fantastic for crafters of all skill levels. Whether you want to make a spooky set of coasters for your autumn coffee table or string them together into a festive Halloween bunting, these little pumpkins are guaranteed to add a handmade touch to your holiday decor.
Grab your crochet thread, and let’s get started on this fun and beginner-friendly pattern!
Materials and Supplies
To achieve a delicate and sturdy finish, this pattern uses fine crochet cotton. Here is what you will need:
- Crochet cotton ball – Size 7 to 10 (2 or 3 colours: main pumpkin, edging, and eyes/mouth)
- Crochet hook – Size 2.5
- Scissors
- Embroidery needle – rounded point
- Spray starch (optional, for stiffening)
NOTE: Crochet thread is labelled with a number, like a 3 or a 10, and this refers to the thickness of the thread. The smaller the number, the thicker the thread. For this project, a size 7 to 10 thread will give you the best results.
Abbreviations Used (US Version)
Before we begin, familiarize yourself with the standard US crochet abbreviations used in this pattern:
- Chain – ch
- Chain stitch – ch st
- Chain space – ch sp
- Single crochet – sc
- Slip stitch – sl st
- Decrease – dec
Finished Measurement
- Approximately 11 cm x 8 cm
Crochet Pumpkin Pattern Instructions
Base
Chain 26
Row 1: 1 sc into the 2 ch from hook. 1 sc into the next 24 ch st. Turn.
Row 2: 2 ch, 1 sc into the next 24 ch st. Turn.
Row 3 to Row 5: REPEAT ROW 2.
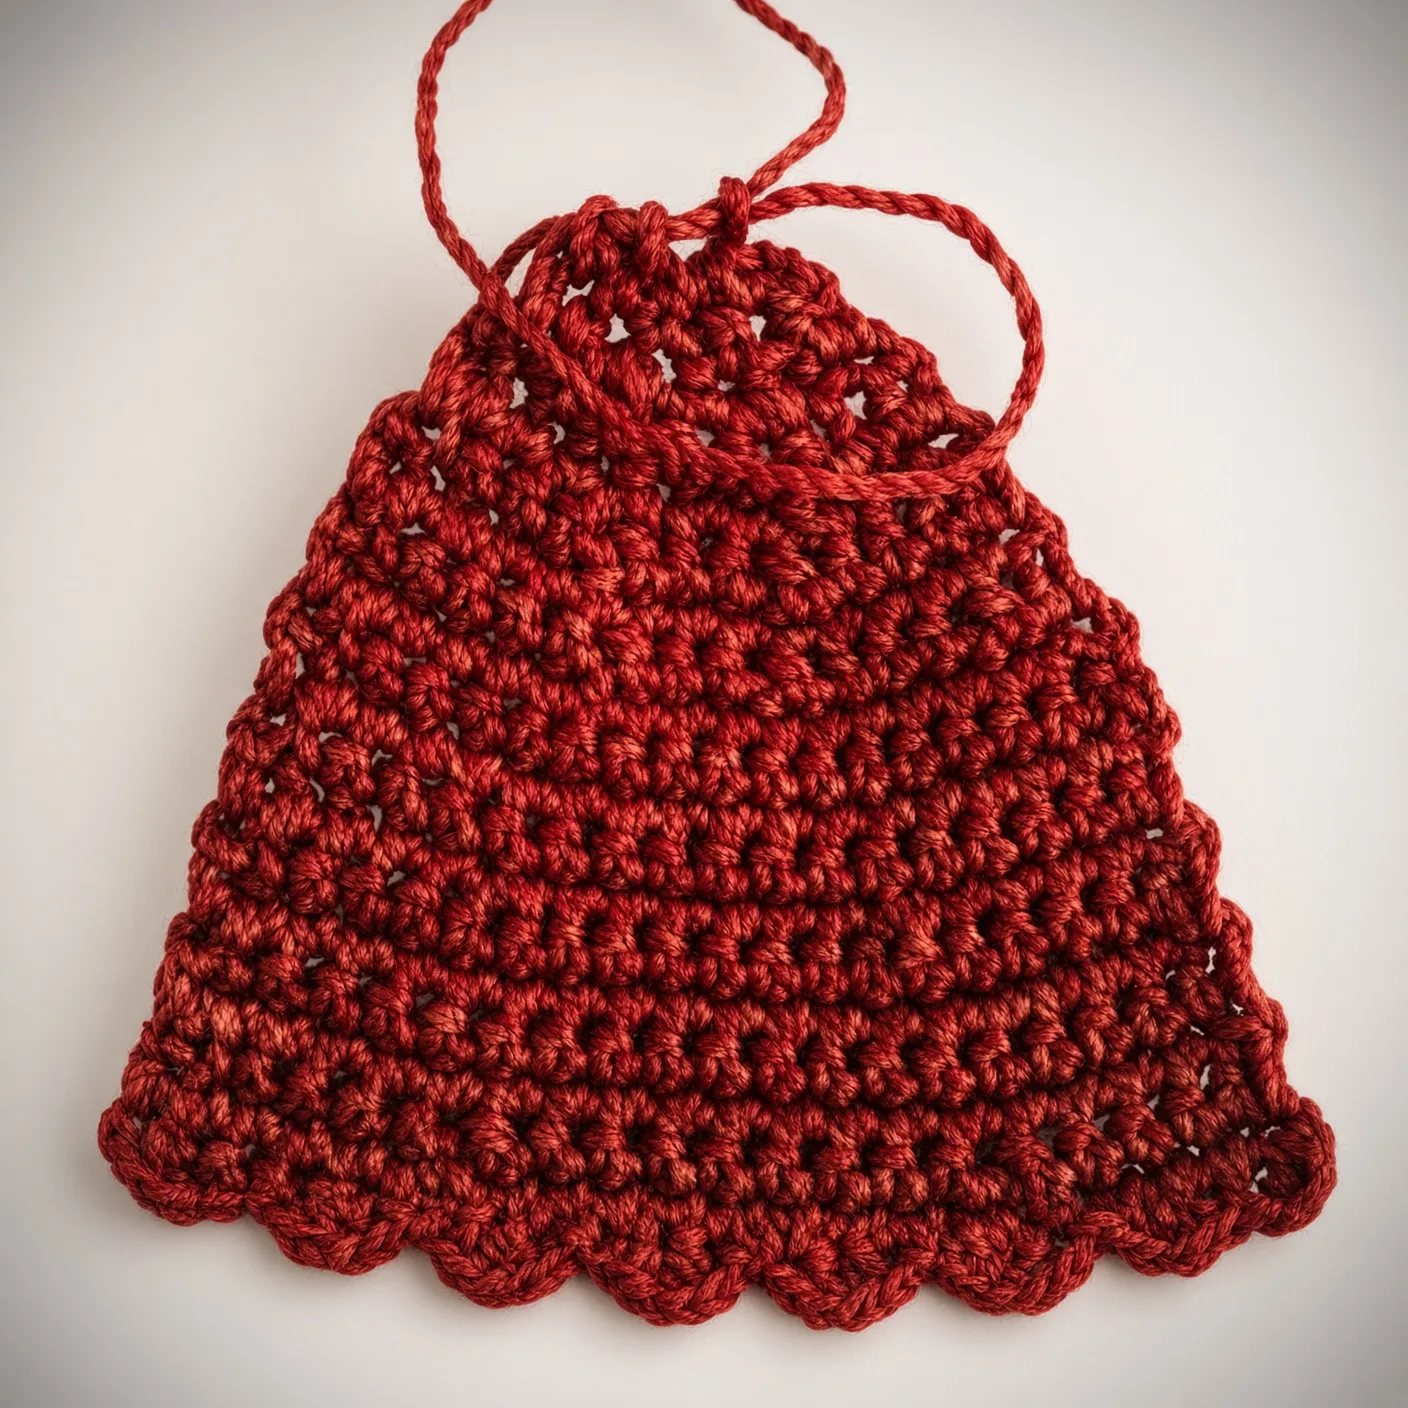
Row 6: 2 ch, 1 sc into the next 4 ch st, 1 dec – (SEE TUTORIAL IN TIPS & TRICKS), 1 sc into the next 4 ch st, 2 dec, 1 sc into the next 4 sc, 1 dec, 1 sc into the next 5 ch st. Turn.
Row 7: 2 ch, 1 sc into the next 21 ch st. Turn.
Row 8 to Row 10: REPEAT ROW 7.

Row 11: 2 ch, 1 sc into the next 4 ch st, 1 dec, 1 sc into the next 8 ch st, 1 dec, 1 sc into the next 5 ch st. Turn.
Row 12: 2 ch, 1 sc into the next 18 ch st. Turn.
Row 13 to Row 15: REPEAT ROW 12.
Row 16: 2 ch, 1 sc into the next 4 ch st, 1 dec, 1 sc into the next 6 ch st, 1 dec, 1 sc into the last 5 ch st. Turn.
Row 17: 2 ch, 1 sc into the next 16 ch st. Turn.
Row 18 to Row 20: REPEAT ROW 17.
Row 21: 2 ch, 1 sc into the next 4 ch st, 1 dec, 1 sc into the next 3 ch st, 1 dec, 1 sc into the last 5 ch sp. Turn.
Row 22: 2 ch, 1 sc into the next 14 ch st. Turn.
Row 23: 2 ch, 1 sc into the next 4 ch st, 1 dec, 1 sc into the next ch st, 1 dec, 1 sc into the last 5 ch st. Turn.
Row 24: 2 ch, 1 sc into the next 12 ch st. Turn.
Row 25: 2 ch, 1 sc into the next 3 ch st, 1 dec, 1 sc into the next ch st, 1 dec, 1 sc into the next 4 ch st. Turn.
Row 26: 2 ch, 1 sc into the next 2 ch st, 1 dec, 1 sc into the next ch st, 1 dec, 1 sc into the last 3 ch st. Turn.
Row 27: 2 ch, 1 sc into next ch st, 1 dec, 1 sc into the next ch st, 1 dec, 1 sc into the last 2 ch st. Turn.
Row 28: 2 ch, 1 sc into the next ch st, 1 dec, 1 sc into the next 3 ch sp. Turn.
Row 29: 2 ch, 2 dec, 1 sc into the last ch st. Turn.
Row 30: 2 ch, 1 dec, 1 sc into the last ch st. Fasten off.
Edging
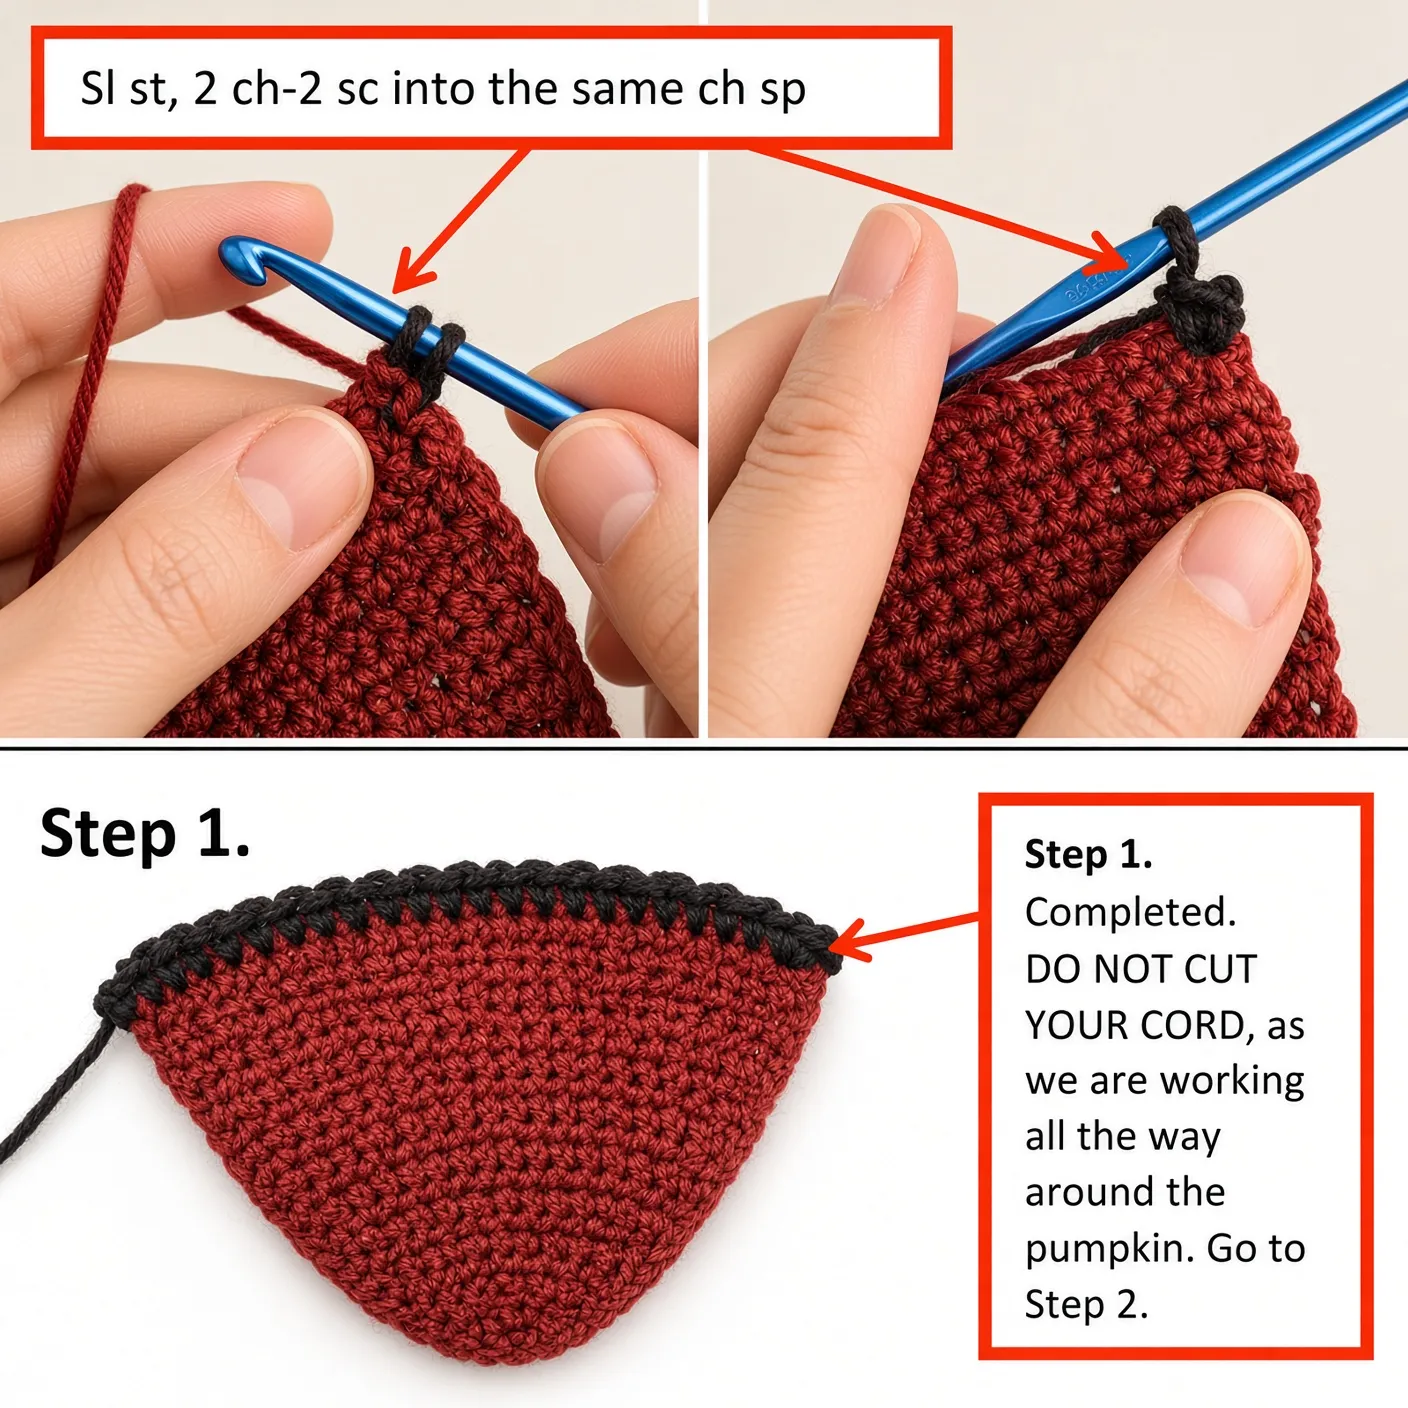
Starting at the bottom right-hand corner of your pumpkin.
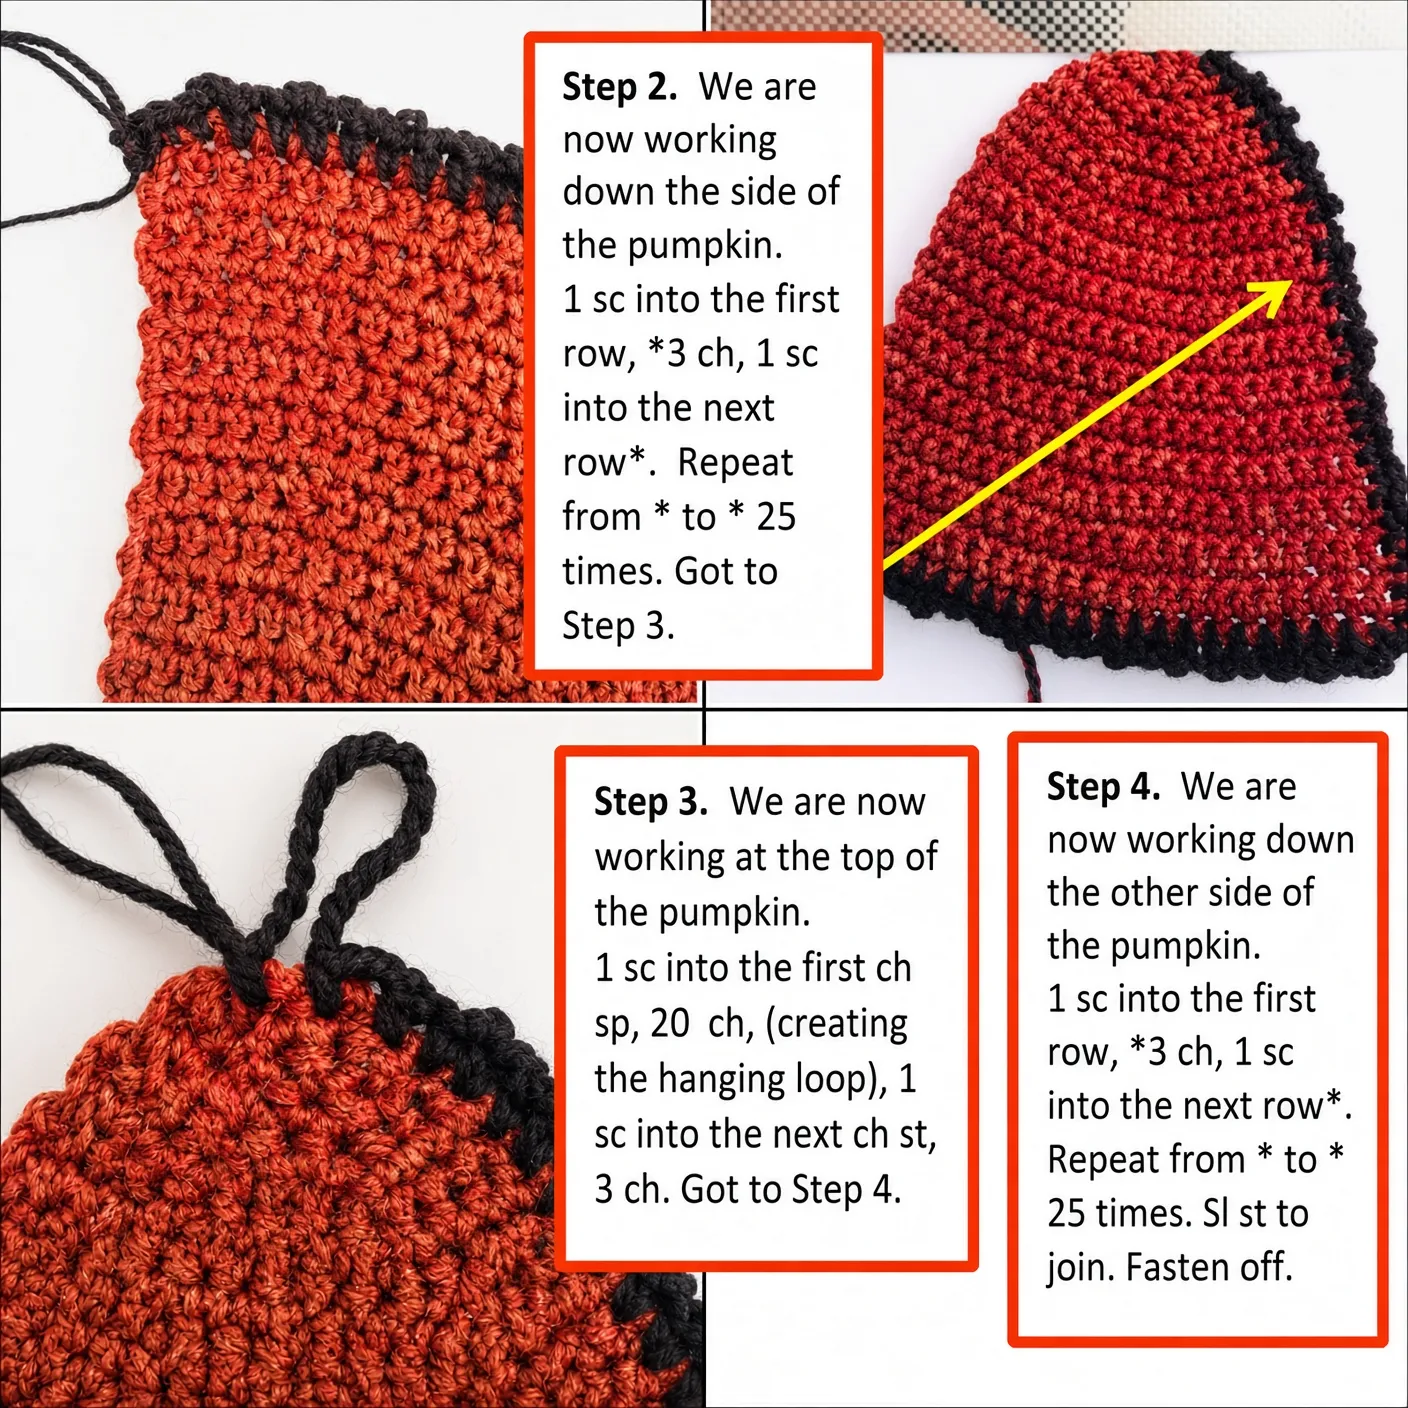
Step 1: Take your edging colour and sl st, 2 ch-2 sc into the same ch sp. 1 sc 3ch into the next ch sp. Repeat from * to * 23 times. 3 sc into the last ch st.
Adding the Eyes & Mouth
Using either embroidery thread (unsplit) or crochet cotton, add the eyes and a spooky mouth to give your pumpkin some personality!
If you love adding quirky, spooky faces to your holiday decor, you will definitely want to check out our Free Crochet Eyeball Pattern: Spooky Coasters & Bunting Decor. Mixing and matching these spooky eyeballs with your new pumpkins makes the ultimate Halloween tablescape!
Finishing Touches & Decorating Ideas
Repeat the process for however many pumpkins you would like to make. To give your pumpkins a crisp, professional finish, spray starch onto the pumpkin to make it more stiff. This is especially helpful if you plan to use them as coasters, as the starch prevents them from curling and protects them from minor spills.
How to Use Your Crochet Pumpkins
- Spooky Coasters: Keep a set by the coffee maker or on your party table to protect your surfaces in style.
- Halloween Bunting: String a dozen of these stiffened pumpkins along a piece of twine or ribbon and drape them across your mantle or doorway.
Take Your Spooky Decor to the Next Level
If you want to create a full haunted house aesthetic, why not pair your flat pumpkins with some 3D amigurumi? Our Free 3D Crochet Eyeball Pattern with Bobble Stitch Eyelids & Realistic Veins is an incredible companion project. Imagine a garland featuring these flat pumpkins interspersed with hyper-realistic 3D eyeballs—it’s a guaranteed conversation starter for your next Halloween party!
Happy Crocheting! We hope you enjoy making this crochet pumpkin pattern. Don’t forget to share your finished projects with us!
