
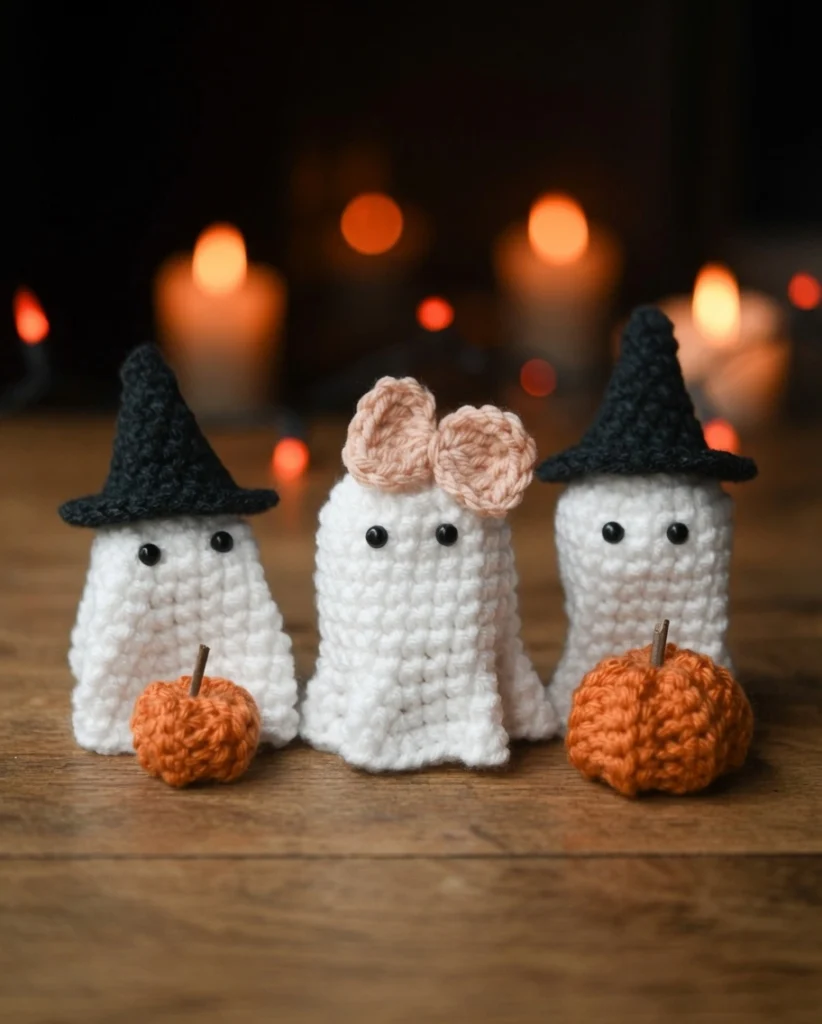
There is nothing quite as charming as spooky-cute crochet projects when the autumn season arrives. Amigurumi ghosts are an absolute staple for Halloween decor, but these little cuties are so adorable that you will want to keep them out on your shelf all year round. With their sweet little faces and customizable accessories, they make perfect handmade gifts, shelf sitters, or playful additions to a festive mantel.
This cutie ghost crochet pattern collection is incredibly beginner-friendly and works up in just an evening. Because they use simple single crochet increases and don’t require complex color changes, they are a fantastic introduction to amigurumi if you are just starting out. If you love making spooky-themed decor, you might also enjoy this Amigurumi Ghostface Pattern or these Halloween Crochet Kitchen Towels!
Materials Needed
- Hook: 4.0 mm
- Eyes: 6 mm safety eyes
- Yarns: #4 Worsted weight in White, Black or Charcoal, Orange and Pink. All yarns in this project are from Hobby Lobby:
- Ghost: Antique White-I love this yarn
- Hat: Dark Heather Gray-Yarn Bee Soft & Sleek
- Pumpkins: Desert Glaze-I love this yarn
- Bow: Soft Shell-Yarn ID
- Tools: Scissors & Tapestry needle
- Stuffing: Polyfil stuffing for the pumpkins
Stitches & Techniques
- SC – single crochet
- Inc – increase (make 2 single crochets in one stitch)
- Tr – treble
- Sl st – slip stitch
- SC in BLO – single crochet in back loop only
- Invisible fasten off – for amigurumi-cut yarn leaving a 5 inch tail. Pull yarn straight up through the last stitch finished. Thread yarn on a tapestry needle and insert underneath the top loops of the 2nd stitch, then straight down through the middle of the last stitch of the round through to the back of the work. This creates a faux stitch that blends in with the tops of the last round.
Tip: Use the Yarn Under/Yarn Over method of single crochet for tighter stitches: Insert your hook into the stitch, yarn UNDER and pull up a loop, yarn OVER and pull through both loops.
Pattern Notes & Finished Size
Ghosts and witch hats are worked in a continuous spiral, do not slip stitch to begin a new row. The finished size is about 3 inches for the taller ghosts and 2.75 inches for the smallest one, not including height with accessories.
This pattern uses USA crochet terminology
Pattern Instructions
Ghost #1

Round 1: In a Magic Ring, SC 6
Round 2: Inc in each stitch (12 stitches)
Round 3: (SC 1, inc) x6 (18)
Round 4: (SC 2, inc) x6 (24)
Round 5, 6: SC around (24)
Round 7: (SC 5, inc) x4 (28)
Round 8: (SC 6, inc) x4 (32)
Round 9: (SC 7, inc) x4 (36)
Round 10-12: SC around (36)
Round 13: SC 1, Sl st in next 2 stitches, invisible fasten off and weave in ends.
Attach eyes between Row 4 and 5, about 2-3 stitches apart. Pinch the areas along the increases to crease the ghost into shape.
Ghost #2
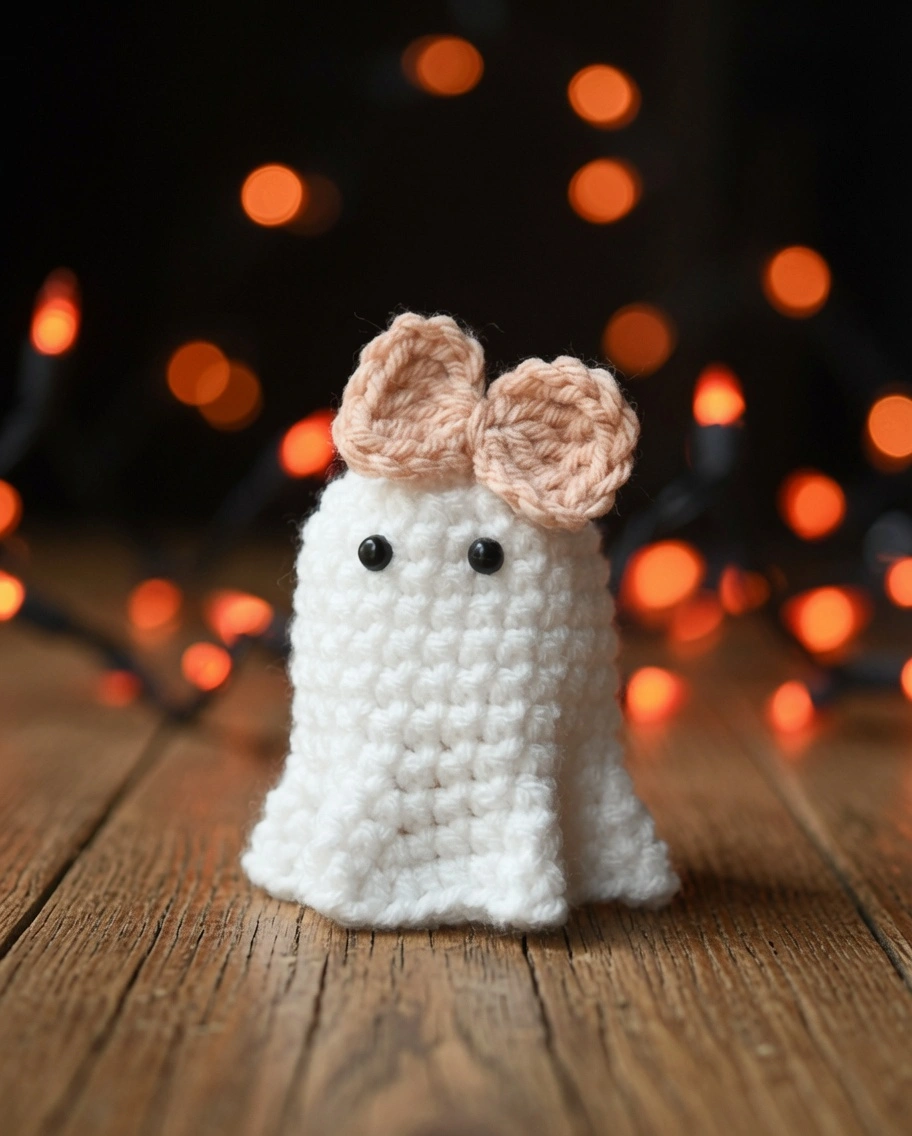
Round 1: In a Magic Ring, SC 6
Round 2: Inc in each stitch (12 stitches)
Round 3: (SC 1, inc) x6 (18)
Round 4: (SC 2, inc) x6 (24)
Round 5-11: SC around (24)
Round 12: (SC 3, inc) x6 (30)
Round 13: (SC 4, inc) x6 (36)
Round 14: (SC 5, inc) x6 (42)
Round 15: SC 1, Sl st in next 2 stitches, invisible fasten off and weave in ends.
Attach eyes between Row 5 and 6, about 2-3 stitches apart. Pinch the areas along the increases to crease the ghost into shape.
Ghost #3
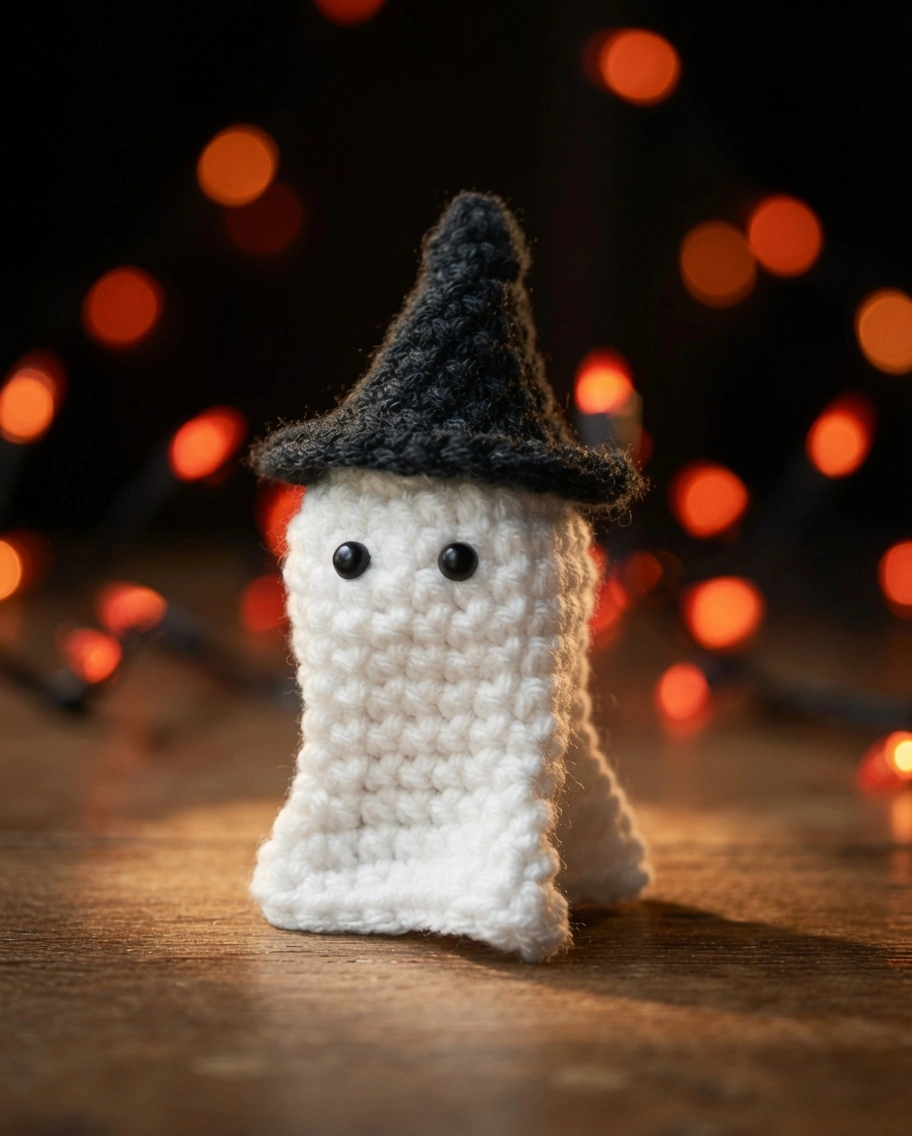
Round 1: In a Magic Ring, SC 6
Round 2: Inc in each stitch (12 stitches)
Round 3: (SC 1, inc) x6 (18)
Round 4: (SC 2, inc) x6 (24)
Round 5-11: SC around (24)
Round 12: (SC 5, inc) x4 (28)
Round 13: (SC 6, inc) x4 (32)
Round 14: (SC 7, inc) x4 (36)
Round 15: SC 1, Sl st in next 2 stitches, invisible fasten off and weave in ends.
Attach eyes between rows 5 and 6, about 2-3 stitches apart. Pinch the areas along the increases to crease the ghost into shape.
Accessories for Ghosties
The Bow
In a magic ring: (Ch-4 , 3 Tr, Ch-4) and Sl st into ring. Again, (Ch-4, 3 Tr, Ch-4) Sl st into ring and fasten off.
Thread the end tail through the center of the magic ring to the back of the bow. Tighten the magic ring to close.
Take the beginning tail and the end tail and go around the front in opposite directions and tie around back (like tying a gift).
Cinch down tightly in center of bow before knotting.
For the bow:
In a magic ring: (Ch-4 , 3 Tr, Ch-4) and Sl st into ring. Again, (Ch-4, 3 Tr, Ch-4) Sl st into ring and fasten off.
Thread the end tail through the center of the magic ring to the back of the bow. Tighten the magic ring to close.
Take the beginning tail and the end tail and go around the front in opposite directions and tie around back (like tying a gift).
Cinch down tightly in center of bow before knotting.
The Witch Hat
Round 1: In a Magic Ring, SC 4
Round 2: (SC 1, inc) x2 (6 stitches)
Round 3: (SC 2, inc) x2 (8)
Round 4: (SC 3, inc) x2, (10)
Round 5: (SC 4, inc) x2, (12)
Round 6: (SC 5, inc) x2, (14)
Round 7: (SC 6, inc) x2 (16)
Round 8: (SC 7, inc) x2 (18)
Round 9: (SC1, inc) x9, (27)
Round 10: SC 1, Sl st in next 2 stitches, invisible fasten off and weave in ends
Assembly & Finishing Tips
To get that classic, droopy ghost shape, the creasing step is absolutely vital! Once your ghost is fully fastened off, use your fingers to pinch the fabric along the increase rounds. You don’t need to sew these creases; simply manipulating the tight stitches will hold the shape beautifully.
If you are adding the witch hat, simply place it on top of the ghost’s head and use your yarn tail to stitch it securely in place. For the bow, tie it around the ghost’s “neck” (the transition area between the head and the body). If you want to add a bit of weight to the bottom of the ghost so it stands up nicely on a flat surface, you can slip a couple of small pebbles or a washable fabric scrap inside the bottom before adding your polyfil. If you love making little holiday characters, you’ll also adore this Baby Grinch Crochet Pattern and this Plush Axolotl Amigurumi Free Crochet Pattern.
FAQ
Can I use a different weight yarn? Yes, but your ghost will be a different size! If you use a DK or sport weight yarn, your ghost will be smaller. If you use a chunky/bulky yarn, it will be much larger. Just make sure to adjust your hook size accordingly so your stitches remain tight enough to keep the stuffing hidden.
Do I have to use the Yarn Under method? No, the traditional yarn over method will work perfectly fine for this pattern. However, the yarn under method creates a tighter, more defined stitch that looks very clean in amigurumi, so it is highly recommended if you are familiar with the technique.
What if I don’t have safety eyes? If you are making these for a baby or small child, safety eyes can pose a choking hazard. In that case, simply embroider the eyes on using a few strands of black embroidery floss or black yarn.
More Spooky Cute Patterns to Try
- Crochet Spiderweb Bunting Pattern
- Small Leggy Frog Crochet Pattern Free No Sew Pattern with Amigurumi Heart
- Crochet Bunting Pattern Free Granny Triangle Bunting Tutorial for Beginners
Conclusion
Congratulations on creating your adorable cutie ghost family! These spooky-sweet little amigurumi make perfect handmade decorations for the Halloween season. Share your finished ghosts in the comments below!
