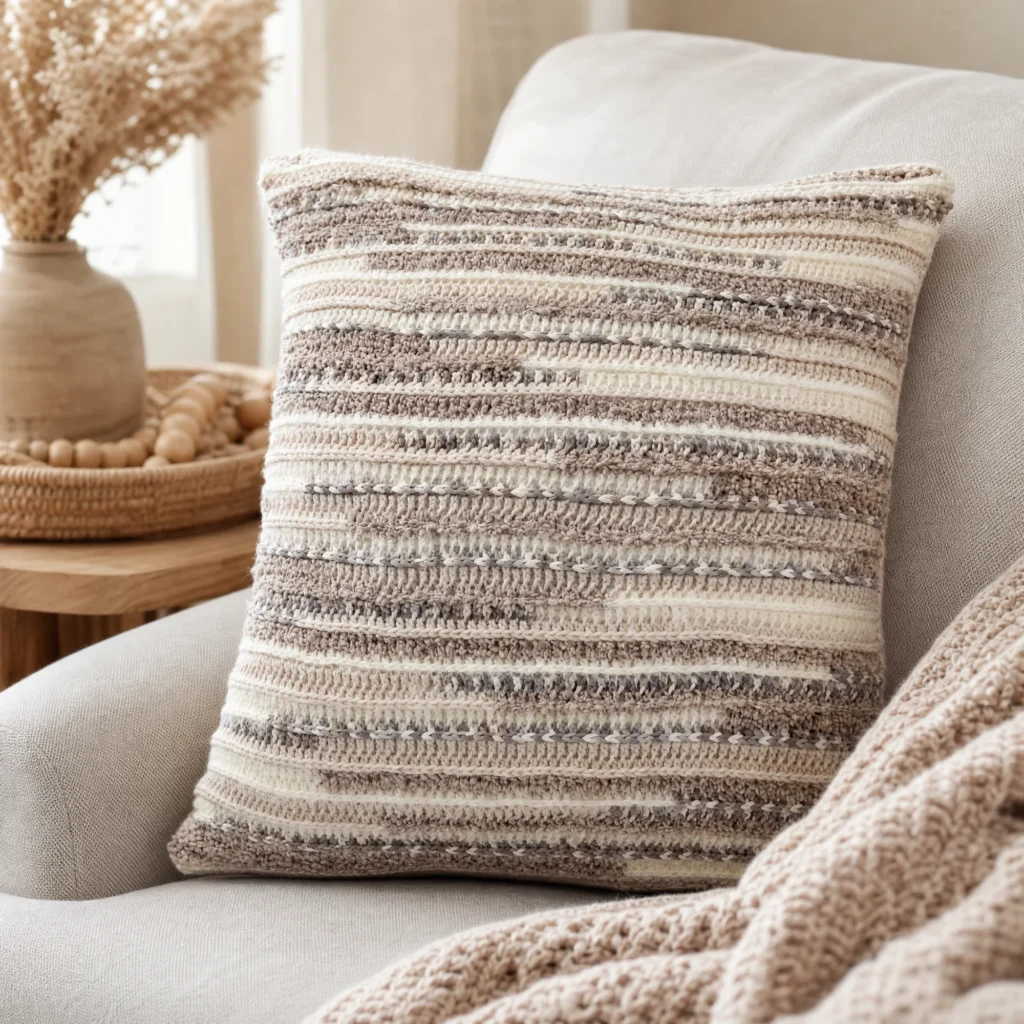
Textured Crochet Floor Pillow Pattern
Creating a cozy and inviting space in your home is easy with this Textured Crochet Floor Pillow pattern. Not only does it provide a chic decorative element, but it also serves a practical function. This oversized pillow, measuring 36 inches square, is perfect for lounging, supporting your back, or adding a soft touch to your living space. Follow this guide to make your very own floor pillow using the provided crochet pattern.
About the Crochet Project
This project consists of a textured square pillow cover created using a combination of half double crochet (hdc) and single crochet (sc) stitches. The use of Bernat® Mix Home™ yarn gives the pillow a unique appearance and a lovely softness, making it an excellent addition to any home décor.
Materials

Yarn
- Bernat® Mix Home™: 8 oz / 225 g; 183 yds / 167 m — 8 balls
- This yarn is particularly well-suited for home décor projects due to its durability and variety of colors.
Crochet Hook
- U.S. L / 11 [8 mm]
- Select a hook size that allows you to achieve the gauge specified in the pattern.
Pillow Form
- 36″ [91.5 cm] square pillow form
- Ensures the fill fits snugly and maintains the shape of your pillow.
Crochet Abbreviations
- ch = chain
- hdc = half double crochet
- sc = single crochet
- RS = right side
- WS = wrong side
Finishing Measurements
- Finished Size: 36″ [91.5 cm] square
Gauge
- The pattern does not specify gauge measurements, but it’s recommended to crochet a small swatch to ensure the stitch tension matches preferred firmness.
Pattern Structure
Front
To begin crafting the front of your floor pillow:
- Ch 92.
- 1st row: (RS) 1 hdc in 3rd ch from hook. 1 hdc in each ch to end of chain. Turn. (You will have 90 hdc).
- 2nd row: Ch 2. 1 hdc in the horizontal bar created below the stitch in the previous row (the bar is below the loops normally worked on the WS—see diagram) in each hdc to the end of the row. Turn.
- Repeat the 2nd row until the work from the beginning measures 36″ [91.5 cm]. Fasten off.
Back (make 2 pieces)
The back will be made in two separate pieces:
- Ch 8.
- 1st row: 1 sc in the 2nd ch from hook. 1 sc in each ch across. Turn. (7 sc).
- 2nd row: Ch 1. Working in back loops only, 1 sc in each sc to end of row. Turn.
- Repeat the last row until the work from the beginning (when slightly stretched) measures 36″ [91.5 cm]. Do not fasten off.
Side Edging
- Now proceed as follows:
- 1st row: (RS). Turn work sidewise. Ch 2. Work 90 hdc evenly across the side of the ribbing. Turn.
- 2nd row: Ch 2. 1 hdc in the horizontal bar created below the stitch in the previous row (the bar is below the loops normally worked on WS—see diagram) in each hdc to the end of row. Turn.
- Repeat the 2nd row until the work from the beginning measures 22″ [56 cm]. Fasten off.
Finishing
To assemble your pillow:
- Overlap the Back pieces to match the Front, ensuring the ribbed sections are in the center to create an opening for the pillow form.
- Sew the outer edge seams securely to finish the pillow cover.
Project Context
Creating a cushy floor pillow is not only a fantastic way to learn or practice crochet skills, but it also enhances your living area. You get to express your personal style through the color and texture of the yarn you choose. The Bernat® Mix Home™ yarn is versatile and perfect for this project, providing a soft and cozy feel that complements the playful design of the pillow.
How the Pieces Are Constructed
This project is constructed by making two main pieces, the front and back, which are then sewn together. The front uses half double crochet stitches to form a rich fabric, while the back is ribbed for texture and provides a functional opening to insert the pillow form.
Understanding the Design
The textured surface created by the various stitch choices not only adds depth and aesthetics but also enhances the tactile experience. As you work through the pattern, notice how the choice of yarn affects the overall look and feel of the pillow.
Frequently Asked Questions
What crochet hook is used for this pattern?
You will need a U.S. L / 11 [8 mm] crochet hook to create this floor pillow.
Is this project worked in rows or rounds?
The project is worked in rows. You will make a front panel and two back panels, followed by assembling them together.
Does this crochet project require assembly?
Yes, after you complete the front and back pieces, you will need to overlap and sew the seams to finish the pillow.
How long does it take to make this floor pillow?
The time it takes to complete depends on your crochet skill level. Generally, you can expect to spend several hours creating the pillow from start to finish.
What are the finished dimensions of the pillow?
The finished pillow measures 36″ [91.5 cm] square, making it a great size for floor seating or decoration.
Conclusion
In conclusion, the Textured Crochet Floor Pillow pattern is a rewarding project that not only enhances your crochet skills but also adds a beautiful, functional piece to your home. By following the provided instructions carefully and utilizing the recommended materials, you can create a stylish and cozy floor pillow that showcases your craftsmanship. Happy crocheting!