
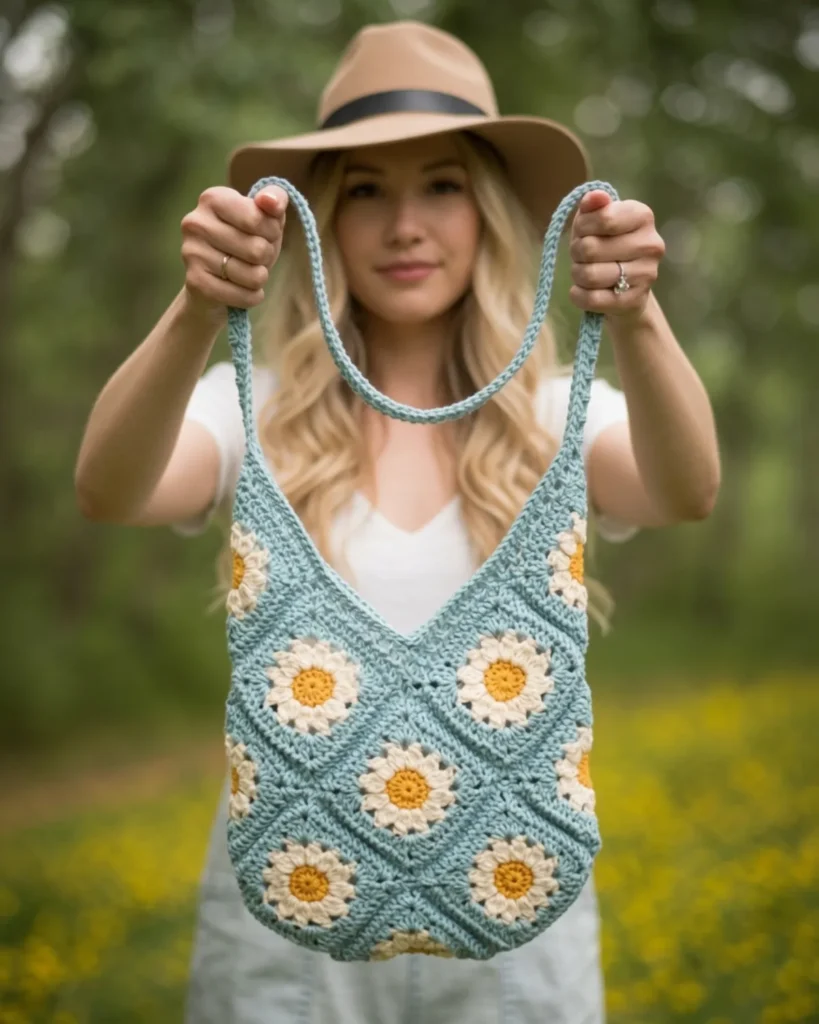
There is something undeniably special about crocheting daisy granny squares. They bring a bright, nostalgic charm that instantly transports you back to simpler times, making them incredibly joyful to stitch up. This beautiful shoulder bag takes that classic motif and transforms it into a highly functional, everyday accessory.
The Summer Days Daisy Bag is a fantastic project for confident beginners looking to expand their skills. By seaming together 15 colorful granny squares in a clever layout, you will create a stunning bag that is perfect for keeping your essentials close while enjoying hands-free convenience on warm days out.
Materials Needed
- 4 skeins of 24/7 Cotton (worsted weight level 4 yarn)
- Color A: 116 g/216 yds (Succulent) – 2 skeins
- Color B: 42 g/78 yds (Ecru) – 1 skein
- Color C: 24 g/45 yds (Goldenrod) – 1 skein
- 2.75 mm and 3.75 mm crochet hooks
- Yarn needle (bent tip helpful for attaching)
- Lock ring stitch markers
- Steamer (optional for blocking granny squares)
- Small purse organizer insert (optional to add zipper closure and compartments; dimensions: Length: 9″/23 cm, Height: 5.9″/15 cm)
Abbreviations Used
- Magic Ring (MR): Make a loop. Hold yarn where ends cross. Insert hook into loop and pull up working yarn. Yarn over and pull through. Work subsequent stitches in magic ring and then pull tight to close.
- Beginning cluster: Ch 2, [YO, insert hook in st, YO, pull up a loop, YO, draw through 2 loops], rep 3 times in same st, YO, draw through 4 loops on hook.
- Cluster: [YO, insert hook in st, YO, draw up a loop, YO, draw through 2 loops on hook], rep 4 times in same st, YO, draw through 5 loops on hook.
- Half double crochet decrease: YO, insert hook into both indicated gaps. YO, pull through first 2 loops. YO, pull through remaining 3 loops.
- Invisible single crochet decrease (worked across 3 stitches in this pattern): Insert hook into front loops of next 3 stitches. YO, pull through 3 loops. YO, pull through both loops.
- Invisible slip stitch decrease (worked across 3 stitches in this pattern): Insert hook into front loops of next 3 stitches. YO, pull through all loops.
This pattern uses USA crochet terminology
Pattern Notes
This bag is constructed of 15 granny squares seamed together in a special way to form the shape. Color A serves as the background frame, Color B creates the petals, and Color C forms the daisy center.
The daisy granny square consists of 5 rounds: Rounds 1 and 2 make the center of the daisy using single crochet, Round 3 forms the petals using clusters, and Rounds 4 and 5 build the background frame using half double crochet and double crochet stitches.
You can crochet over the yarn tails when switching colors for a neater finish. Once all squares are complete, they are laid out in a specific arrangement and seamed together using a slip stitch method. Stitches are then picked up along the top edge to form a lovely eyelet top edging and strap. Adjust the length of the strap based on where you want the bag to hang, keeping in mind that it will hang lower once filled with items. Blocking your squares helps relax the fibers and gives a smooth finish, and this bag is technically reversible depending on which side of the stitches you prefer to show!
Pattern Instructions
Daisy Granny Square

With Color C (Goldenrod),
Using 3.75 mm hook,
Round 1: 12 sc in Magic Ring. Sl st to first sc. (12 sts)
R2: Chain 1, sc in same st. Sc around. Sl st to first sc. Fasten off. (12 sts)
With Color B (Ecru),
R3: Join with sl st in any sc. Work beginning cluster, chain 3. Work cluster in next sc, chain 3 around. Slip stitch to top of beg cluster. Fasten off. (12 clusters and 12 ch-3 spaces)
With Color C (Succulent),
R4: Join with slip st in any ch-3 space. Chain 3 (counts as 1 dc), 2 dc, chain 2, 3 dc in same space. Work 3 hdc in each of next 2 ch-3 spaces. [Work 3 dc, chain 2, 3 dc in next ch-3 space. Work 3 hdc in each of next 2 ch-3 spaces.] Repeat everything between square brackets [ ] 2 more times. Slip stitch to top of chain 3. (48 sts and 4 ch-2 spaces).
R5: Chain 2 (counts as 1 hdc). Work 1 hdc in next st. Skip next st, 2 hdc, chain 2, 2 hdc in chain-2 space. [Skip next st, hdc across until reach st before Ch 2 space (10 hdc). Skip next st, 2 hdc, chain 2, 2 hdc in ch-2 space.]. Repeat everything between square brackets [ ] 2 more times. Skip next st, hdc 8. Slip st to top of chain 2. Fasten off. (56 sts and 4 ch-2 spaces).
Note: Crochet 15 granny squares in total. You can block the squares to give them defined edges and to smooth out the stitches.
Assembly and Strap
To complete the bag, assemble the 15 granny squares together using a slip stitch seaming technique. After the bag body is seamed, crochet the top edging and strap by picking up stitches along the top edge and working half double crochets separated by chain 1’s for the eyelet detail. A round of single crochet is then worked along one side of the top edging and strap, followed by a round of slip stitches to strengthen and widen the strap. Repeat on the other side, working the special decrease stitches at the bottom of the V so the stitches do not bunch up.
Conclusion
Congratulations on completing your Summer Days Daisy Bag! This nostalgic, cheery design is the perfect handmade accessory for sunny days out. Share your finished bag in the comments below!
More Crochet Patterns to Try
If you loved making this granny square bag, you might enjoy these other fun projects:
