
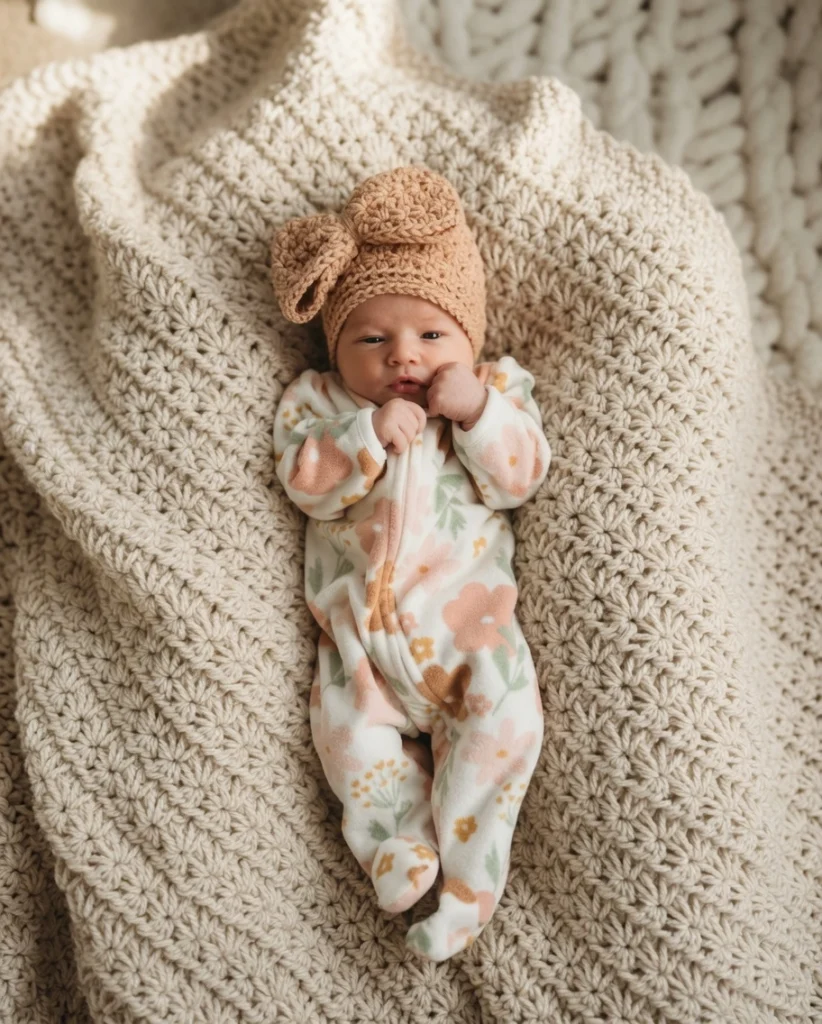
Looking for the perfect handmade gift for a new little one? The star stitch creates a beautifully dense, textured fabric that is as warm as it is stunning. This star stitch crochet baby hat is an easy-level pattern that works up quickly, making it an ideal project for baby shower gifts, hospital donations, or your own little one’s coming-home outfit.
Because this pattern includes eight different sizes ranging from preemie all the way to child, it is a incredibly versatile design that will grow with your little one. Whether you are a beginner looking to learn a new stitch or an experienced crafter needing a relaxing weekend project, this hat is a joy to make. It also pairs perfectly with other baby accessories, like an easy textured crochet baby blanket, for a complete, customized gift set.
Materials Needed
- Yarn: Worsted weight #4 yarn (approx. 75 to 245 yards depending on size)
- Crochet Hook: US G+/7 (4.5mm) or size needed to obtain gauge
- Tapestry Needle: For weaving in ends and sewing on embellishments
- Scissors
- Measuring Tape
- Custom Tags: Optional, for gifting
Abbreviations & Special Stitches
- MR – Magic Ring
- Hdc – Half double crochet
- Sc – Single crochet
- Dc – Double crochet
- Sl st – Slip stitch
- Ch – Chain stitch
- BLO – Back loop only
- YO – Yarn over
- Sp(s) – Space(s)
- St(s) – Stitch(es)
- Rep – Repeat
Beg sc5tog (Star Stitch): Ch 3, pull up a lp in the 2nd ch from the hook, pull up a lp in the next ch, pull up a lp in the next 3 sts, 6 loops on the hook, yo, pull through all 6 loops, ch 1 (creates the eye of the star).
Sc5tog (Star Stitch): Pull up a lp in the eye of the previous star, pull up a loop by going through the leg of the last loop of the previous star, pull up a lp in the base st of the previous star, pull up a loop in the next 2 sts, 6 loops on the hook, yo, pull through all 6 loops, ch 1.
Reverse Sl St: Go through the stitch back to front; keep working yarn to the front, YU (Yarn Under) pulling through the loop on the hook.
This pattern uses USA crochet terminology
Pattern Instructions
Hat
Notes: Follow directions for the size you are working on. Some hats begin with 10 sts, and the other sizes with 11 sts.

Preemie (3mth, 9mth, toddler)
Increase Rounds – Continue increasing for larger sizes.
Round 1: Magic Ring, ch 2, work 10 hdc in the ring, pull the ring tight, rev sl st in the first hdc to join—10 sts.
Round 2: Ch 2, work 2 hdc in each st around, rev sl st in the first hdc to join—20 sts.
Round 3: Ch 2, *work 1 hdc in the first st, 2 hdc in the next st; rep from * around, rev sl st in the first hdc to join—30 sts.
Round 4: Ch 2, *work 1 hdc in the first 2 sts, 2 hdc in the next st; rep from * around, rev sl st in the first hdc to join—40 sts. Stop Preemie.
3mth (9mth, Toddler)
Round 5: Ch 2, *work 1 hdc in the first 3 sts, 2 hdc in the next st; rep from * around, rev sl st in the first hdc to join—50 sts. Stop 3mth.
9mth (Toddler)
Round 6: Ch 2, *work 1 hdc in the first 4 sts, 2 hdc in the next st; rep from * around, rev sl st in the first hdc to join—60 sts. Stop 9mth.
Toddler
Round 7: Ch 2, *work 1 hdc in the first 5 sts, 2 hdc in the next st; rep from * around, rev sl st in the first hdc to join—70 sts.
Newborn (6mth, 12mth, Child)
Increase Rounds – Continue increasing for larger sizes.
Round 1: Magic Ring, ch 2, work 11 hdc in the ring, pull the ring tight, rev sl st in the first hdc to join—11 sts.
Round 2: Ch 2, work 2 hdc in each st around, rev sl st in the first hdc to join—22 sts.
Round 3: Ch 2, *work 1 hdc in the first st, 2 hdc in the next st; rep from * around, rev sl st in the first hdc to join—33 sts.
Round 4: Ch 2, *work 1 hdc in the first 2 sts, 2 hdc in the next st; rep from * around, rev sl st in the first hdc to join—44 sts. Stop Newborn.
6mth (12mth, Child)
Round 5: Ch 2, *work 1 hdc in the first 3 sts, 2 hdc in the next st; rep from * around, (add 2 hdc in the 2nd last st for 6mth only), rev sl st in the first hdc to join—56 (55, 55) sts. Stop 6mth.
12mth (Child)
Round 6: Ch 2, *work 1 hdc in the first 4 sts, 2 hdc in the next st; rep from * around, rev sl st in the first hdc to join—66 sts. Stop 12mth.
Child
Round 7: Ch 2, *work 1 hdc in the first 5 sts, 2 hdc in the next st; rep from * around, (add 2 hdc in the 2nd last st), rev sl st in the first hdc to join—78 sts.
Star Stitch Pattern
Preemie (Newborn, 3mth, 6mth, 9mth, 12mth, Toddler, Child)
Round 1: Beg sc5tog, *sc5tog in next 2 sts; rep from * around until 1 st remains, end with a sc5tog in the last st and the sl st join, sl st in the ch to join— 20 (22, 25, 28, 30, 33, 35, 39) stars.
Round 2: Ch 2 (not included as a st), 1 hdc in the first sp, *2 hdc in the eye of the star; rep from * around to the last star, 1 hdc in the eye of the last star, sl st in the ch to join—40 (44, 50, 56, 60, 66, 70, 78) sts.
Rounds 3-6 (8, 8, 10, 10, 10, 10, 12): Rep Rounds 1 & 2.
Finishing Band
Round 1: Ch 1, 1 sc in the blo of each st around, sl st in the blo of the first sc to join—40 (44, 50, 56, 60, 66, 70, 78) sts.
Round 2: Ch 1, 1 sc in the blo of each st around, sl st in the first sc to join, fasten off and weave in tails—40 (44, 50, 56, 60, 66, 70, 78) sts.
Big Bow
The bow is the same width as the hat; The child has a toddler-size bow. Make a smaller bow if desired.
Preemie (Newborn, 3mth, 6mth, 9mth, 12mth, Toddler, Child)
Round 1: Start with a long tail. Ch 40 (44, 50, 56, 60, 66, 70, 70), sl st in the first ch to join (make sure not to twist the chain)—40 (44, 50, 56, 60, 66, 70, 70) chs.
Round 2: Beg sc5tog, *sc5tog in next 2 sts; rep from * around until 1 st remains, end with a sc5tog in the last st and the sl st join, sl st in the ch to join— 20 (22, 25, 28, 30, 33, 35, 35) stars.
Round 3: Ch 2 (not included as a st), 1 hdc in the first sp, *2 hdc in the eye of the star; rep from * around to the last star, 1 hdc in the eye of the last star, sl st in the ch to join—40 (44, 50, 56, 60, 66, 70, 70) sts.
Rounds 4-6 (6, 6, 8, 8, 8, 8, 8): Rep Rounds 2 & 3. Fasten off with a long tail. Weave the tail so that the beginning and ending tails are in the centre of the bow. Knot the bow in the centre with the tails. Wrap 1 tail around the centre several times. Knot the tails together to secure. Use the tails to tie to the hat. Position the bow so that the bottom of the bow lines up with the band. Knot the bow to the hat. Fasten the left and right sides of the bow if needed.
Flower
Row 1: Begin with a long tail, ch 62, sc in the 2nd ch from the hook, * ch 2, sk ch, sc in the next ch; rep from * across, turn—30 ch-2 sps.
Row 2: In *ch 2 sp (sc, 3 dc, sc), sl st in next sc; rep from * [9 more times], in next ch 2 sp (sc, 3 hdc, sc), sl st in next sc; rep from * [9 more times], in next ch 2 sp (5 sc), sl st in next sc; rep from * [9 more times], fasten off with a tail for sewing.
Assembly
Starting at the sc petal end. Start wrapping the petals around in a spiral. Ensure that the petals flare out as you wrap them. With a yarn needle, weave back and forth through the base layers of the petals. Secure the final dc petal by sewing to another petal. Use the starting and ending tails to tie to the hat.
Tips
- Check Your Gauge: This pattern requires a specific gauge of 4 sts and 5 rows equal to 2″ in the star stitch pattern. Because the star stitch is uniquely textured, you may find you need to go up or down a hook size to match the gauge, even if you usually hit gauge with a 4.5mm hook for standard single crochet. If you need more help mastering gauge for wearables, check out our guide on how to crochet a hat.
- Yarn Selection: A soft, worsted weight acrylic is perfect for baby garments because it is durable, machine washable, and gentle on sensitive skin.
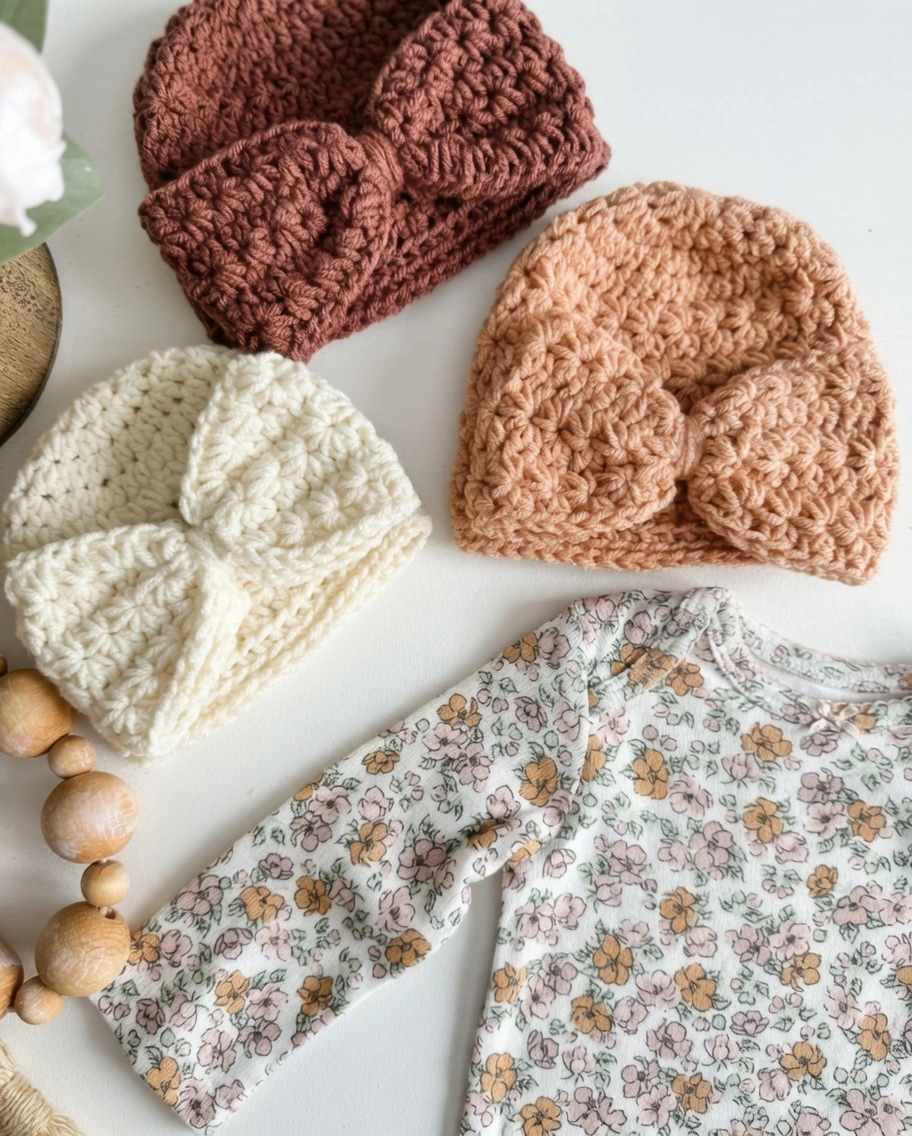
- Customize the Look: You can leave the hat completely plain for a modern, minimalist aesthetic, or add the oversized star stitch bow for a whimsical touch. If you love making handmade baby accessories, you might also enjoy this easy crochet hat pattern or this classic crochet hat pattern for even more gifting options.
FAQ
What is the difficulty level of this pattern? This pattern is rated as Easy. The star stitch might look intimidating, but once you get the hang of pulling up the loops, it becomes a very rhythmic and relaxing stitch to work.
Can I sell finished items made from this pattern? Yes! You may sell finished items made from this pattern, but please credit the original designer as a courtesy.
Conclusion
Congratulations on completing your Star Stitch Crochet Baby Hat! This beautifully textured, cozy hat is a special handmade treasure that will keep little heads warm. Share your finished hat in the comments below!
