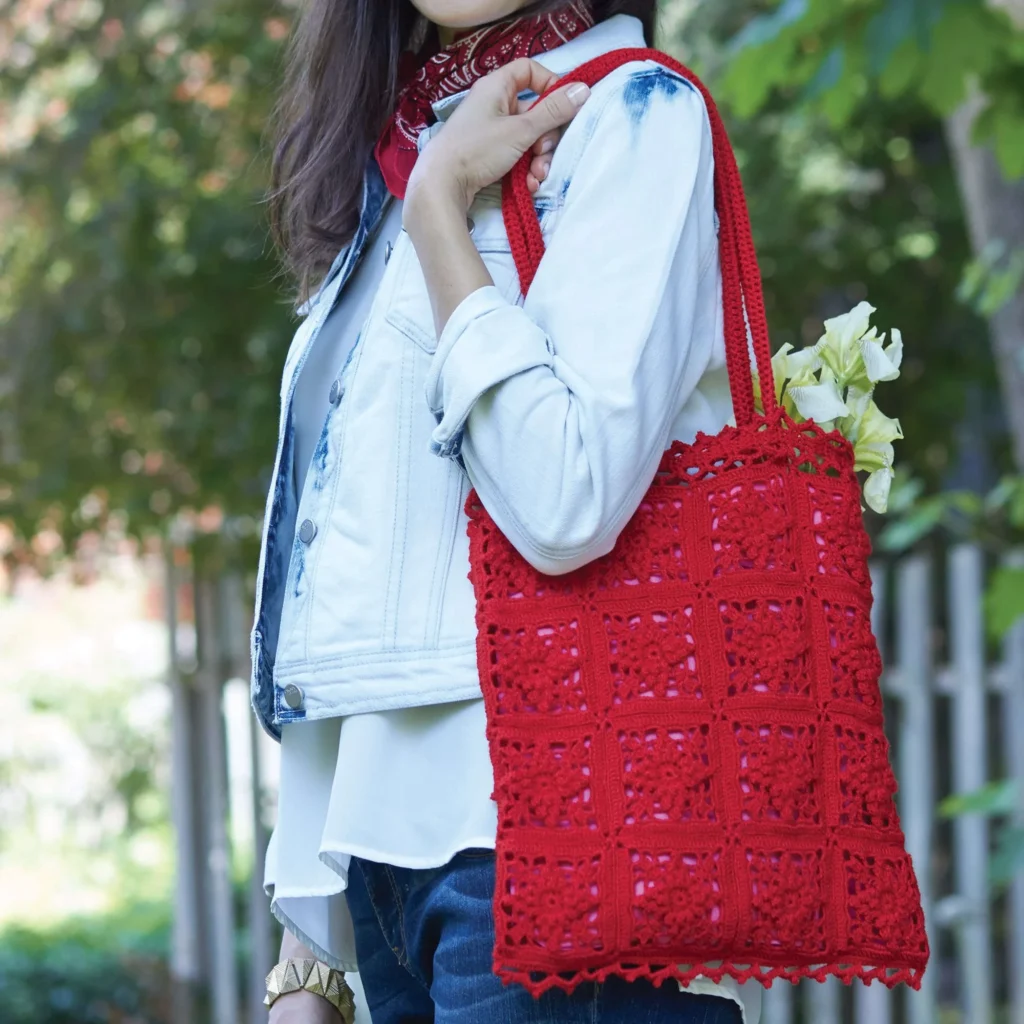
Crochet Vintage Lace Bag Pattern: A Detailed Guide
Crocheting a vintage lace bag is a delightful way to showcase your crochet skills while creating a stylish accessory. This article will guide you through the intricacies of the Crochet Vintage Lace Bag Pattern, using step-by-step instructions and helpful tips to ensure your project is a success.
Materials Needed

Before you start on your crochet bag, gather the following materials:
-
Yarn:
- Bernat Handicrafter® Crochet Thread
- 3 balls of Perfect Red (31707) – 830 m / 850 yds total (recommended)
- Alternatively, you can use:
- 400 g / 14 oz; 1596 m / 1746 yds
- Bernat Handicrafter® Crochet Thread
-
Crochet Hooks:
- Steel crochet hook 1.75 mm (U.S. 6)
- Steel crochet hook 2.75 mm (U.S. C/2)
-
Other Supplies:
- Optional: Lining fabric and matching thread for added durability and style
Motif Instructions
For this bag, you will create a total of 32 motifs. Below are the instructions for making the motifs:
Ring and Rounds
-
Foundation:
- With the smaller hook, ch 5 and join with a sl st to form a ring.
-
1st Round:
- Ch 3 (counts as dc).
- Work 11 dc into the ring.
- Join with sl st to the top of ch 3 (total: 12 dc).
-
2nd Round:
- Ch 3. Work 3 dc in the same space as the last sl st.
- Drop loop from hook, insert hook in the top of ch 3, and pull the dropped loop through to create a popcorn stitch.
- Repeat popcorn stitches and chain spaces as directed in the original pattern.
-
3rd, 4th, 5th, and 6th Rounds:
- Continue working new rounds as specified, utilizing popcorn stitches, chains, and single crochets (sc) to build your motif.
Assembly of Bag
Once your motifs are complete, it’s time to assemble your bag:
Create Strips of Motifs
- Join motifs into 4 strips, each containing 8 motifs long.
- The front and back of the bag should each measure 4 motifs wide x 4 motifs high.
Joining the Motifs
For seamless integration of motifs, follow this edging/corner method carefully:
- Align the right side (RS) of two motifs together.
- Use a sl st through corresponding corner spaces to secure them.
- Continue the joining method across all strips and seams until the bag is fully constructed.
Edgings
Lower Edging
- Work through both thicknesses and join yarn at the side seam, creating sc across the motifs to add a finished look.
- Illustrate the 2nd and 3rd rows as indicated, creating a charming pattern.
Top Edging
- Utilize the smaller hook and follow the chain and dc instructions to create an elegant top edging, which will frame your bag beautifully.
Straps
Make two straps for your bag using 2 strands of yarn held together with the larger hook. Start with a chain of 130 and work in dc, finishing with a neat seam.
Optional Lining
To enhance durability and aesthetics:
- Mark and cut lining pieces based on the shape of your bag.
- Sew the bottom and side seams, then secure it to the bag as described in the technical steps.
Final Thoughts
Crocheting the Vintage Lace Bag requires patience and precision, but the result is a beautiful and functional piece of fashion. This pattern not only offers an opportunity to practice various crochet techniques but also to create a timeless accessory that can be cherished for years. Happy crocheting!