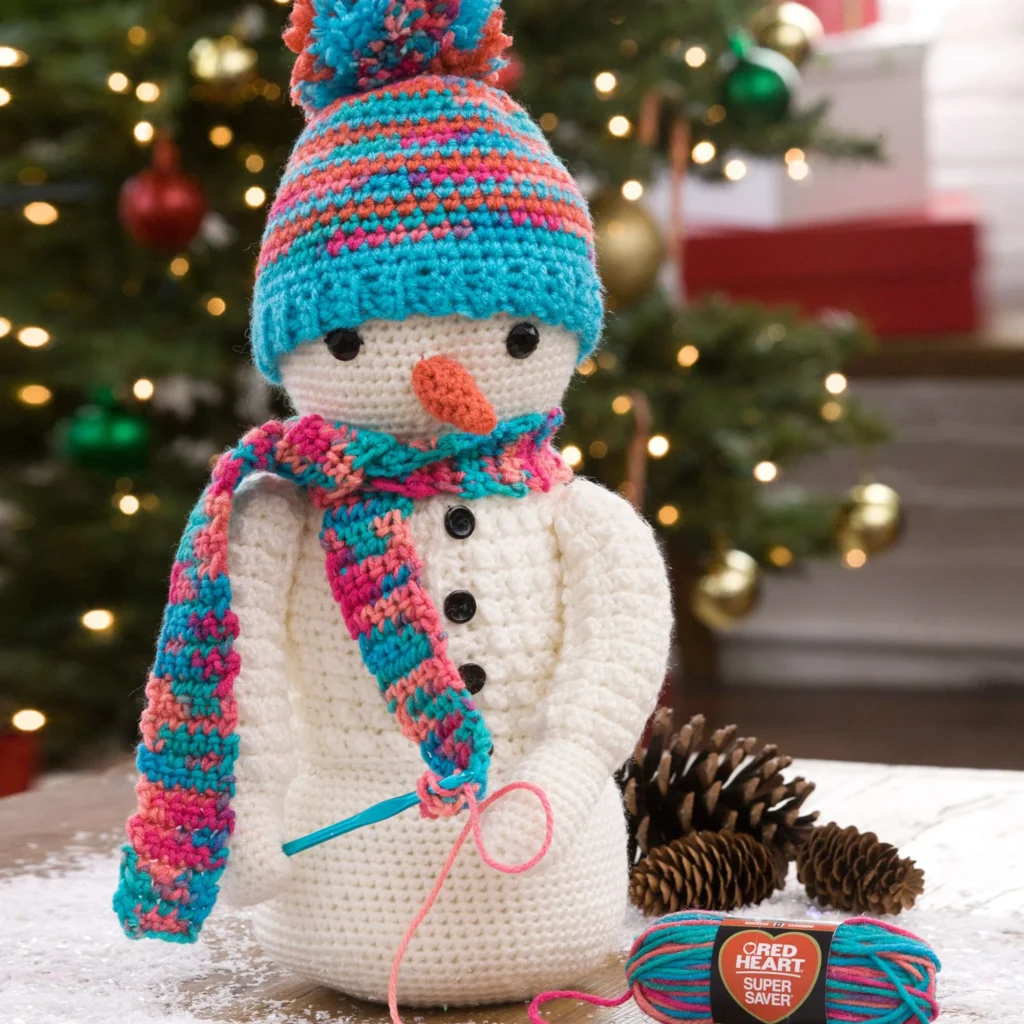
Crocheting a Snowman: A Joyful Winter Project
Winter is the perfect season to indulge in crafting, and what could be more charming than a handmade snowman? This adorable Crocheting Snowman pattern brings together a variety of crochet techniques and materials to create a delightful decoration for your home or gifts for loved ones. Follow along as we break down the materials and step-by-step instructions required to make your very own snowman.

Materials Needed
Before diving into the project, gather the following supplies:
Yarn
- 1 skein each of the following RED HEART® Super Saver® yarn colors:
- 316 Soft White (A)
- 3942 Lagoon (B)
- 512 Turqua (C)
- 726 Coral (D)
Crochet Hooks
- Susan Bates® Crochet Hooks:
- 4mm [US G-6] (for the body)
- 5mm [US H-8] (for the scarf and hat only)
Notions
- Stitch marker
- Buttons/eyes:
- Four ½” (13mm) buttons (for sweater front)
- Two ¾” (19mm) black faceted sew-on rounds (for eyes)
Sewing Tools
- Sewing needle
- Black sewing thread
- Yarn needle
Stuffing
- Polyester stuffing
- Knee-high stocking
- Pellet stuffing (or other weighted stuffing)
Additional Supplies
- For the snowman to hold: medium-sized crochet hook (4mm [US G-6], 5mm [US H-8], or 5.5mm [US I-9])
- For the mini skein: a copy of the mini Red Heart label, craft scissors, and cellophane tape.
Instructions
Special Technique: Adjustable Ring
To start, learn the adjustable ring technique. Wrap yarn into a ring and ensure the tail is behind the working yarn. Insert your hook through the center of the ring as you draw up a loop and work the first round of stitches in the ring. After completing your first round, pull the tail gently to tighten the ring.
Crocheting the Snowman
Head
- With the smaller hook and color A (Soft White), create an adjustable ring.
- Round 1: Ch 1, 6 sc in ring (total of 6 sc).
- Work continuously in rounds (do not join). Pull the tail to tighten and place a marker to indicate the start of the round.
- Continue following the pattern for rounds 2 to 11, increasing the number of stitches according to the pattern until Round 11 (total of 66 sc).
- Rounds 12-28: Sc in each sc around.
- Rounds 29-83: Decrease the stitches per the pattern instructions until you finish the bottom (total of 6 sc).
Mid-Section (Cardigan Sweater)
- After finishing the head, switch to back and forth rows starting from Row 36. The sweater consists of various rows of sc, psc, and button band stitches as detailed in the instructions.
- Follow the specific rows and make sure to stuff each section appropriately before working through.
Bottom Section
- The bottom section continues from the mid-section and includes rounds of increases and decreases until fully formed.
- Ensure the bottom is filled with pellets for stability.
Arms, Nose, Scarf, and Hat
- Arms: Follow a similar pattern to the head, adjusting the size as necessary.
- Nose: Create a carrot nose using color D (Coral) and attach it post-completion.
- Scarf: Crochet a long strip using color B (Lagoon) and adjust to your desired length.
- Hat: Style a ribbed band and body in alternating colors as per the pattern, finishing with cute pompoms on top.
Finishing Touches
Assemble your snowman following the pattern:
- Attach the arms, hat, and nose.
- Sew on the buttons for a lovely cardigan look.
- Use the scarf to add warmth and character.
Conclusion
Creating a crocheted snowman not only showcases your crochet skills but also adds a touch of handmade charm to your winter decorations. This project can be shared with family and friends, making it perfect for seasonal gifts. So grab your materials, follow this detailed guide, and enjoy your new cozy creation! Happy crocheting!