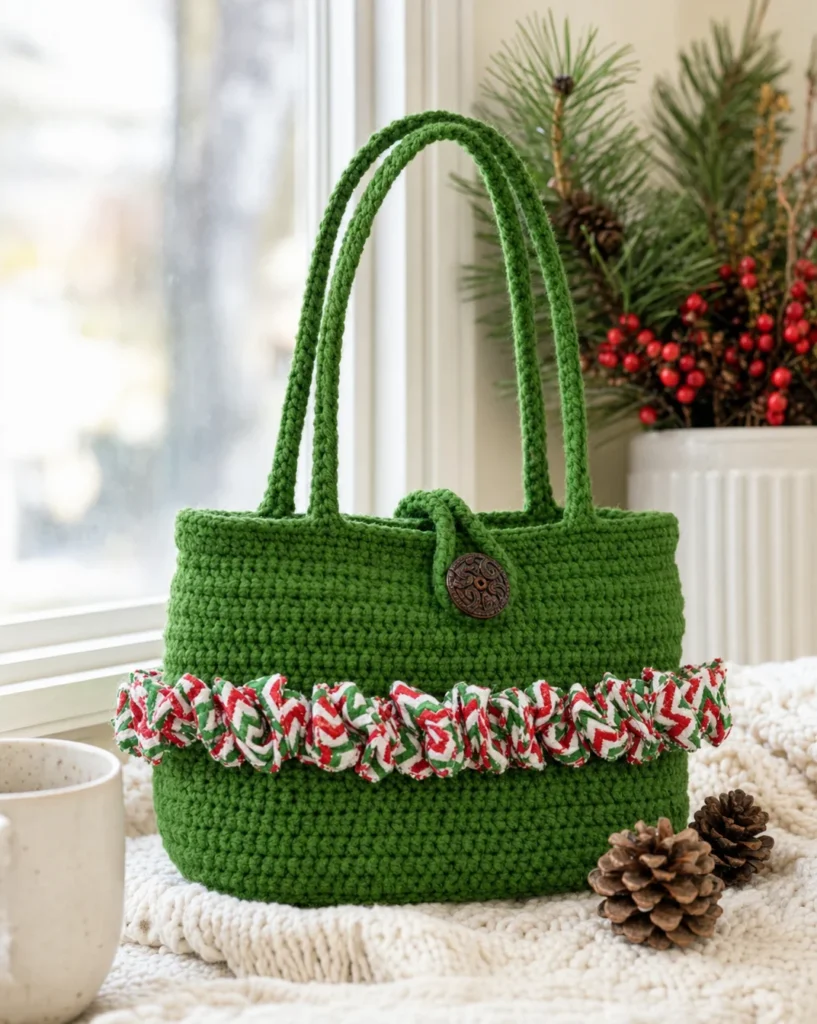
Crochet Designer Ruffle Bag Pattern: A Step-by-Step Guide
Crocheting provides a wonderful outlet for creativity, and the Crochet Designer Ruffle Bag is a perfect project for those looking to add a stylish accessory to their collection. With its unique ruffled edges and vibrant colors, this bag is both functional and fashionable. This guide will walk you through the materials needed and the step-by-step crochet instructions to create your very own ruffle bag.

Materials
To successfully create the Ruffle Bag, gather the following materials:
- Yarn:
- 1 skein of RED HEART® Super Saver® in color 368 Paddy Green A
- 1 hank of RED HEART® Boutique Holiday Sassy Fabric™ in color 9950 Holiday Chevron B
- Crochet Tools:
- 1 Susan Bates® Crochet Hook (4mm / US G-6)
- 1 yarn needle
- 2 stitch markers
- Sewing Supplies:
- 1 button (1¼” / 32 mm)
- Sewing needle and matching thread
- Fabric sealant (optional)
Instructions
Purse Bottom
- Foundation: With yarn A, chain 25.
- Row 1 (Right Side): Single crochet (sc) in the second chain from the hook and in each chain across, turn—total of 24 sc.
- Rows 2-4: Chain 1, sc in each sc, turn. Do not fasten off; continue to the sides.
Sides (Continue)
- Round 1: Chain 1, sc in each sc across; working across the ends of rows, (3 sc in the first row, sc in the next 3 rows, 3 sc in the last row); working across the opposite side of the foundation chain, sc in each chain; repeat from * to * on the other side—total of 66 sc. Place a marker in the first stitch.
- Rounds 2-22: Working in back loops only, sc in each sc. Place a marker on the first stitch of Round 6 for ruffle placement.
Next, reduce the stitches:
- Round 23: *Sc in the next 9 sc, sc2tog; repeat from * around—60 sc.
- Round 24: *Sc in the next 3 sc, sc2tog; repeat from * around—48 sc.
- Round 25: *Sc in the next 6 sc, sc2tog; repeat from * around—42 sc.
- Round 26: *Sc in the next 5 sc, sc2tog; repeat from * around—36 sc.
- Round 27: Slip stitch in the next 9 sc, chain 15 (this creates your button loop), slip stitch in the next 27 sc and join with a slip stitch in the first sc. Secure off.
Ruffles
- Round 1: With the right side and marked stitch of Round 6 facing you, begin ruffle slip stitch in the marked sc and continue ruffle slip stitching in each remaining sc around—total of 66 ruffle slip stitches.
- Rounds 2-4: Skip the next round; working in the next round, ruffle slip stitch in each sc around. To finish off, cut B after the next hole, insert the hook through the last hole, and pull the top edge of the fabric through the loop on the hook. Gently pull the remaining tail through the loop and tighten.
Handles
- Centering the Purse: Flatten the purse so the button loop is centered and the stitches at each top edge are visible.
- Round 1: Join A with a slip stitch to the stitch at the end of the top edge, chain 35, skip the next 16 stitches, slip stitch in the next 2 stitches, chain 35, skip the next 16 stitches, and slip stitch in the last stitch.
- Round 2: Slip stitch in each chain. Fasten off.
Finishing Touches
- Sew the button onto the front of the purse under the button loop using a strand of yarn A.
- If desired, apply fabric sealant to cut ends of B to prevent fraying. Tuck ends under and tack in place with a sewing needle and thread.
- Finally, weave in any remaining ends.
Conclusion
Creating your own Crochet Designer Ruffle Bag is a satisfying project that combines creativity with functionality. This bag not only showcases your crochet skills but also serves as a trendy accessory that you can use for various occasions. Enjoy the process, and don’t forget to share your finished bag with friends, family, or online crochet communities! Happy Crocheting!