
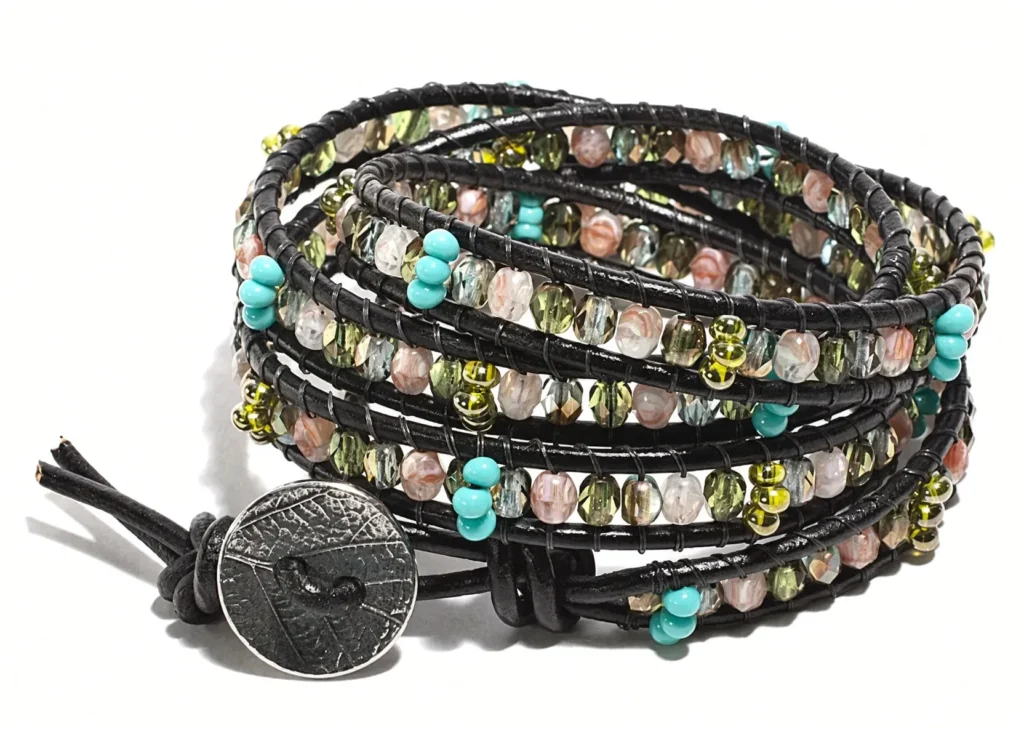
A basic beaded bracelet is a great project if you want to combine simple leather cord with colorful beads for a handmade bracelet that looks much more complicated than it really is.
This tutorial shows you how to make a leather and bead wrap bracelet using round leather cord, beading thread, a metal button, and a mix of fire-polished and magatama beads. The finished bracelet wraps around the wrist multiple times and closes with a simple button-and-loop clasp.
It is a good project for beginners who already feel comfortable using a needle and thread and want to try a more polished beaded jewelry design.
Pattern credit: Chris Franchetti Michaels.
What You’ll Need
Tools
- Measuring tape
- Side cutters or flush cutters
- Clipboard
- Size 10 beading needle
- Masking tape or painter’s tape
- Thread burner
- Scissors, optional
Materials
- 72 inches of 2 mm round leather cord
- One 17 mm round metal button
- Beading thread, 6-pound tensile strength
- 45 fire-polished glass beads, 4 mm
- 15 color A
- 15 color B
- 15 color C
- 30 magatama beads, 3 mm
- 15 color D
- 15 color E
- About 6 inches of C-Lon beading cord, optional
These are the materials and tools specified in the source tutorial.
How to Make a Leather and Bead Wrap Bracelet
Step 1: Measure and Cut the Leather Cord

Start by wrapping a measuring tape around your wrist as many times as you want the finished bracelet to wrap.
Keep the tape a little looser than the final fit you want because the beads will add thickness.
For the sample bracelet, the wrist measurement was 24 inches.
Add 12 inches to your measurement, then double the result.
For example:
- Wrist measurement: 24 inches
- 24 + 12 = 36 inches
- 36 × 2 = 72 inches
Cut the leather cord to that length using side cutters.
Step 2: String the Button
:max_bytes(150000):strip_icc():format(webp)/wrap_bracelet_tutorial_1-56a07b375f9b58eba4b0dd09.jpg)
Take your metal button and thread the leather cord up through one hole and down through the second hole.
Slide the button until it sits at the center of the cord.
The two leather ends should now be approximately equal in length.
Step 3: Secure the Cord and Begin the Thread
:max_bytes(150000):strip_icc():format(webp)/wrap_bracelet_tutorial_2-56a07b383df78cafdaa20595.jpg)
Clamp the button end of the leather cord under the clip of your clipboard.
Cut a long piece of bead thread, at least about two arm spans.
Thread the beading needle so the needle sits near the middle of the thread, creating a double strand.
Bring the loose thread ends together and tie them loosely around one strand of leather cord close to the clipboard clip.
Leave at least 8 inches of thread tail so you can weave the ends into the beadwork later.
If you are right-handed, it may be easier to tie the thread to the left leather strand; if left-handed, use the right strand.
Tape the loose thread tails down to keep them out of the way.
Step 4: String and Position the First Bead
:max_bytes(150000):strip_icc():format(webp)/wrap_bracelet_tutorial_2b-56a07b383df78cafdaa20598.jpg)
Pick up one color A bead with the needle.
Slide it all the way down the thread.
Pass the needle underneath both leather cords.
Use your finger to push the bead upward so it sits neatly between the two leather strands.
Step 5: Stitch the First Bead
:max_bytes(150000):strip_icc():format(webp)/wrap_bracelet_ills_2-56a07b343df78cafdaa2056d.jpg)
Pass the needle back through the same bead, this time going over the top of both leather cords.
Hold the bead in place with your fingers while pulling the thread snug.
Pull slowly.
Because you are working with double thread, make sure both strands tighten evenly around the leather.
If the thread begins to tangle, stop and straighten it before continuing.
Step 6: Slide the First Bead Into Place
Gently slide the first bead closer to the clipboard clip.
The first few beads should sit relatively close to the button.
This keeps the beginning of the beadwork neat and reduces unnecessary gaps near the clasp.
:max_bytes(150000):strip_icc():format(webp)/wrap_bracelet_tutorial_3-56a07b393df78cafdaa2059c.jpg)
Step 7: String the Second Bead
Pick up one color B bead.
Slide it down the thread.
Pass the needle underneath both leather cords again.
Push the bead upward so it fits between the cords beside the first bead.
:max_bytes(150000):strip_icc():format(webp)/wrap_bracelet_ills_3-56a07b343df78cafdaa20571.jpg)
Step 8: Make the Second Stitch
Pass the needle back through the second bead.
Pull the thread tight slowly, just as you did with the first bead.
Keep the bead centered between the leather cords and maintain even tension.
:max_bytes(150000):strip_icc():format(webp)/wrap_bracelet_ills_4-56a07b345f9b58eba4b0dcea.jpg)
Step 9: Stitch the Third Bead
Pick up one color C bead.
Use the same technique:
- slide the bead down the thread
- pass beneath the leather cords
- position the bead between them
- pass back through the bead
- pull the thread snug
You now have the first A-B-C color sequence.
:max_bytes(150000):strip_icc():format(webp)/wrap_bracelet_ills_5-56a07b345f9b58eba4b0dced.jpg)
Step 10: Keep Stitching Beads
Continue building the pattern.
Add another sequence of:
- one color A bead
- one color B bead
- one color C bead
Then add three color D magatama beads together, treating the group as if it were one bead.
Next, stitch:
- two more A-B-C sequences
- three color E magatama beads together
Keep alternating these bead sequences.
The source tutorial recommends stopping with a fire-polished bead when you have about 8 inches of thread remaining.
The sample bracelet reached around 9 inches of beadwork before a new thread was needed.
:max_bytes(150000):strip_icc():format(webp)/wrap_bracelet_tutorial_3b-56a07b393df78cafdaa205a0.jpg)
Keeping the Bead Pattern Even
As you work, check that the beads remain centered between the leather strands.
Try to maintain consistent thread tension.
Too loose, and the beads may shift.
Too tight, and the leather may begin to pinch inward.
Take your time and correct the placement as you go.
Step 11: End the Old Thread
When your working thread becomes too short, weave it back into the bracelet before starting a new strand.
Turn the beadwork over.
Pass the needle back through the last bead you stitched.
Make a small loop with the thread and pass the needle through it to create a securing knot.
Turn the bracelet right-side up and pass back through the bead.
Turn it again and pass through the bead from the back.
Repeat once more so the thread is woven securely into the beadwork.
Use a thread burner to trim the thread close to where it exits the bead.
Also remove the excess thread that was originally tied around the leather cord.
:max_bytes(150000):strip_icc():format(webp)/wrap_bracelet_tutorial_4-56a07b3a5f9b58eba4b0dd14.jpg)
Step 12: Start a New Thread
Cut a fresh length of beading thread.
Attach it to the leather cord the same way you did at the beginning.
Thread your needle and continue adding beads from the point where you stopped.
:max_bytes(150000):strip_icc():format(webp)/wrap_bracelet_tutorial_5-56a07b3a5f9b58eba4b0dd19.jpg)
Step 13: Complete the Beading
Continue adding beads until the bracelet reaches the length you want.
Start a new thread whenever necessary.
When the beadwork is complete, weave in the final thread tails using the same method used earlier.
Make sure all thread ends are secure before moving on to the clasp.
:max_bytes(150000):strip_icc():format(webp)/wrap_bracelet_tutorial_last-56a07b3b3df78cafdaa205aa.jpg)
How Long Should a Leather Wrap Bracelet Be?
The ideal length depends on:
- wrist size
- number of wraps
- bead size
- preferred fit
The best approach is to test the bracelet around your wrist as you work.
Stop when the beadwork wraps comfortably without feeling too tight.
Step 14: Tie the End Knots
At the end opposite the button, tie an overhand knot using both leather cords.
Position it close to the last bead.
Pull it tight.
Next, use the button itself as your measuring guide.
Tie a second overhand knot so the space between the two knots is slightly longer than the button diameter.
Test the button in the loop before tightening the second knot fully.
This creates the bracelet’s button-and-loop clasp.
:max_bytes(150000):strip_icc():format(webp)/wrap_bracelet_tutorial_main-56a07b3b3df78cafdaa205b2.jpg)
Step 15: Optional — Wrap C-Lon Cord Below the Button
For a cleaner finish, you can wrap a short piece of C-Lon beading cord around both leather strands directly beneath the button.
Wrap it several times.
Tie it securely.
Trim the ends with scissors.
This step is optional, but it can help keep the button stable and give the bracelet a more finished appearance.
:max_bytes(150000):strip_icc():format(webp)/wrap_bracelet_tutorial_6-56a07b3c5f9b58eba4b0dd21.jpg)
Step 16: Finish the Leather and Bead Wrap Bracelet
Use side cutters to trim the two leather tails.
Leave at least 1 inch of leather beyond the second knot on the loop end.
Check the clasp one final time.
The button should pass through the leather loop securely but still be easy enough to open when needed.
Your leather and bead wrap bracelet is now ready to wear.
:max_bytes(150000):strip_icc():format(webp)/wrap_bracelet_main_w_button-56a07b3c3df78cafdaa205b5.jpg)
Tips for a Neat Beaded Wrap Bracelet
Keep the Leather Parallel
Try to keep the two leather strands evenly spaced while stitching.
This helps the bracelet maintain a consistent width.
Pull the Thread Slowly
Fast pulling makes tangles more likely.
Slow, controlled tension gives you cleaner bead placement.
Check the Fit Before Finishing
Wrap the bracelet around your wrist before tying the final closure knots.
That is much easier than trying to adjust the length after everything is finished.
Keep the Button Loop Snug
The loop should be large enough for the button to pass through, but not so large that it slips open easily.
Bead Color Ideas
The original pattern uses five bead colors, but you can adapt the color palette.
Try combinations such as:
- turquoise, cream, and bronze
- black, silver, and gray
- blush pink, ivory, and gold
- navy, white, and copper
- green, amber, and brown
- rainbow colors
- neutral earth tones
You can also use only two or three colors for a simpler look.
Frequently Asked Questions
Is this leather and bead bracelet beginner-friendly?
Yes, but it is slightly more advanced than a simple cord bracelet because it involves a beading needle and thread.
It is still approachable if you work slowly and follow the bead-stitching sequence carefully.
What size leather cord is used?
The source pattern uses 2 mm round leather cord.
What size beads are used?
The bracelet uses:
- 4 mm fire-polished glass beads
- 3 mm magatama beads
How does the bracelet close?
A metal button is attached at one end.
Two overhand knots create a leather loop at the opposite end, forming a simple button-and-loop clasp.
What should I do when the bead thread runs out?
Weave the thread back through the final bead, secure it, trim it, and attach a new thread to the leather cord.
Then continue beading from where you stopped.
Can I change the bead pattern?
Yes.
The original design uses repeating fire-polished bead sequences with groups of magatama beads, but you can customize the color order as long as the beads fit comfortably between the leather strands.
Quick Pattern Summary
- Measure your wrist and calculate the leather length.
- Cut the leather cord.
- Center the button on the cord.
- Secure the leather to a clipboard.
- Tie on the bead thread.
- Add the first bead.
- Stitch through it.
- Add the second bead.
- Add the third bead.
- Continue the repeating bead pattern.
- Weave in the old thread.
- Start a new thread.
- Continue until the bracelet reaches the desired length.
- Tie the leather loop closure.
- Add optional C-Lon wrapping under the button.
- Trim the leather ends and finish the bracelet.
Make Your Own Basic Beaded Bracelet
This basic beaded bracelet is a beautiful next step if you want to move beyond simple knotting patterns and try a bracelet that combines leather, beads, and hand stitching.
The leather gives the bracelet structure, while the beads add color and texture. The button closure also gives the finished piece a handmade jewelry look without requiring a metal clasp.
Once you understand the basic stitching method, you can customize the bracelet with your own bead colors, wrap length, button style, and bead sequence.
Pattern credit: Chris Franchetti Michaels.
