
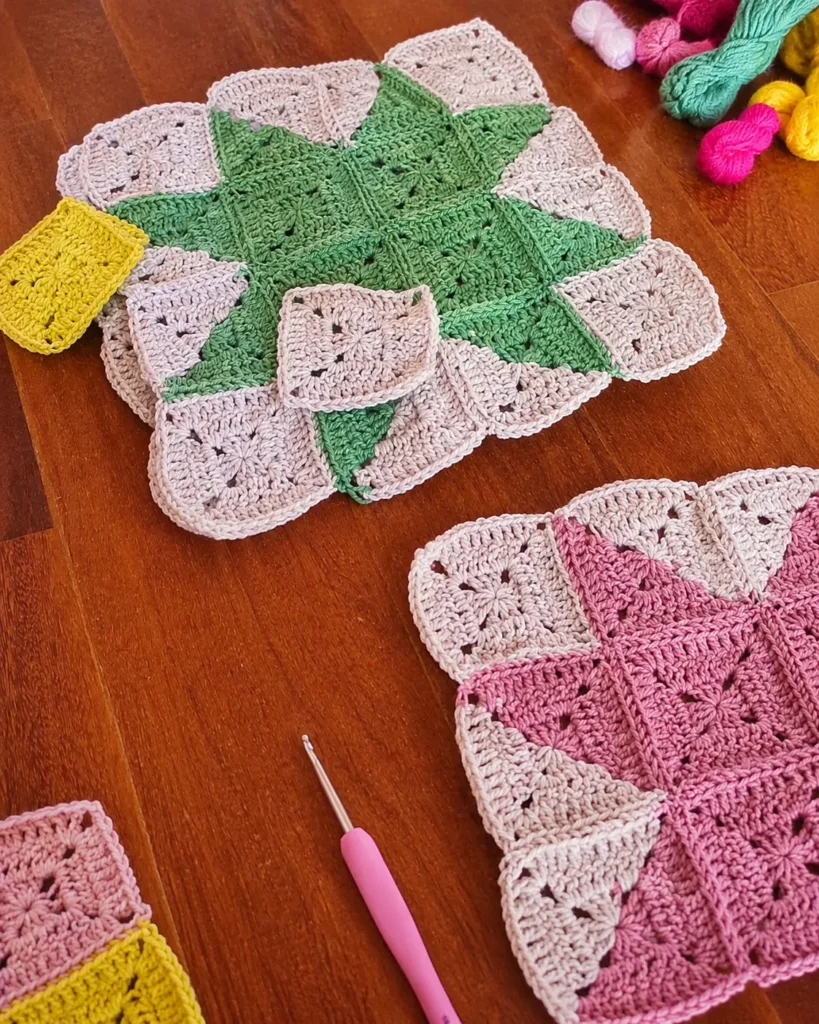
The classic granny square is a staple, but sometimes you want a little visual drama. Enter the Half and Half Granny Square (also known as the diagonal split square). This technique allows you to use two distinct colors that cross from corner to corner, creating a stunning quilt-like effect.
If you have mastered the Mastering the Basic Granny Square, this is the perfect next step. Whether you are planning a scrap busting blanket or a modern pillow cover, these squares work up in about 15 minutes each.
Pro Tip: Fasten off and weave in your ends after every round to save yourself a headache later!
The Patchwork Trend
The yarn world has fallen in love with traditional quilting motifs. While I love a Strawberry Granny Square or a Daisy Granny Square, the Half and Half square brings a geometric, modern vibe to your craft room.
Because these are small, portable projects, you can stash a hook and yarn in your bag and make a few squares while waiting for appointments. Once you have 20 or 30, you can sew them together for a Cozy Crochet Blanket.
Materials You Will Need
-
Yarn: Worsted weight (Weight 4 / Aran). I recommend using two contrasting colors (Color A and Color B).
-
Hook: 5.0 mm (H-8)
-
Notions: Tapestry needle, scissors.
Abbreviations (US Terms)
-
Ch: Chain
-
Sl St: Slip Stitch
-
Sc: Single Crochet
-
Dc: Double Crochet
-
Sp: Space
-
Sk: Skip
The Half and Half Granny Square Pattern
Note: This square is worked in joined rounds. The “split” happens by changing colors halfway through Round 2.
Foundation (Center)
Round 1 (Starting the split):
-
With Color A, make a Magic Circle (or Ch 4, join to form a ring).
-
Ch 3 (counts as first Dc).
-
Dc 2 into the circle. Ch 2.
-
Switch to Color B. (Drop Color A, pick up Color B).
-
Dc 3 into the circle. Ch 2.
-
Dc 3 into the circle.
-
Join with a Sl St to the top of the starting Ch-3. (You should have 2 clusters of Color A and 2 clusters of Color B). Fasten off Color B.
Building the Square
Round 2:
-
Attach Color A to the top of a Color A cluster.
-
Ch 3, Dc 2 in the same space (corner made).
-
Work along the side: In the next Ch-2 space (the center gap), work Dc 3.
-
Reach the corner: In the next Ch-2 space (corner), work Dc 3, Ch 2, Dc 3.
-
Switch to Color B: Drop Color A, pick up Color B.
-
Work the second side: In the next Ch-2 space (center gap), work Dc 3.
-
Work the final corner: In the last Ch-2 space, work Dc 3, Ch 2, Dc 3.
-
Join with Sl St to top of starting Ch-3. Fasten off Color A.
Shaping the Square
Round 3 (The “Straightening” Round):
-
Attach Color A in the corner Ch-2 space of the Color A side.
-
Corner: Ch 3, Dc 2, Ch 2, Dc 3.
-
Side: Dc 3 in the next space. Dc 3 in the next space.
-
Corner (Middle of square): Dc 3, Ch 2, Dc 3.
-
Switch to Color B in the same corner space or the next side gap.
-
Side: Dc 3 in the next space. Dc 3 in the next space.
-
Corner: Dc 3, Ch 2, Dc 3.
-
Join and fasten off.
Round 4 (Optional for larger squares):
Repeat Round 3 logic. To keep the diagonal clean, always switch colors at the exact midpoint corner. For a solid square, you will do 3 clusters per side between corners.
Finishing the Square
-
Weave in all loose ends using a tapestry needle.
-
To get a perfectly flat square, lightly wet block the square and pin it to a mat to dry.
Looking for more wearables? Once you have mastered this square, use it to make a patchwork Simple Crochet Top Pattern for Women or a cozy Crochet Hat Pattern Free.
Design Ideas & Inspiration
One of the best things about this pattern is its versatility. Here are three ways to use your finished squares:
-
The Quilted Blanket: Make 12 squares in red/cream and 12 in navy/cream. Sew them together alternating directions.
-
The Boho Bag: Sew two large squares together on three sides, add a liner, and attach a wooden handle.
-
The Pillow Cover: Make one large square (just keep repeating Round 3 until it is 12″ wide) and sew it to a fabric backing.
If you love home decor, check out these Charming Crochet Decor Patterns to Brighten Your Space for more ideas.
Troubleshooting & Tips
-
My square looks like a triangle: You are not putting enough clusters in the corners. Remember: (3 Dc, Ch 2, 3 Dc) in every corner space.
-
The diagonal line is wavy: You are pulling the color change yarn too tight. Leave a slight slack when you drop the yarn and pick it up on the next round.
-
Uneven edges: Try the “Chainless Starting Double Crochet” instead of Ch 3 for a smoother edge.

Join the Crafted & Cherished Family
I love seeing your projects! Tag me on Instagram or Pinterest using the hashtag #CraftedAndCherished.
If you are new to joining squares, don’t miss my guide on Cozy Crochet Ideas to Keep You Snug.
Happy stitching, friends! 🧶
