
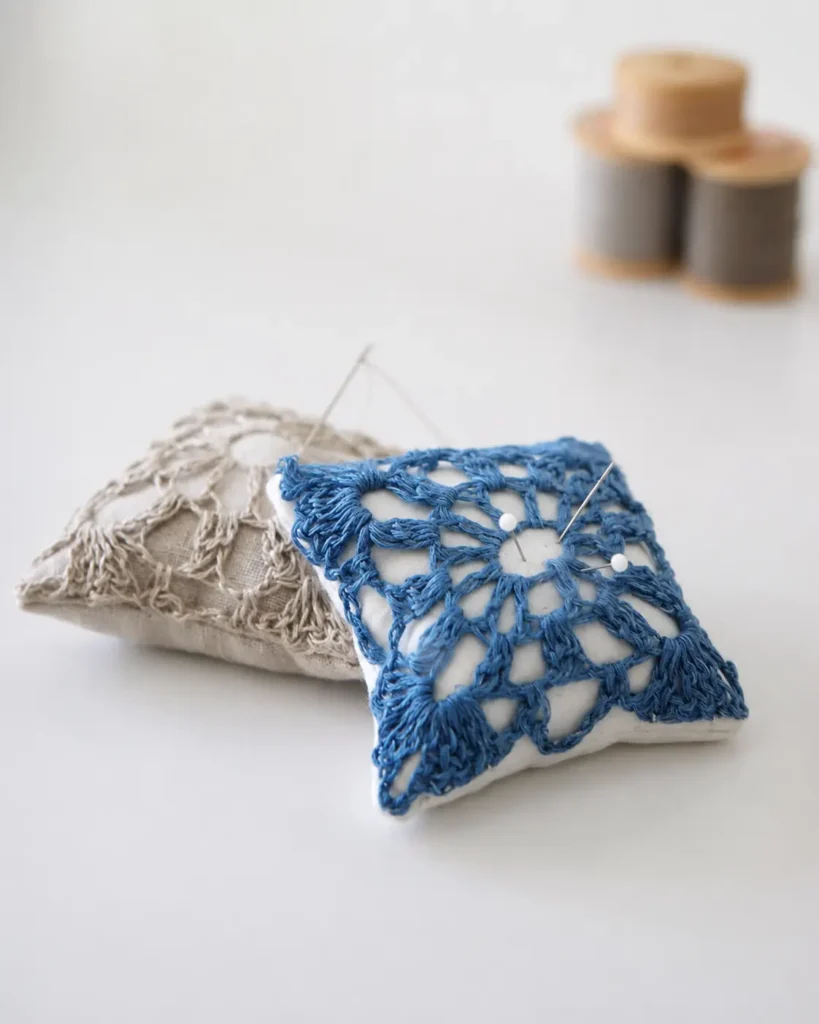
There is something incredibly satisfying about creating beautiful, functional tools for your crafting space. If you are looking for a quick, relaxing project that uses up small scraps of yarn, learning how to crochet a pincushion is the perfect solution.
This free crochet pincushion pattern combines the timeless look of a textured granny square with a tailored fabric backing. Not only does it keep your sewing needles and pins neatly organized, but it also makes a gorgeous handmade gift for a fellow crafter.
Why You’ll Love This Crochet Pincushion Pattern
- Beginner-Friendly: If you know how to work basic stitches like double crochet and chain spaces, you can easily make this.
- Customizable: You can adjust the size by using different yarn weights or stopping at a larger granny square round.
- Dual-Purpose: Follow the included variation to turn this into a scented lavender sachet for your drawers or closet!
- Perfect for Gifting: Make a set of three in coordinating colors for a beautiful housewarming or birthday gift.
Tip: If you are new to making granny squares, brush up on the basics with my guide on mastering the basic granny square before you begin!
Materials Needed
- Yarn: 25 meters of fingering weight yarn. (Pure linen or cotton yarn is highly recommended as it creates a sturdy, dense fabric that pins won’t easily slip through).
- Crochet Hook: 2mm hook (or the size needed to achieve gauge).
- Yarn Needle: For weaving in ends and sewing the motif to the fabric.
- Fabric: Two 9x9cm (approx. 3.5×3.5 inches) squares of non-stretch woven fabric (like quilting cotton or linen).
- Sewing Needle & Thread: Matching your fabric.
- Sewing Machine: (Optional, but recommended. You can absolutely sew the fabric bag by hand using small, tight backstitches).
- Filling:
- For a Pincushion: Fine craft sand or crushed walnut shells. (Using sand or crushed shells is a pro-secret: it adds weight to keep the cushion stable on your table, and it naturally sharpens your pins every time you push them in!)
- For a Lavender Sachet: Polyester fiberfill stuffing mixed with 2 tablespoons of dried lavender buds.
Gauge & Finished Size
- Gauge: 26 double crochet (dc) stitches and 12 rows = 10x10cm (4×4 inches).
- Finished Size: Approximately 7x7cm (2.75×2.75 inches) square.
Note: This pattern is written in US crochet terms.

How to Crochet the Pincushion Granny Square
Row 1: Make a magic circle. Chain 4 (this counts as 1 dc and 1 ch-sp). 1 dc into the ring, ch 1. Repeat from * to * 11 more times. Slip stitch into the 3rd chain of the beginning ch-4 to join. Total: 12 (dc, ch-1) groups.
Row 2: Chain 2 (does not count as a stitch throughout). Work a dc2tog (decrease) over the first dc and the next dc, ch 3. Dc3tog over the next 3 dc stitches, ch 3. Repeat from * to * 10 more times. Join with a sl st into the top of the first dc2tog. Total: 12 (3-dc cluster, ch-3) groups.
Row 3: Chain 1, sc in the same ch-3 space. Ch 5, sc in the next ch-3 space. Repeat from * to * 10 more times. Ch 2, join with a dc into the top of the first sc (this ch-2 + dc acts as your final ch-5 space). Total: 12 ch-5 spaces.
Row 4: Ch 1, sc in the space made by the joining dc from the previous round. Ch 5, sc in the next ch-5 space, ch 1. In the next ch-5 space, work: (5 dc, ch 3, 5 dc, ch 1). Repeat the following sequence 3 times: sc in the next ch-5 space, ch 5, sc in the next ch-5 space, ch 1, (5 dc, ch 3, 5 dc, ch 1) in the next ch-5 space. Sl st into the first sc to join. Fasten off and weave in all ends.
Crucial Step: Block your granny square! Spray it with water, pin it down to a foam mat so the corners are perfectly pointed and the square lays completely flat, and let it dry. This ensures your pincushion will look professional and tailored.
How to Sew the Fabric Backing
While your granny square is drying, you can prep the fabric base.
- Pin the Fabric: Place your two 9x9cm fabric squares together with the right sides facing each other (the pretty sides touching on the inside).
- Mark the Opening: On one edge, place two pins about 4cm (1.5 inches) apart. This gap is where you will turn the fabric right-side out and add your filling.
- Sew the Edges: Using a sewing machine (or tight hand stitches), sew a 1cm (approx. 3/8 inch) seam allowance all the way around the perimeter of the square. Start at one pin, sew around the square, and stop at the second pin. Do not sew the gap closed.
- Clip the Corners: Trim the excess fabric off the four corners, being very careful not to cut through your stitches. This reduces bulk and helps your cushion turn out with sharp, crisp corners.
- Turn and Fill: Turn the fabric square right-side out through the gap. Use a point-turner (like a chopstick or the blunt end of a pencil) to gently push the corners out.
- Add the Filling: Using a funnel (highly recommended to avoid a mess!), fill the bag with your sand, walnut shells, or stuffing. Fill it until it is firm but not bursting.
- Close the Gap: Thread a hand-sewing needle and use an invisible slip stitch (also known as a ladder stitch) to sew the 4cm gap completely closed. Tie off securely and hide the knot inside the bag.
Assembling Your Pincushion
Now it’s time to bring your crochet and sewing together!
- Place your blocked granny square centered on top of the fabric bag.
- Thread your yarn needle with a length of matching yarn (you can use the tail left over from fastening off your granny square).
- Using a whipstitch or an invisible appliqué stitch, sew the outer edges of the granny square directly to the fabric. Be sure to catch just the top layer of the fabric, not sewing all the way through to the back.
- Knot off securely on the underside of the crochet square and weave your tail in.
Embrace the Slow Craft Movement
Projects like this are a wonderful reminder of why we craft. Taking the time to make your own tools—rather than buying mass-produced items—aligns perfectly with a slow living crochet journey. It’s an act of mindfulness, transforming simple threads and scraps of fabric into something both beautiful and highly useful.
If you loved making this little square, you might enjoy exploring more geometric designs. Check out the cluster crochet granny square pattern for another textured twist on a classic motif, or try the daisy granny square for a floral touch.
More Cozy Crochet Home Decor
Handmade items bring so much warmth to a space. If you enjoyed making this pincushion, you will love these other free patterns designed to brighten your home:
- Charming Crochet Decor Patterns to Brighten Your Space
- Cozy Up Your Space with Crochet Home Decor Patterns
- Easy Textured Crochet Baby Blanket Free Pattern (A larger home decor project perfect for using up stash yarn!)
