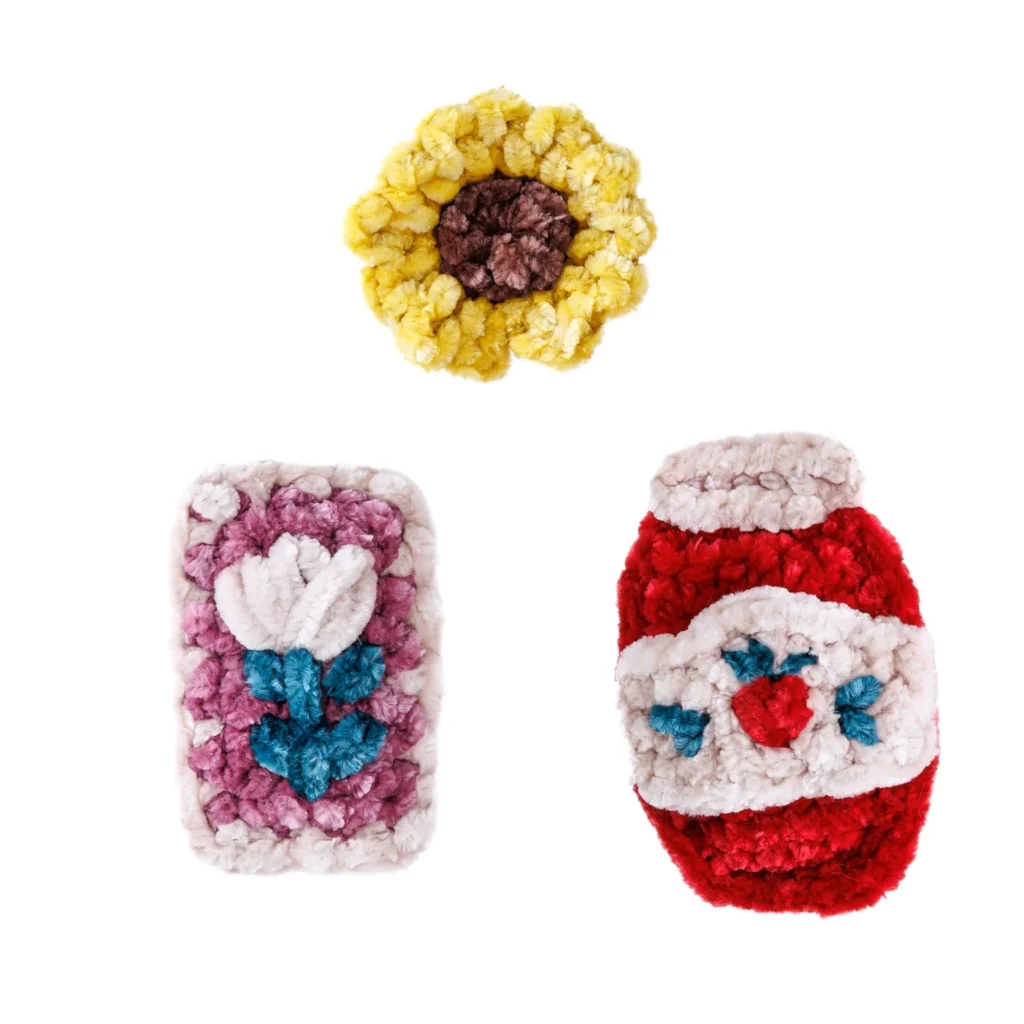
Garden Party Crochet Bag Charms Pattern
Are you ready to add a touch of whimsy to your bag? The Garden Party Crochet Bag Charms are not only adorable but also a delightful way to use your crochet skills. This pattern features charming crochet bag decorations including a sunflower, a framed flower, and a jam jar, all of which can be personalized with vibrant yarn colors. Let’s dive into the details of this creative project!
Materials

To create your Garden Party Crochet Bag Charms, you will need the following supplies:
- Bernat® Velvet Minis™ 1 Kit:
- 20 balls (1.2 oz/35 g; 41 yds/38 m) each, totaling 25 oz/700 g
- Contrast A (Chocolate): 1 ball (2 yds/2 m)
- Contrast B (Joyful Gold): 1 ball (2 yds/2 m)
- Contrast C (Orchid Hush): 1 ball (6 yds/5.5 m)
- Contrast D (Velveteal): 1 ball (2 yds/2 m)
- Contrast E (Sandy Cream): 1 ball (6 yds/5.5 m)
- Contrast F (Red): 1 ball (7 yds/6.5 m)
- Size U.S. G/6 (4 mm) crochet hook or size needed to obtain gauge
- Susan Bates® yarn needle
- Bag charm bits
Special Techniques
This pattern utilizes a few specific crochet techniques:
- Magic Ring: Used to start the sunflower.
- Stitch Manipulation: Working in back loops only and front loops only for different sections of the sunflower.
- Edging: Front and back pieces are edged together for a tidy finish.
- Embroidery: Incorporating Lazy Daisy and Chain Stitch for decorative details.
- Assembly: Gluing bag charm bits to specified areas, ensuring a polished final product.
Instructions
Sunflower (Make 1)
- Magic Ring: Begin with Contrast A.
- 1st Round: Chain 1, 12 single crochets (sc) in the magic loop. Pull tight, break Contrast A, and join Contrast B with a slip stitch (sl st) to first sc.
- 2nd Round: With Contrast B, working in back loops only, slip stitch in each sc around. Do not join.
- 3rd Round: Chain 1, working in front loops only, 1 sc in next sl st, ch 3. Repeat from * around. Join with a slip stitch to the first sl st from the previous round. Fasten off.
- Finishing: Glue bag charm bit to the back of the sunflower.
Framed Flower (Make 2, Front and Back Alike)
- Front and Back Piece: With Contrast C, chain 6.
- 1st Row: 1 sc in 2nd chain from hook, 1 sc in each chain to end. Turn.
- 2nd Row: Chain 1, 1 sc in each sc to end. Turn.
- Next Rows: Repeat 2nd row until work measures 2½” [6 cm] from the beginning. Fasten off.
- Embroidery: With Contrast D, embroider the stem and petals using Chain and Lazy Daisy stitches with Contrast E for additional petals.
- Edging: Hold Front and Back together, join Contrast E with a sl st to any corner and crochet evenly around edge with sc, placing 3 sc in each corner. Join with sl st to first sc. Fasten off.
- Finishing: Glue bag charm bit to back of the framed flower.
Jam Jar (Make 2, Front and Back Alike)
- Front and Back Piece: With Contrast F, chain 6.
- 1st Row: 1 sc in 2nd chain from hook, sc in each chain to end. Turn.
- 2nd Row: Chain 1, 2 sc in first sc, 1 sc in each sc to last, 2 sc in last. Turn.
- 3rd to 9th Rows: Chain 1, 1 sc in each sc to end. Turn.
- 10th Row: Chain 1, sc2tog, 1 sc in each to last 2 sc, sc2tog to yield 5 stitches. Fasten off.
- Edging: As previously instructed for the framed flower.
- Lid: Join Contrast E to the assembled jam jar as instructed and create the lid using the specified pattern.
- Label: Crochet a label using Contrast E, embroider details with Contrast F and D as required.
- Final Assembly: Sew the label to the jam jar and attach all charm bits as outlined.
Conclusion
You’ll love the vibrant pop these charming bag decorations bring to your accessories. The Garden Party Crochet Bag Charms pattern is perfect for adding a handmade touch to handbags or gifting to friends. Whether you’re a seasoned crocheter or just getting started, these projects offer a fun way to explore your skills. Happy crocheting!
For detailed visual aids, refer to the original pattern image. Make sure to enjoy the process and let your creativity shine as you personalize your bag charms!