
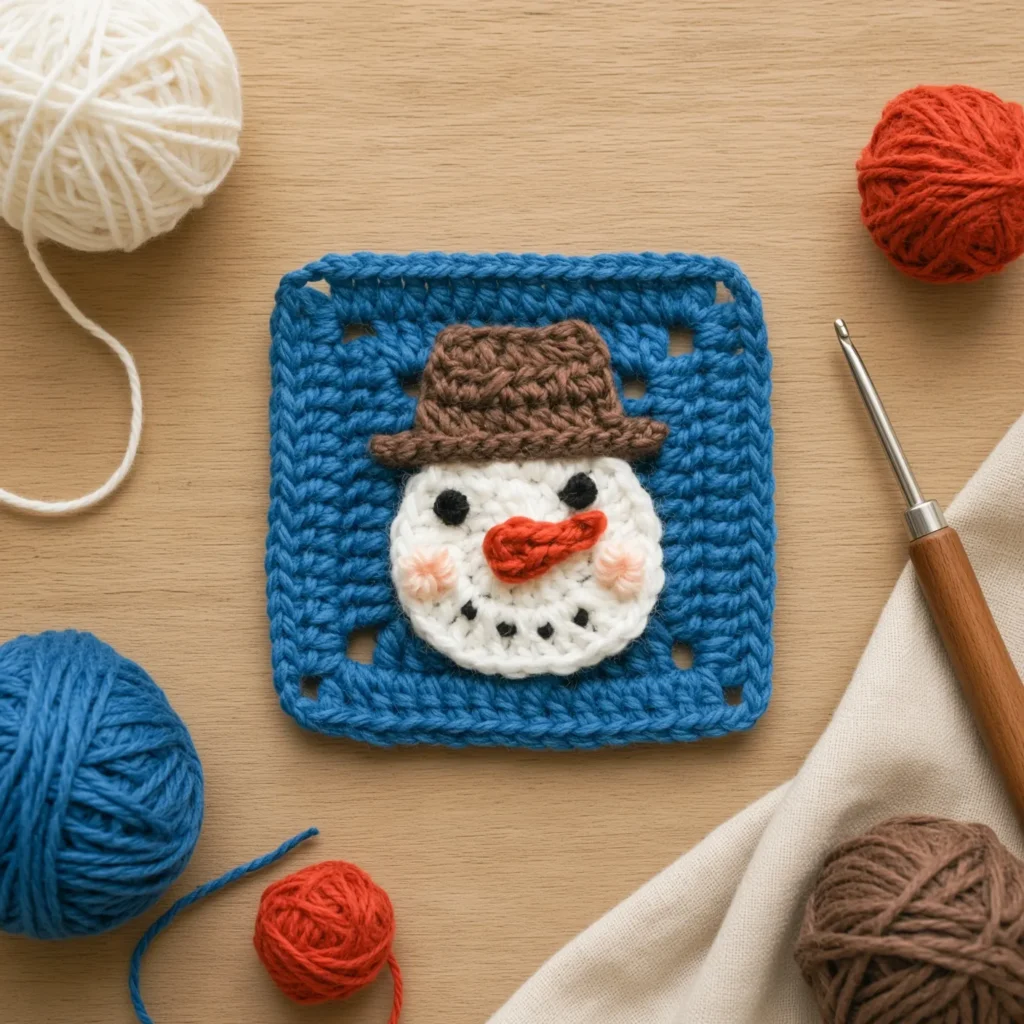
There is nothing quite as cheerful as a frosty-faced snowman to get you into the holiday crafting spirit! This adorable snowman granny square features a plump little face, a classic top hat, and a cute carrot nose, all centered beautifully inside a traditional granny square background.
This pattern is a fantastic project for intermediate crocheters who want to practice colorwork, appliqué making, and fun finishing details like French knots. Whether you are stitching up a cozy winter afghan, a festive holiday pillow, or a set of charming winter coasters, this little snowman is guaranteed to bring a smile to your face.
This pattern uses USA crochet terminology.
Watch the full step-by-step video tutorial here:
Materials Needed
- Yarn of your choice (6 colors; sample is made with DK/sport wool yarn)
- Crochet hook (3.00mm hook used in sample)
- Darning needle
- Scissors
Pattern Instructions
Snowman Face
Round 1: Magic loop, ch3 as a standing st(count as 1dc), 15dc, slst to the top of the first ch3.
Round 2: ch3 as a standing st(count as 1dc), 1dc in the same st to form a dc inc; dc inc in remaining sts, slst to the top of the first ch3. Fasten off.
Snowman Hat
Row 1: ch14, return, sk1, work slst in the BL of the remaining 13 chains.
Row 2: Turn over. Ch1 as a standing st, sk this st, 2slst, ch2, 8hdc.
Row 3: Turn over. Ch2 as a standing st, 1hdc in the same st, 1hdc, hdc2tog, 1hdc, hdc2tog, 2hdc.
Row 4: Turn over. Ch2 as a standing st, 1hdc in the same st, hdc2tog, 1hdc, hdc2tog, 1hdc, ch2, slst to the top of the next ch2. Fasten off.
Snowman Nose
Magic loop, ch4, return, sk1 and BLO: 2slst, 1sc. 3sc in the magic loop. 2slst on the ch4. Pull the tail tightly and fasten off. Leave long tails for attaching.
Granny Square Background
Round 1: magic loop, ch3(count as 1dc), 3dc+ch3; [4dc+ch3] repeat 3 times, omit the final ch3, work ch1+1hdc to join the top of the first ch3.
Round 2-3: ch3 to begin (count as 1dc), 1dc in the same corner. Work 1dc in each st around, (2dc+ch3+2dc) in each corner as you go. When you reach the end of the round and return to the starting corner, 2dc into the starting corner, join the round with ch1, 1hdc into the top of the beginning ch3.
For Round 4: Work as above for sides and corners. When you return to the starting corner, work 2dc+ch3, then slst to the top of the first true dc. Fasten off.

Assembly
Sew the face and hat onto the granny square. Attach the nose to the center of the face. Embroider the facial features: stitch the teeth and make two French knots for the eyes and two loose for the blushes.
Tips
- Yarn Weight: The sample uses a delicate DK/sport weight yarn with a 3.00mm hook to create a beautifully detailed, flat-lying square. If you want a larger, chunkier square for a quicker project, simply upgrade to a worsted weight yarn and a 4.5mm or 5.0mm hook.
- Weaving Ends: Because the snowman’s face, hat, and nose are made separately and sewn on, you will have quite a few yarn tails. Weave them in securely as you go so you don’t have a massive pile of ends to tackle at the very end!
- If you are building a holiday blanket, the Christmas Star Granny Square Pattern is a beautiful, classic pairing. For more festive motifs, you’ll also love the 3D Christmas Tree Granny Square Pattern and the highly textured Rustic Star Granny Square Pattern.
FAQ
Why do I need to leave long tails for the nose? Leaving long tails when you finish the carrot nose gives you built-in sewing yarn! This eliminates the need to attach a separate piece of yarn to sew the nose onto the snowman’s face, making the assembly process much cleaner and more secure.
How do I make the French knots for the eyes? To make a French knot, bring your threaded needle up through the fabric where you want the eye. Wrap the yarn around your needle 2 or 3 times, then insert the tip of the needle right next to where you initially brought it up (not back into the exact same hole). Gently pull the wrapped yarn down the needle until it sits snugly against the fabric, then pull the needle all the way through to the back.
Conclusion
Congratulations on completing your adorable snowman granny square! This festive winter motif makes a perfect addition to any holiday blanket or cozy decor. Share your finished square in the comments below!
