
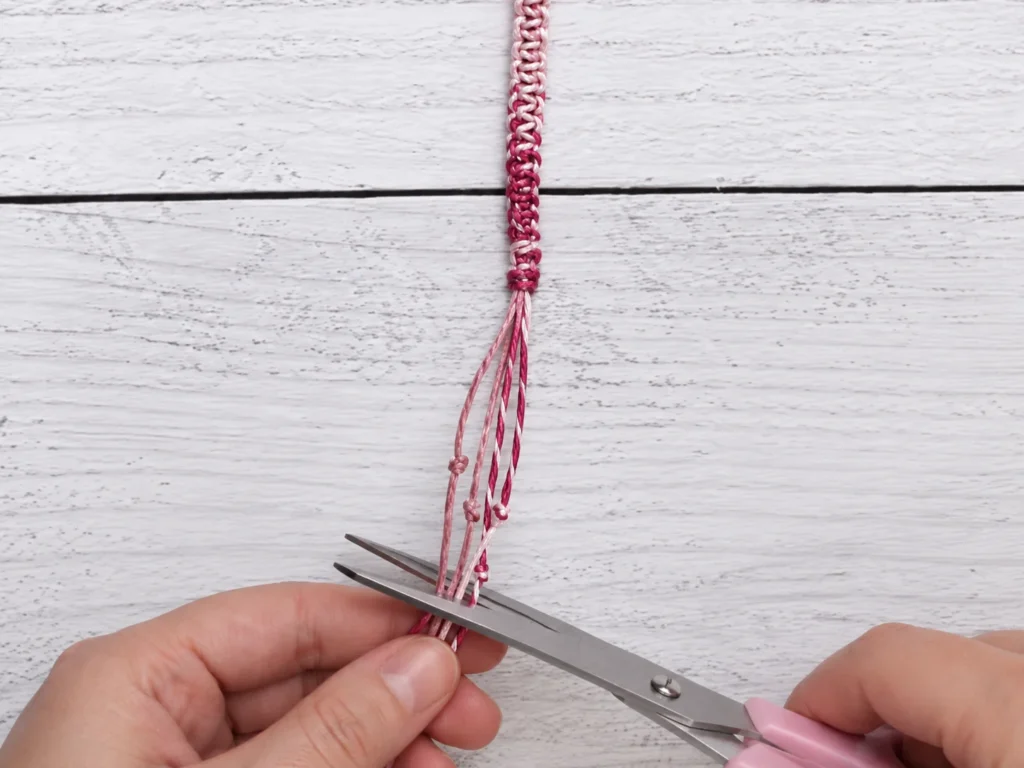
Looking for a quick handmade jewelry project? This easy hemp bracelet is a simple beginner-friendly design made with just four cords and a repeating square knot.
The original project uses two different 1 mm hemp cords: a metallic variegated hemp cord for the outside working strands and a light pink solid hemp cord for the two center strands. The contrast makes the square knot pattern easy to see and gives the finished bracelet a colorful handmade look.
Once the cords are measured and secured, the bracelet is built by repeating the same square-knot sequence until you reach the end of the center cords.
Why You’ll Love This Hemp Bracelet
This project is a good choice if you want a bracelet that is:
- quick to make
- beginner-friendly
- inexpensive
- easy to customize with different cord colors
- based on one repeating square knot
- suitable for handmade gifts or friendship bracelets
The knotting technique is repetitive, so after the first few knots, the process becomes much easier to remember.
Materials for the Hemp Bracelet
You will need:
Hemp Cord
- 2 pieces of #20 Magical Hemp Cord, 50 inches long each
- 2 pieces of #20 solid-color hemp cord, 20 inches long each
The original tutorial uses:
- 1 mm metallic variegated hemp cord in a “Fairy” color
- 1 mm light pink hemp cord
You can keep the same color combination or substitute other hemp cord colors.
You Will Also Need
- scissors
- ruler
- tape
- flat work surface
How to Make a Hemp Bracelet
Step 1: Tie the Cords Together

Gather all four cords together.
Tie them with an overhand knot near one end.
Leave a tail of approximately 6 inches above the knot.
Pull the knot firmly so all four cords are secured together.
This extra tail will be used later when finishing the bracelet.
Step 2: Secure the Cords
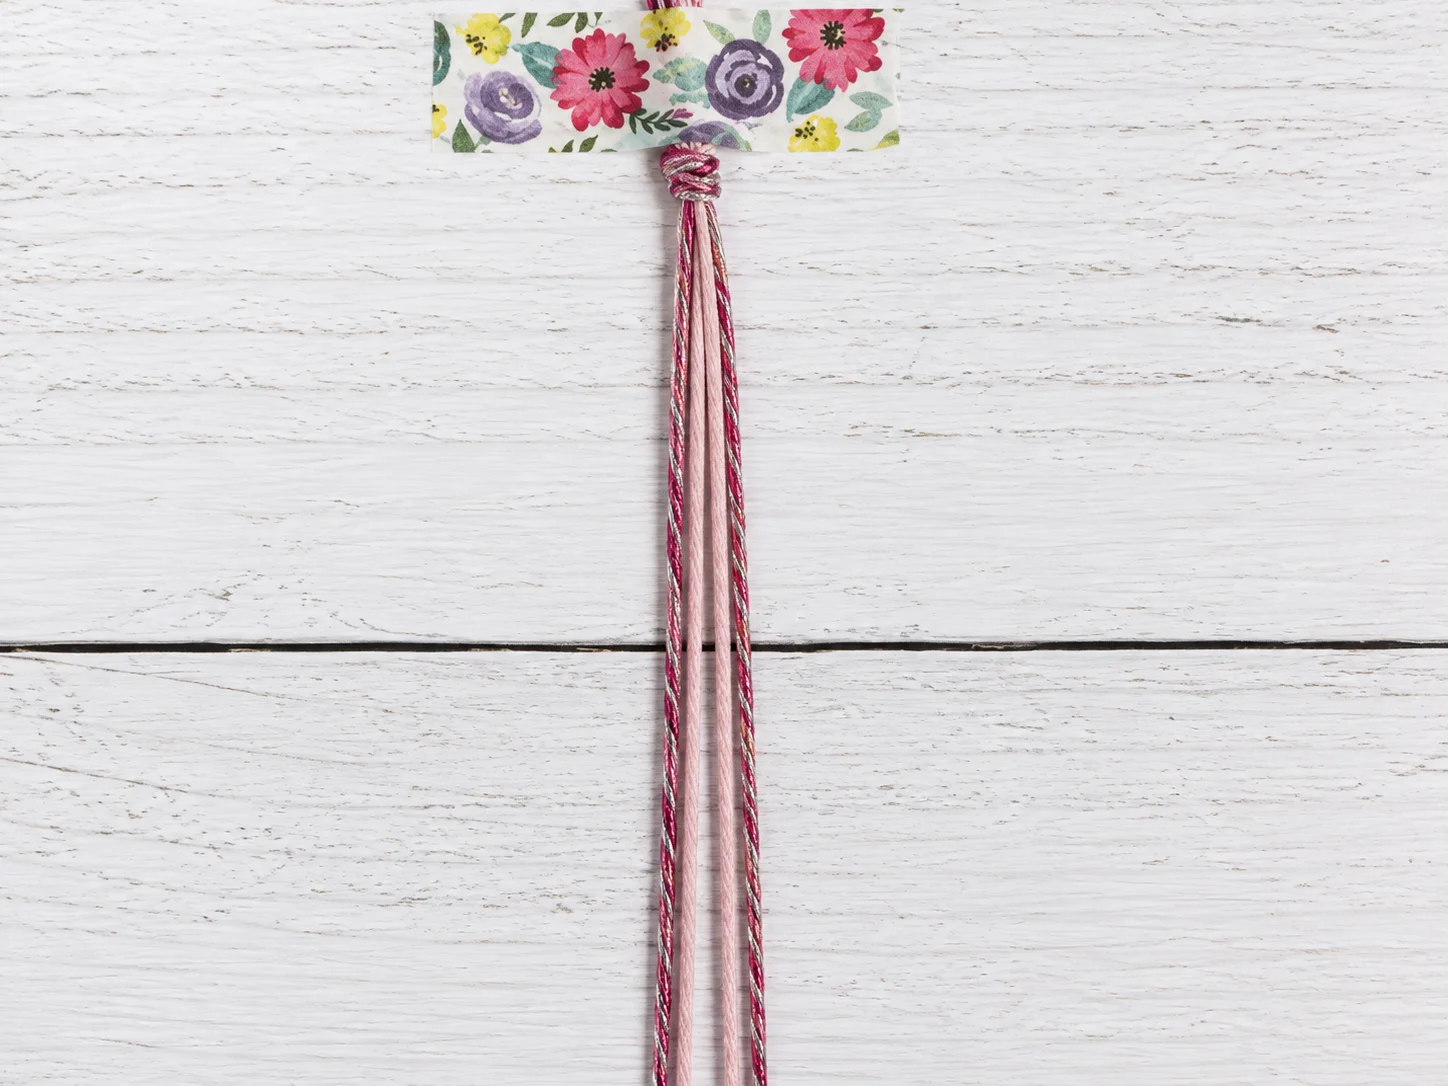
Place the knotted end on a flat work surface.
Use a piece of tape to hold the loose ends in place.
Keeping the top secured will make it much easier to keep even tension while knotting.
Step 3: Arrange the Cords
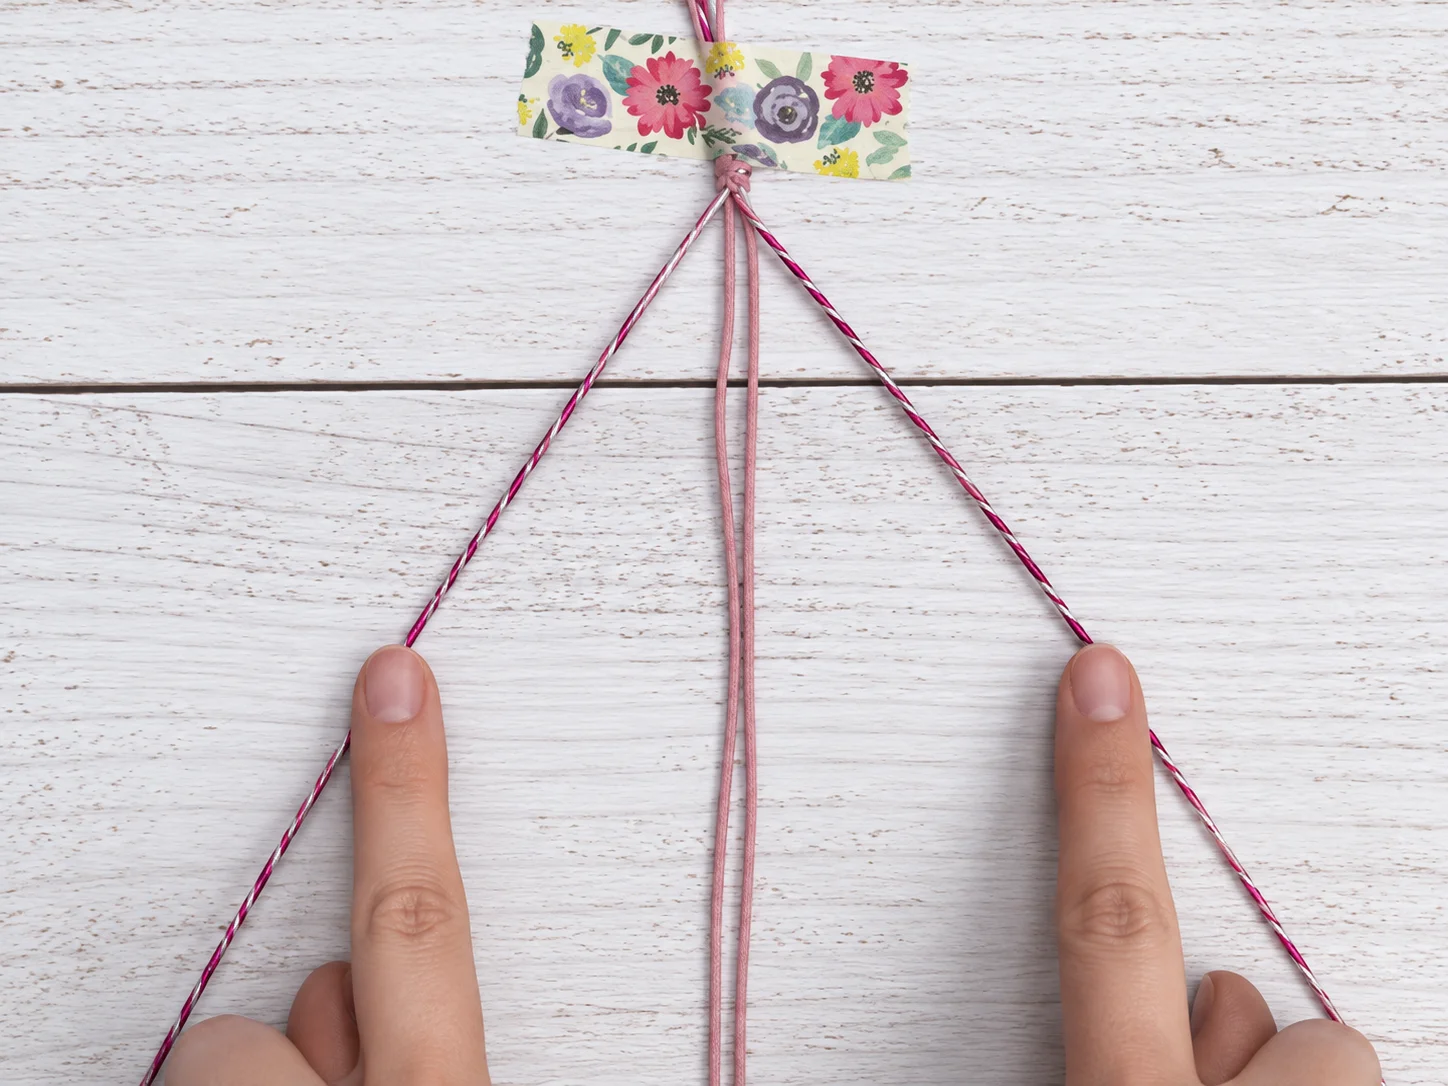
Separate the four strands.
Place the two shorter solid-color cords in the middle.
Place the two longer metallic cords on the outside.
Your setup should look like this:
long working cord — short center cord — short center cord — long working cord
The two outer cords will form the knots around the two center cords.
Making the First Half of the Square Knot
Step 4: Cross the Right Cord Over the Center
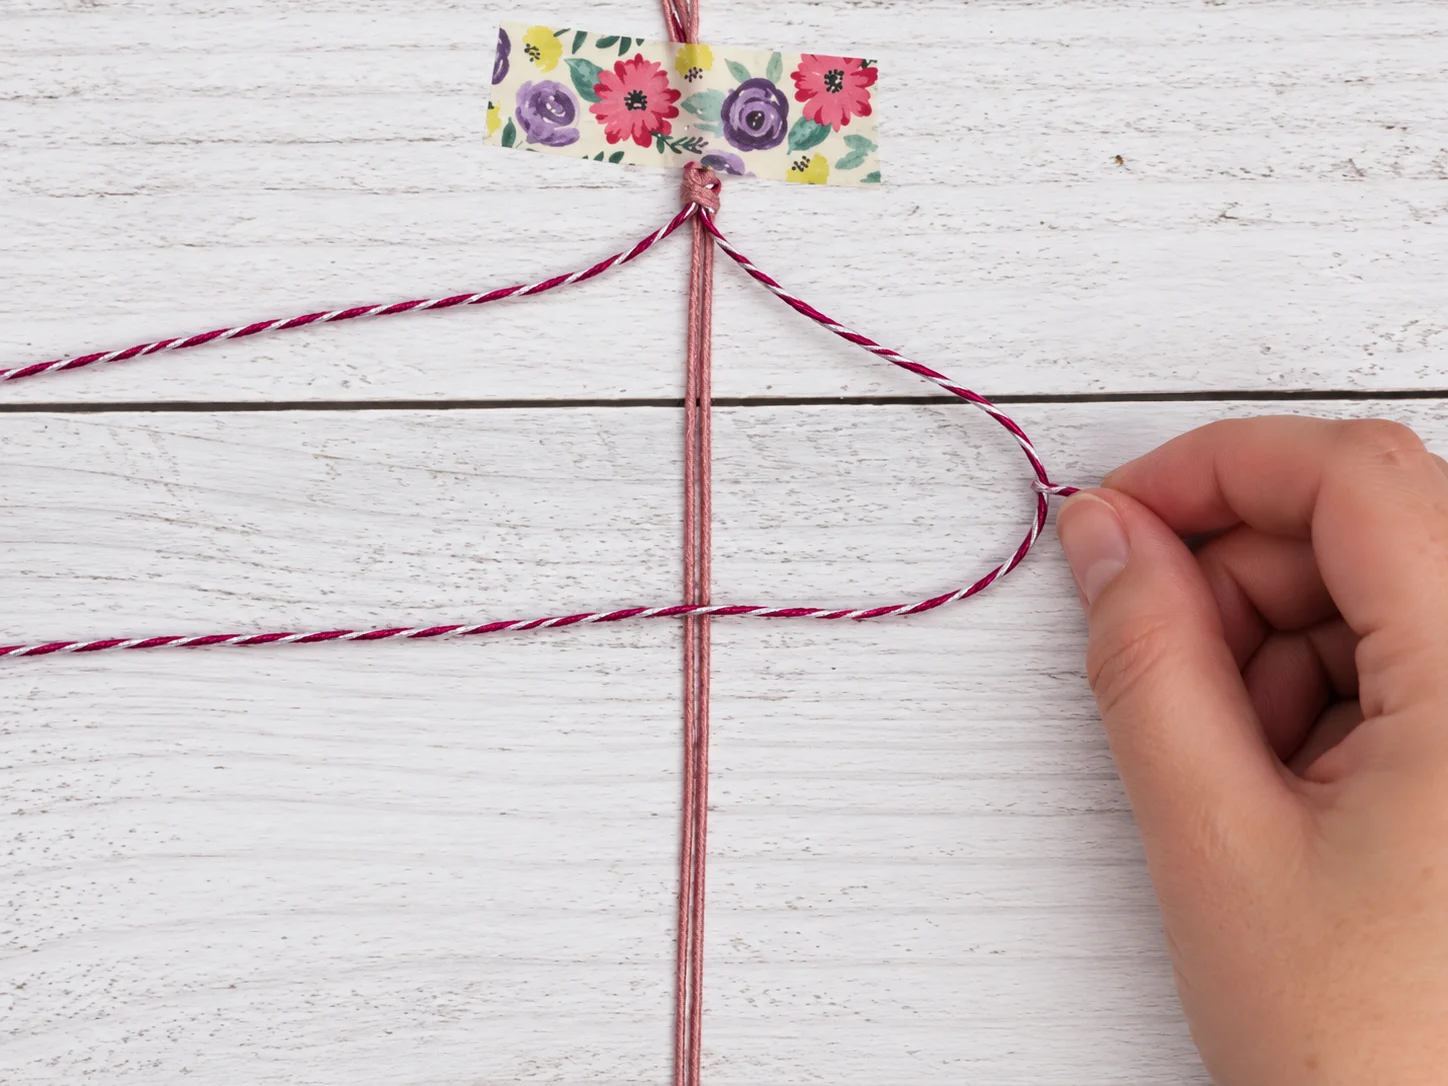
Take the cord on the far right.
Bring it across the two center cords.
This creates a loop on the right side.
Keep the center cords together and straight.
Step 5: Bring the Left Cord Through the Loop
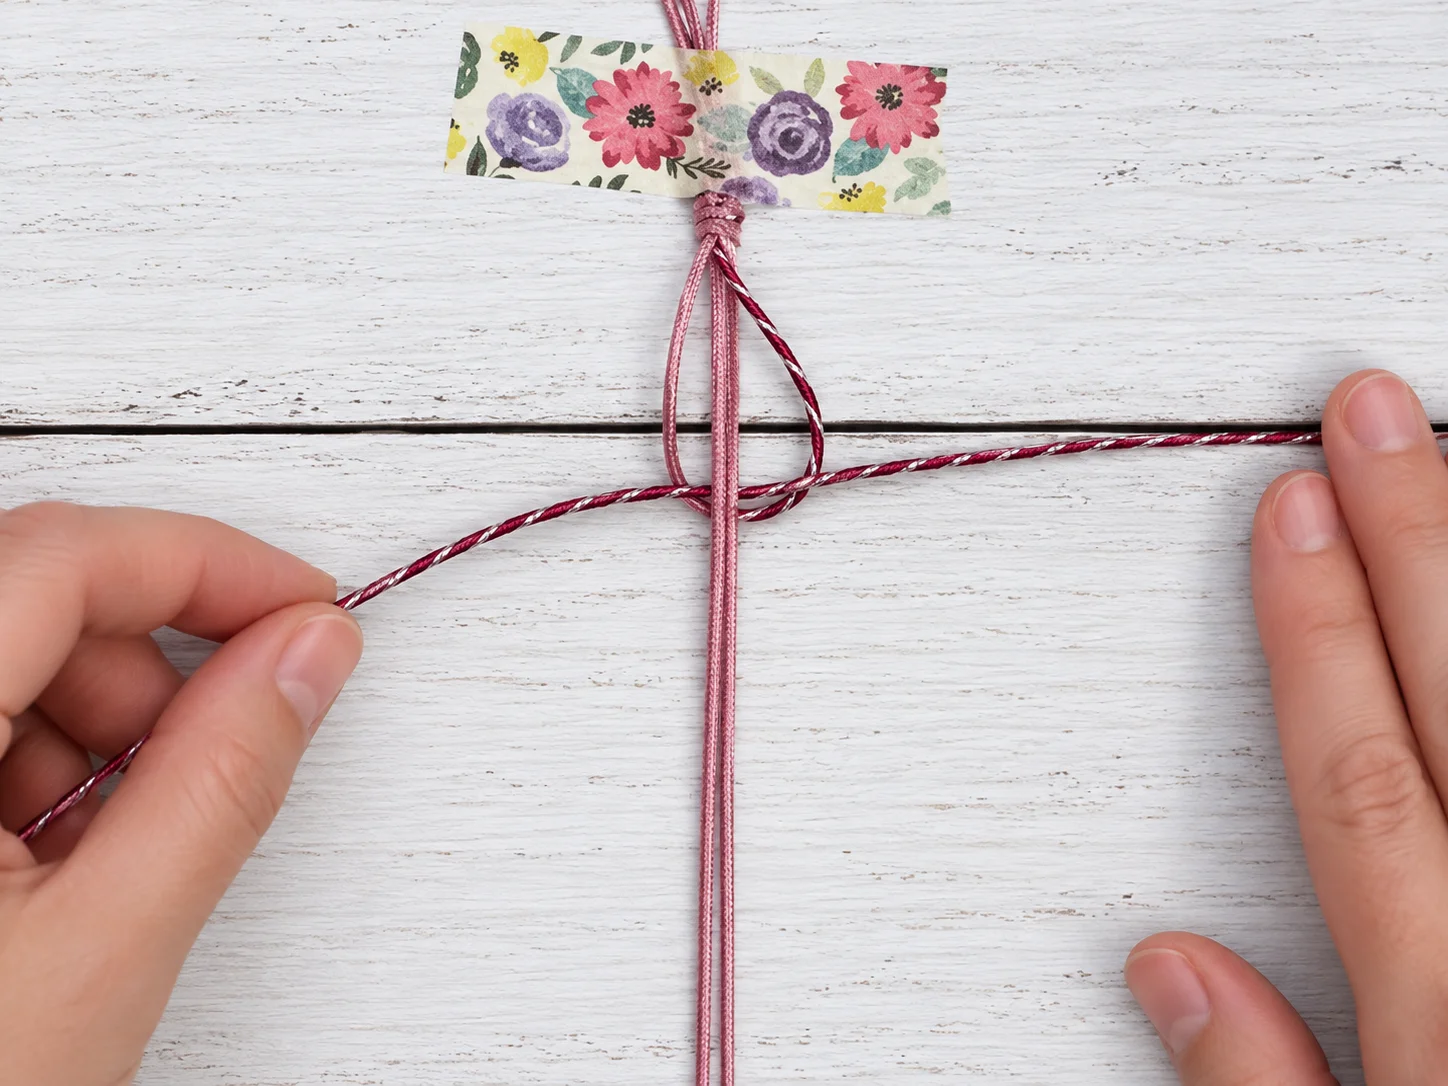
Take the cord on the far left.
Pass it:
- behind the two middle cords
- toward the right side
- up through the loop you created on the right
You should now have the first half of the square knot ready to tighten.
Step 6: Tighten the Knot
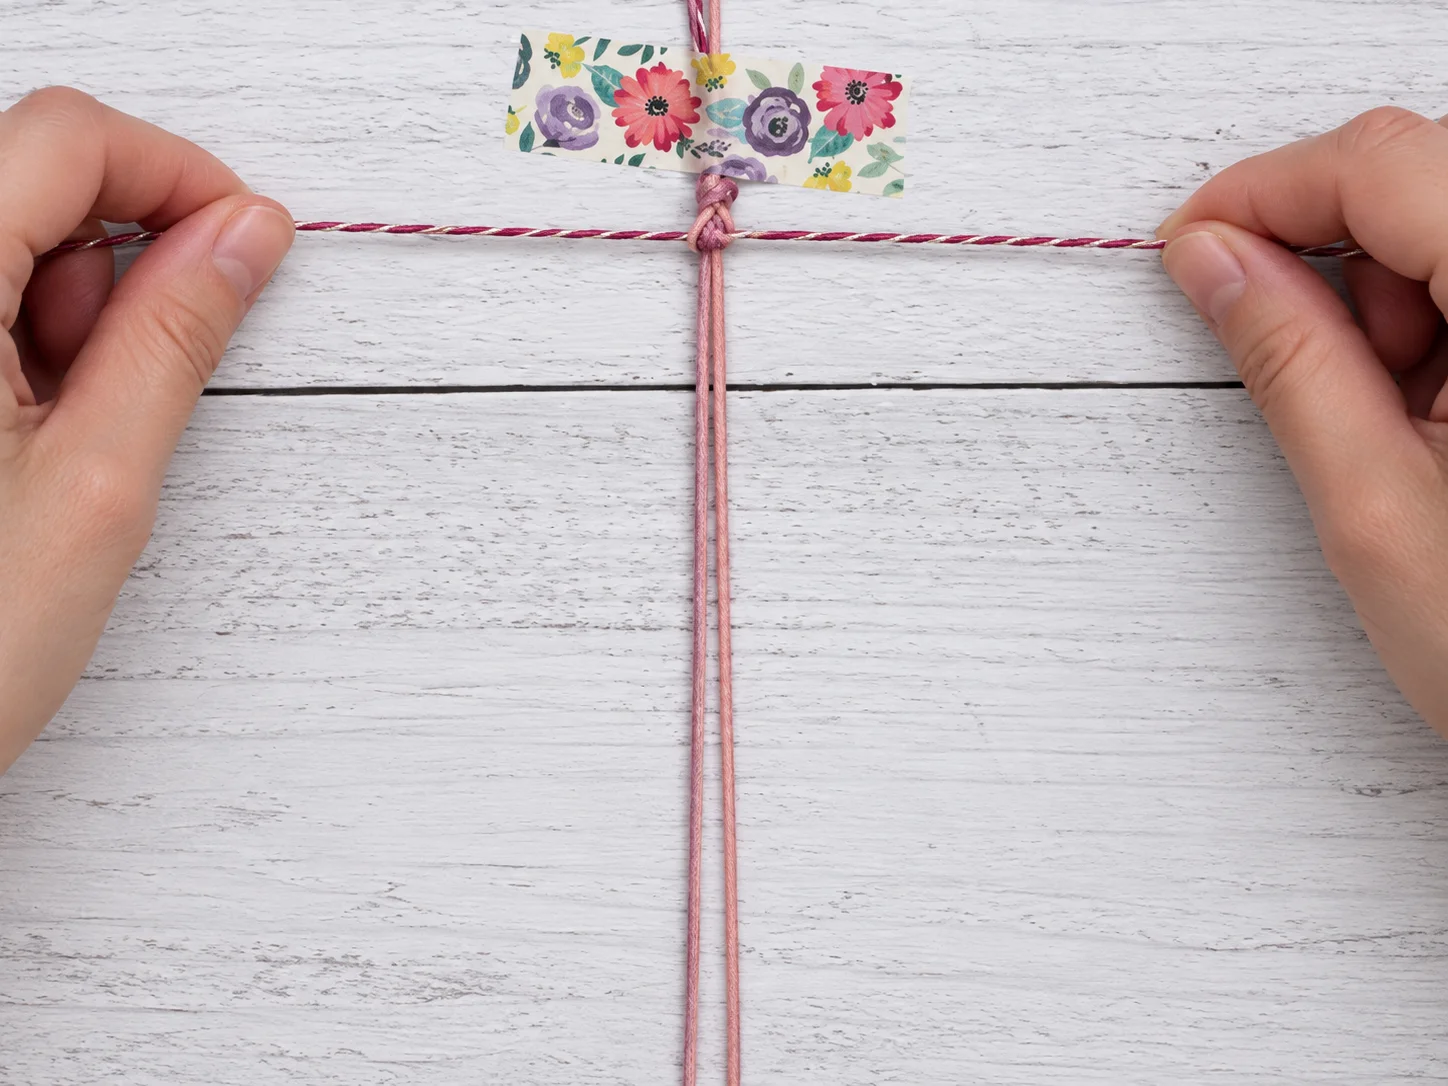
Pull the two outer working cords gently in opposite directions.
Slide the knot upward until it sits neatly beneath the starting knot.
Do not pull so hard that the center cords become distorted.
Try to keep the tension even.
Completing the Square Knot
Step 7: Repeat From the Left Side
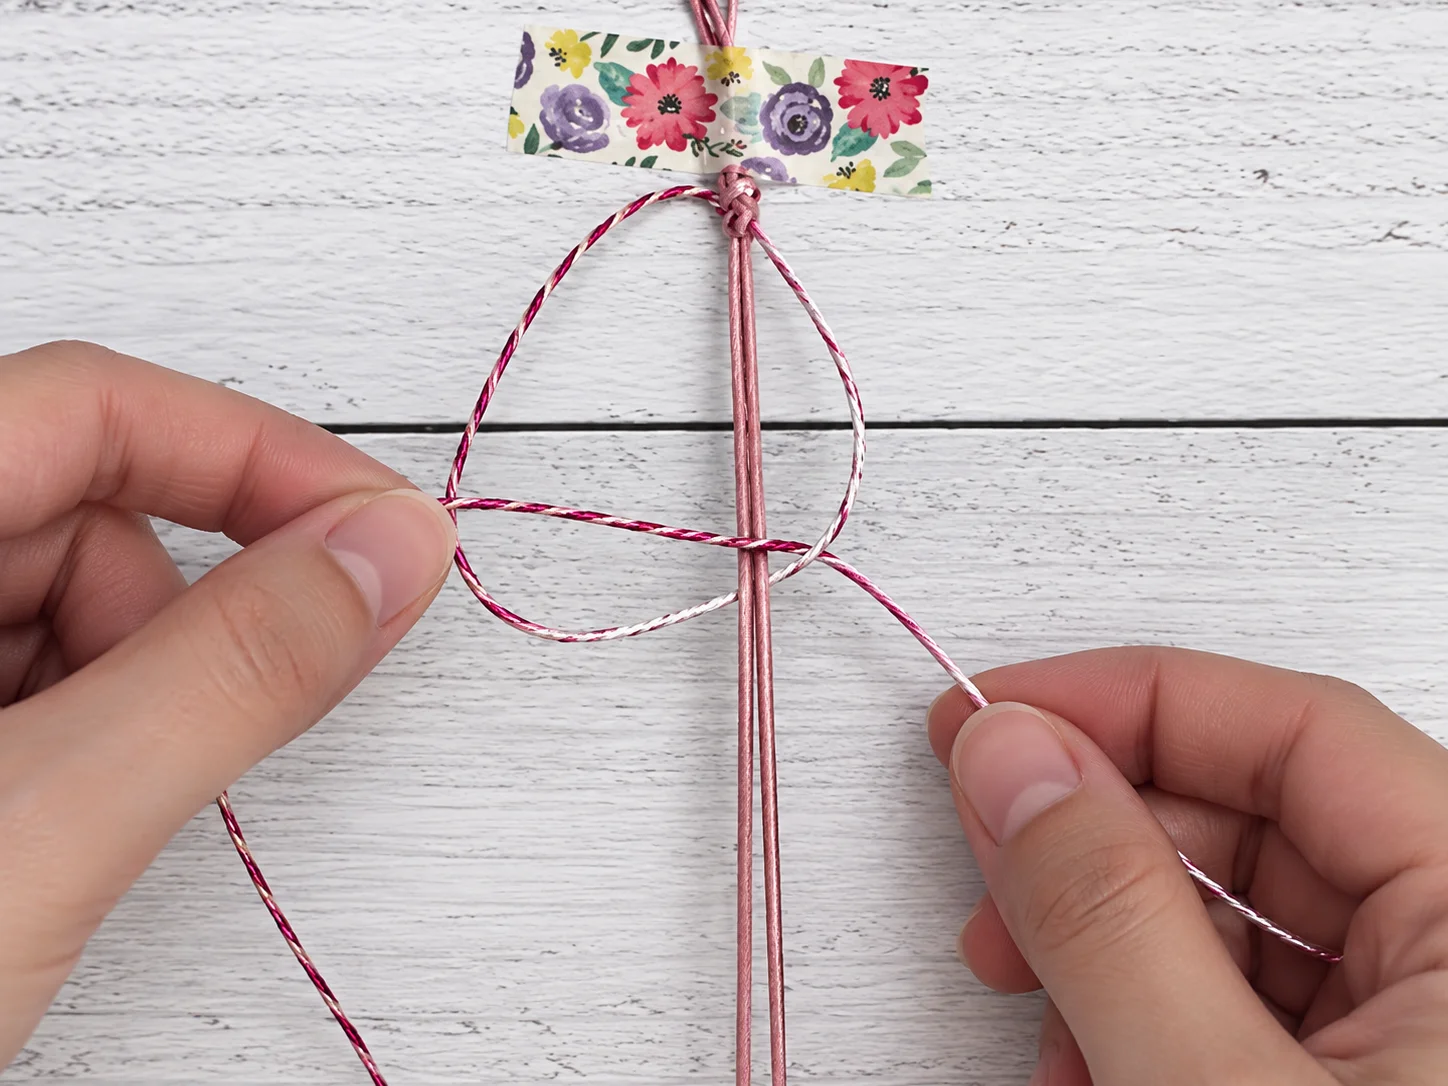
Now repeat the same process in the opposite direction.
Take the left cord and cross it over the two center cords.
This creates a loop on the left side.
Next, take the right cord.
Bring it:
- over the left working cord
- behind the two middle cords
- up through the loop on the left
You have now formed the second half of the square knot.
Step 8: Tighten Again
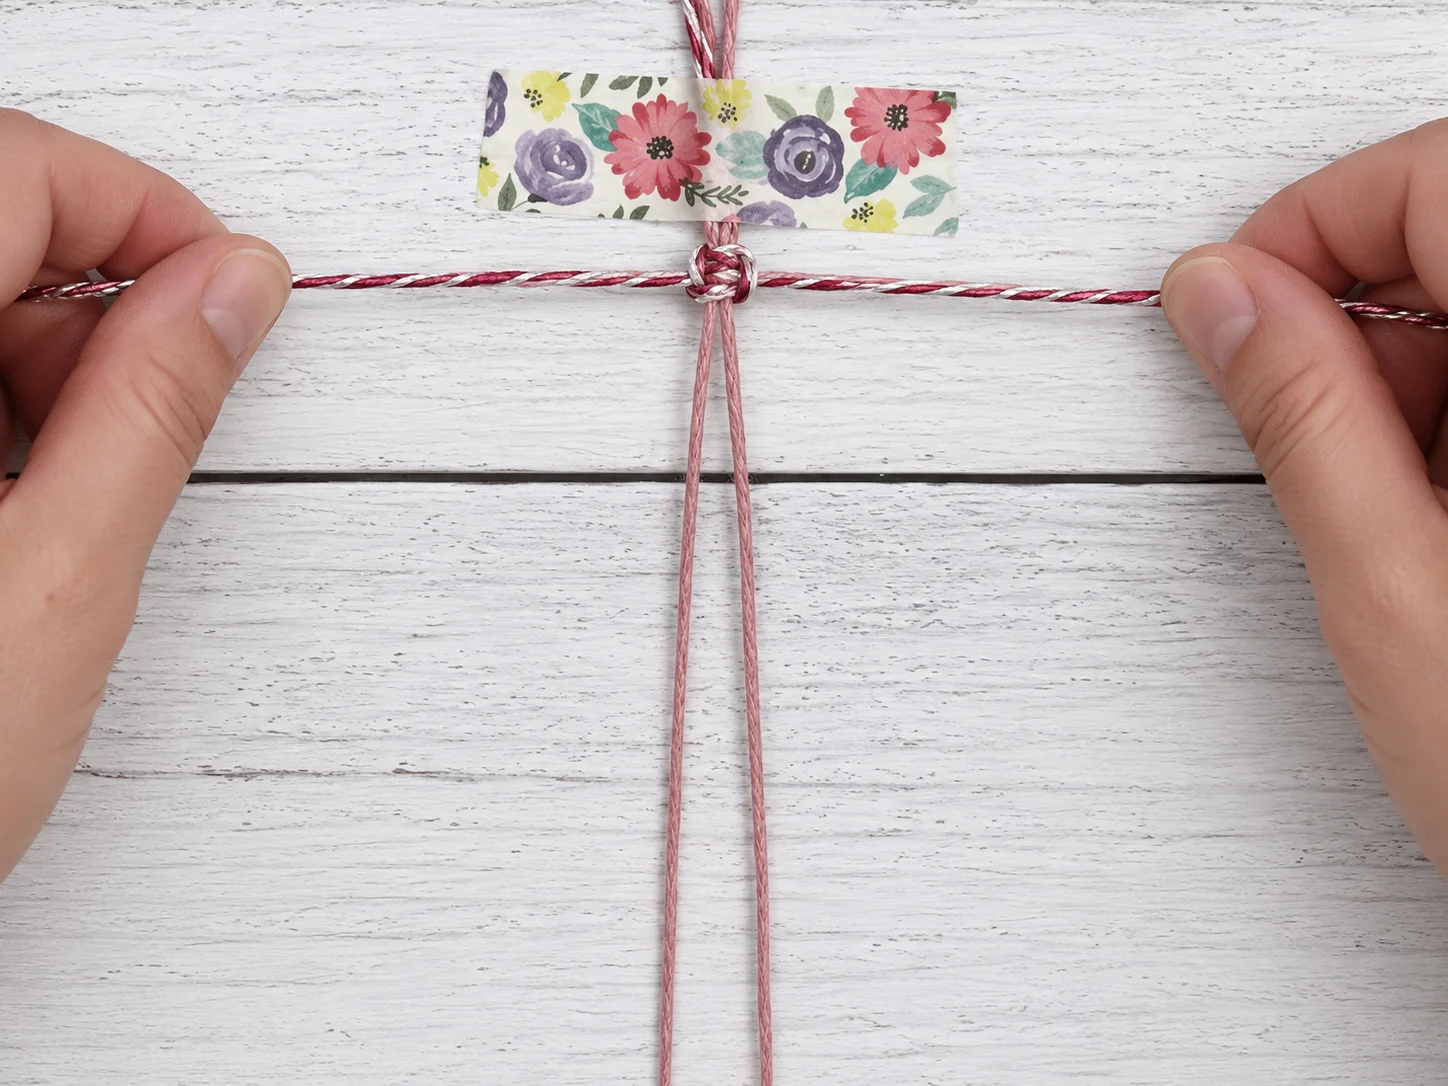
Pull the two outer cords evenly.
Slide the knot upward.
You have now completed one full square knot.
The knot should sit flat around the two center cords.
Step 9: Continue the Square Knot Pattern
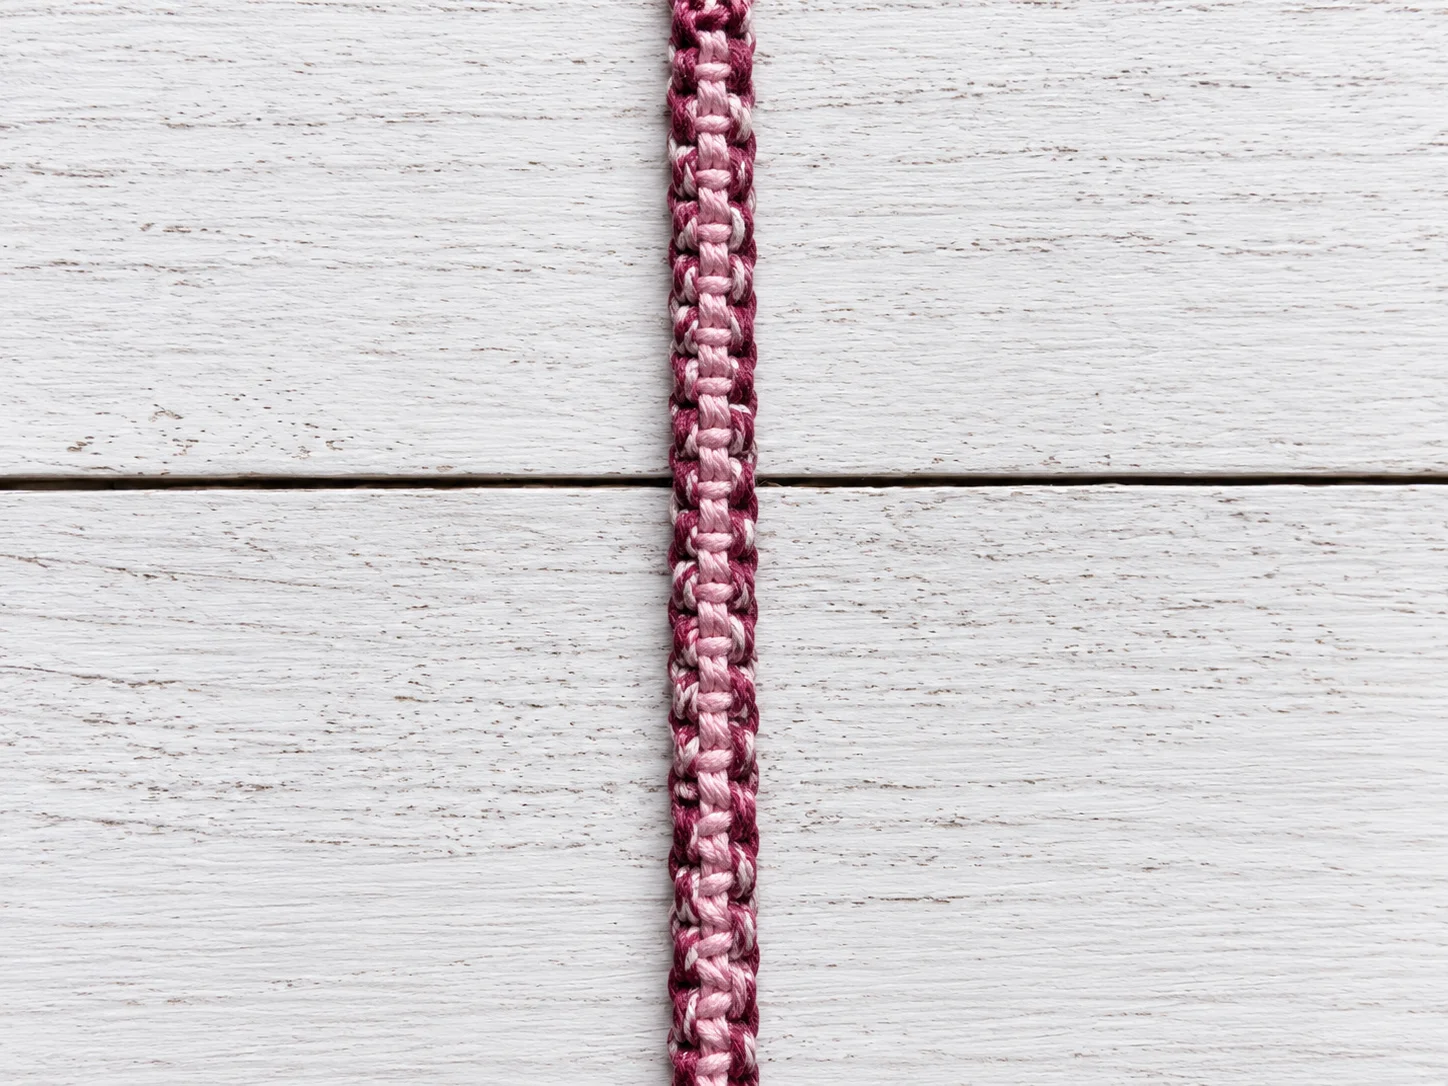
Repeat Steps 4 through 8.
Continue working down the bracelet using the same sequence:
Right side → tighten → left side → tighten
Each pair of half-knots creates one complete square knot.
Keep repeating until you reach the end of the two center cords.
Try to keep your knots similar in size so the bracelet looks neat and even.
Step 10: Tie the End of the Bracelet
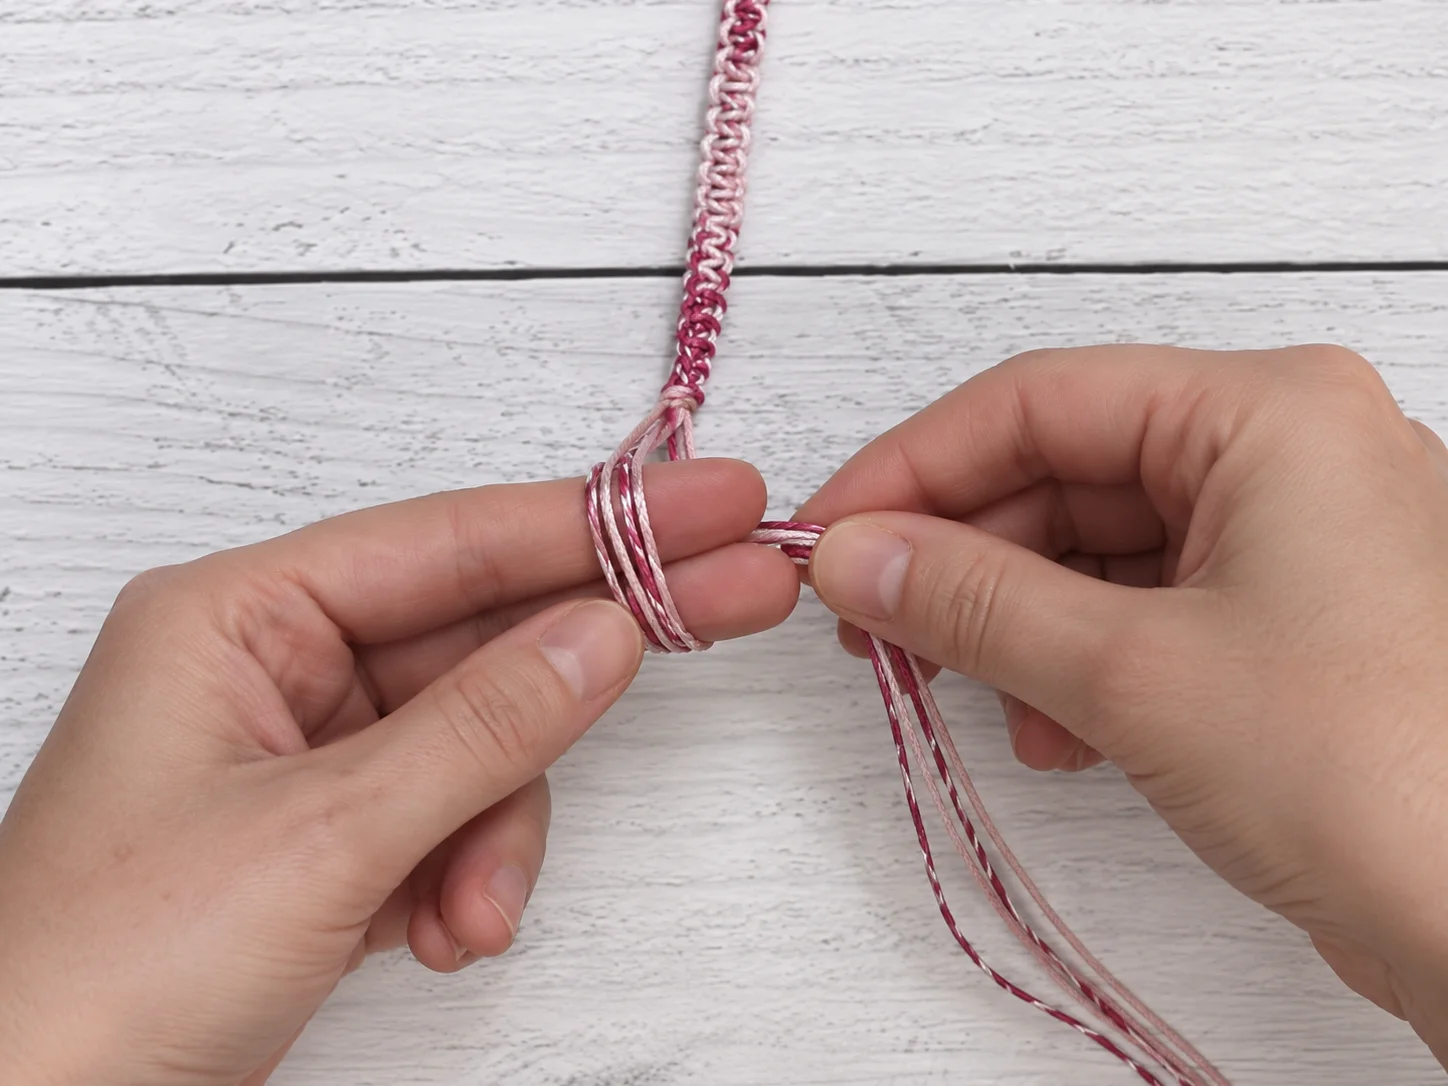
Once the knotted section is finished, gather all four cords together.
Tie another overhand knot at the end of the bracelet.
Next, bring all four cords around two fingers to form a loop.
This loop will help create the final finishing knot.
Step 11: Pass the Ends Through the Loop
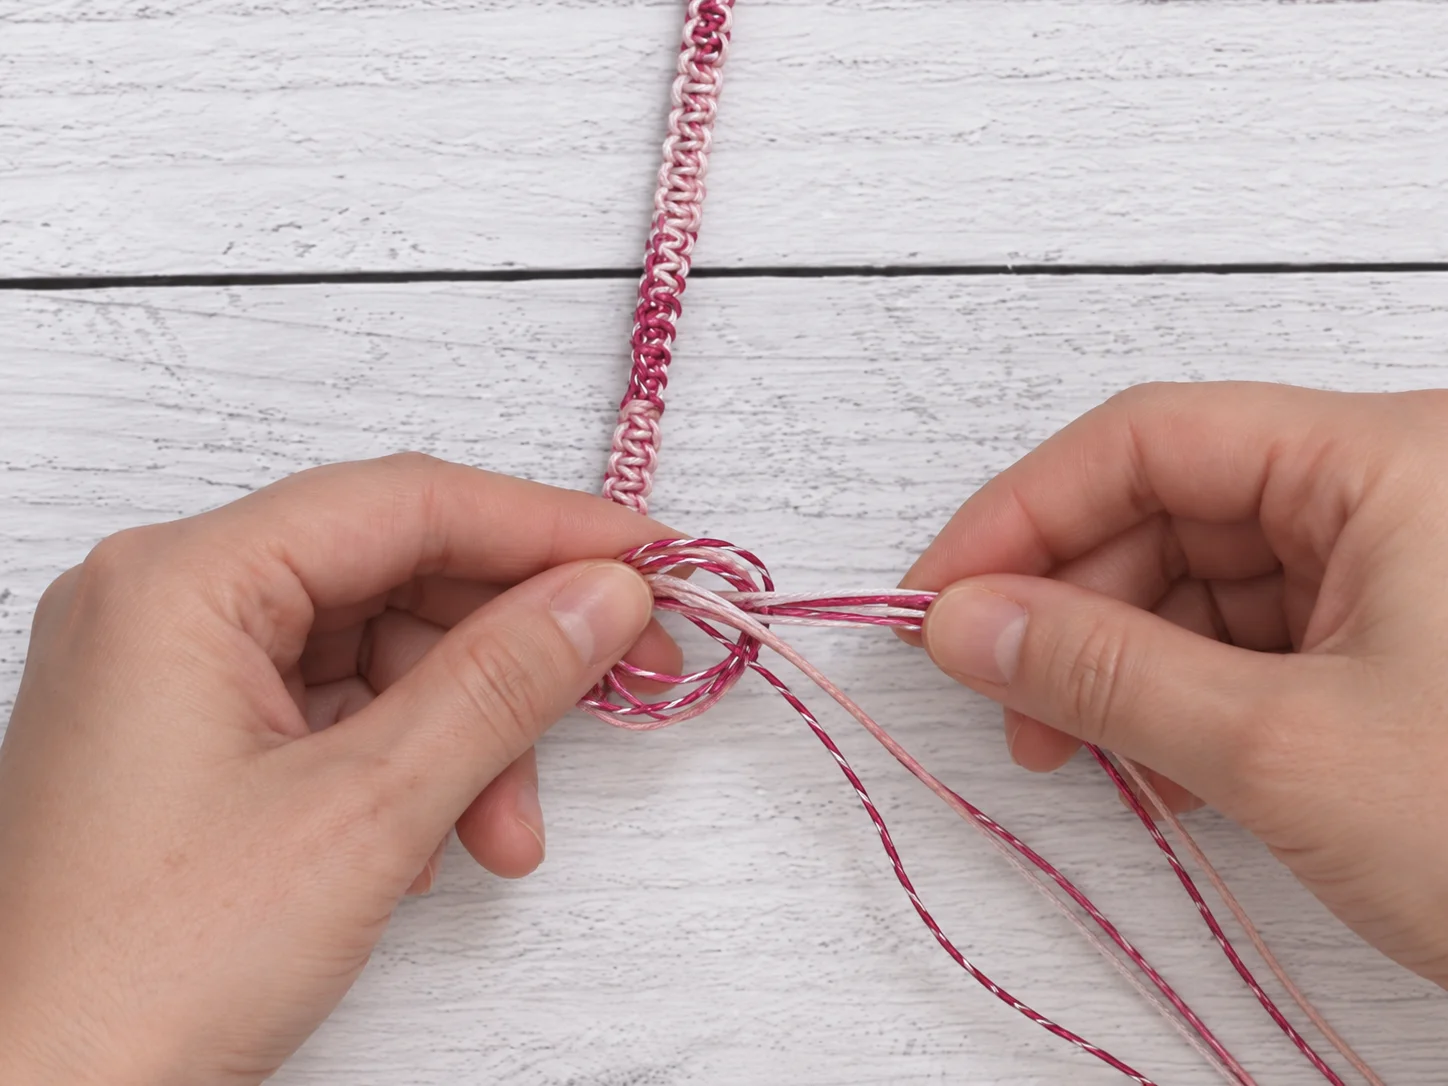
Take the loose cord ends.
Bring them around and pass them through the loop you created.
Keep all four cords together while doing this.
Step 12: Tighten the Finishing Knot
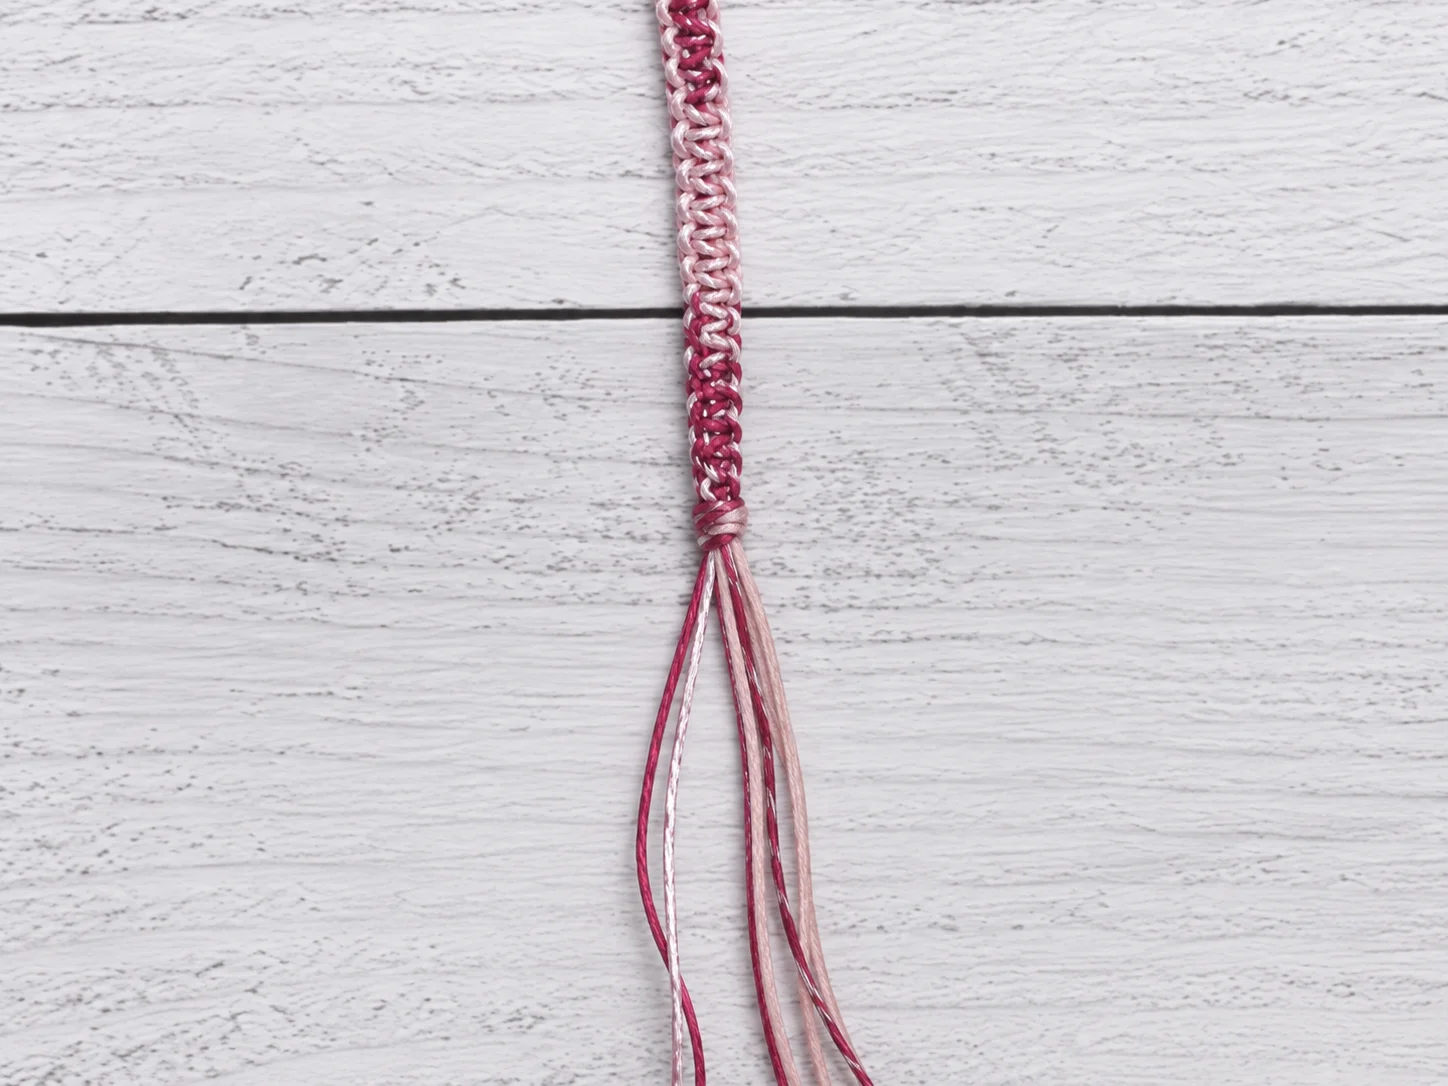
Pull the ends firmly.
The knot should tighten securely at the end of the bracelet.
Check that it feels stable before trimming anything.
Step 13: Finish and Trim the Ends
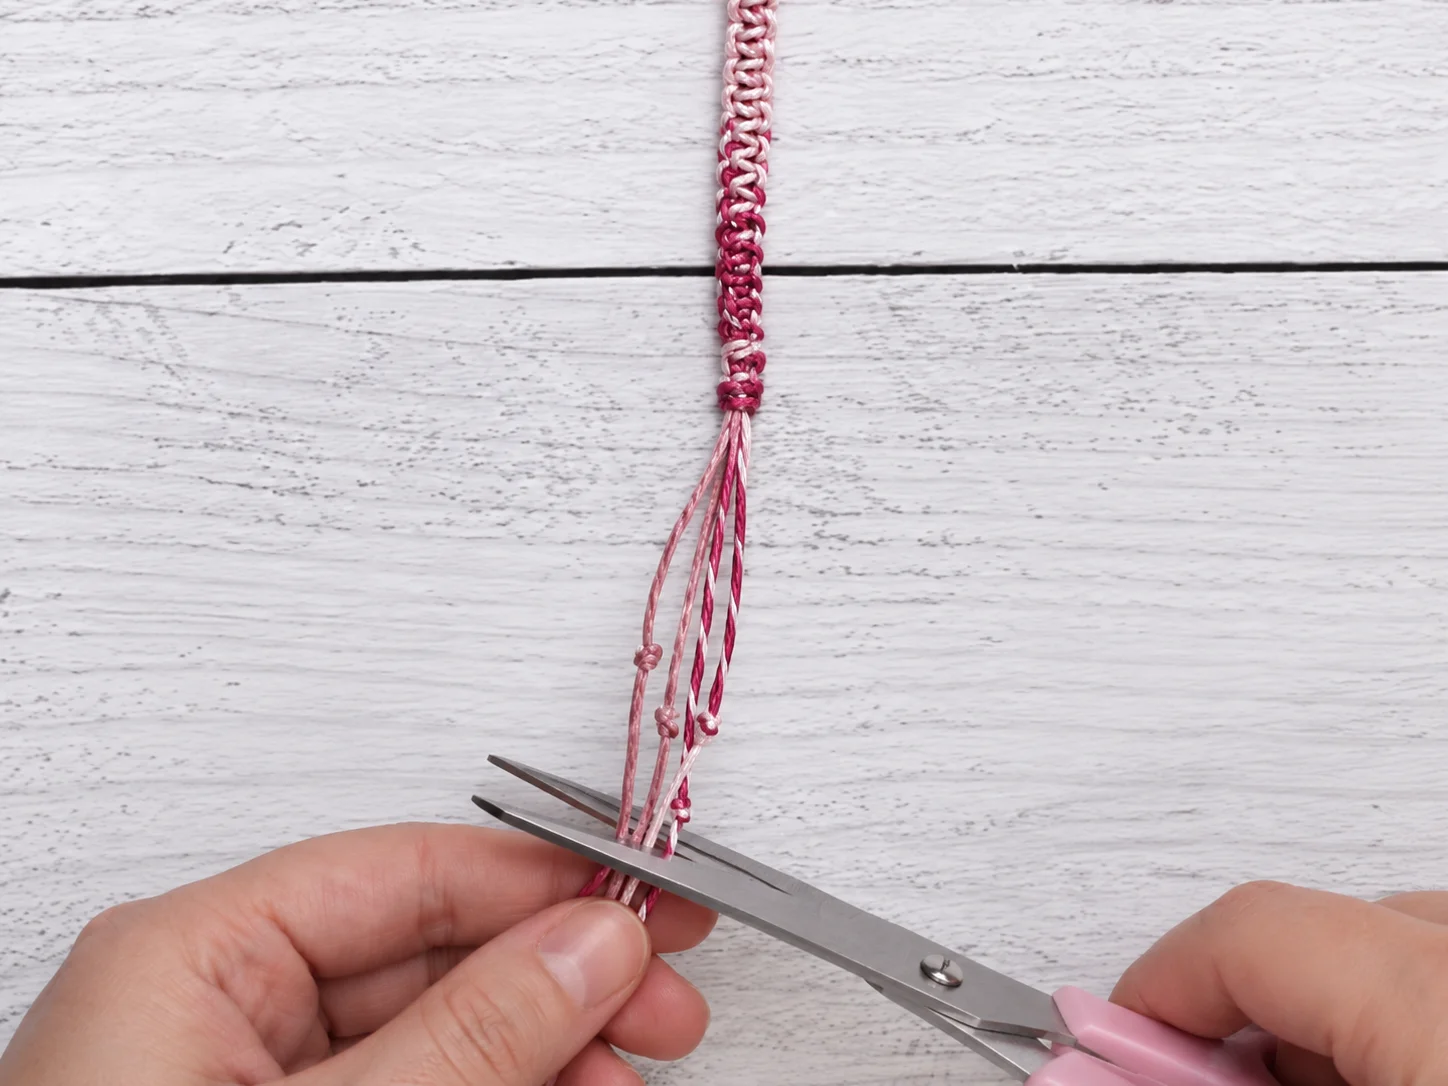
Decide how long you want the loose ends to be.
The original tutorial leaves them about 4 inches long.
Tie the groups of cords with small overhand knots near the ends to help prevent unraveling.
Then trim away any excess cord with scissors.
Your hemp bracelet is now finished.
How the Square Knot Works
The square knot is made from two mirrored half-knots.
First Half
Start from the right.
The right working cord crosses over the center cords.
The left cord moves behind the center cords and comes up through the right-side loop.
Second Half
Start from the left.
The left working cord crosses over the center cords.
The right cord moves behind the center cords and comes up through the left-side loop.
Together, these two movements create one complete square knot.
A simple way to remember it is:
Right side + Left side = 1 square knot
Tips for a Neat Hemp Bracelet
Keep the Center Cords Straight
The two center cords act as the foundation of the bracelet.
Try not to let them twist around the outer working strands.
Use Even Tension
Pull each knot with similar pressure.
If one knot is very tight and the next is loose, the bracelet may look uneven.
Keep the Work Taped Down
If the bracelet moves every time you pull a knot, replace the tape or use a heavier object to secure the top.
A stable work area makes the knotting much easier.
Do Not Cut the Cords Too Short
The outside cords use much more material than the center cords.
That is why the tutorial uses:
- 50-inch outside cords
- 20-inch center cords
Starting with extra cord is better than running out before the bracelet is finished.
Hemp Bracelet Color Ideas
The original bracelet uses metallic variegated cord with light pink center cords.
You can also try:
- black and cream
- natural hemp and brown
- pink and white
- blue and silver
- green and beige
- purple and gray
- rainbow variegated cord with a neutral center
- metallic gold with black
Using contrasting colors makes the knot pattern more visible.
Can You Use Other Cord for This Bracelet?
This tutorial is specifically designed around 1 mm hemp cord, but the same basic square-knot method can be adapted to other suitable knotting cords.
If you change the cord thickness, the finished bracelet may look different and you may need more or less cord.
For your first version, using cord close to the original 1 mm size will make the instructions easier to follow.
How Long Does It Take to Make a Hemp Bracelet?
The original project is presented as a 10-minute hemp bracelet.
Actual time can vary depending on your experience and how quickly you tie the knots.
Beginners may take longer while learning the square-knot sequence, especially during the first bracelet.
Frequently Asked Questions
Is this hemp bracelet good for beginners?
Yes. The bracelet uses a repeating square knot, so once you learn the first full knot, the rest of the bracelet follows the same pattern.
What size hemp cord should I use?
The supplied tutorial uses #20, 1 mm hemp cord.
How many cords do I need?
You need four pieces:
- two 50-inch working cords
- two 20-inch center cords
Why are the outside cords longer?
The outside cords make the square knots, so they use much more material than the two center cords.
How long should I leave the starting tail?
Leave approximately 6 inches when tying the first overhand knot.
How long should the finished ends be?
The original version leaves about 4 inches at the ends before tying small securing knots and trimming the excess.
Can I make the bracelet with one color?
Yes. You can use the same hemp cord color for all four strands.
Using two colors simply makes the square knot pattern easier to see.
Quick Hemp Bracelet Pattern Summary
For easy reference:
- Cut two 50-inch working cords.
- Cut two 20-inch center cords.
- Gather all four cords together.
- Tie an overhand knot, leaving a 6-inch tail.
- Tape the cords to your work surface.
- Place the two short cords in the center.
- Put the two long cords on the outside.
- Make the first half of the square knot from the right.
- Tighten.
- Make the second half from the left.
- Tighten.
- Repeat the square knots to the end.
- Tie an overhand knot.
- Create the finishing loop.
- Pull the loose ends through.
- Tighten.
- Leave about 4-inch ends.
- Tie small overhand knots and trim.
Make Your Own Easy Hemp Bracelet
This easy hemp bracelet is a simple way to practice square knots while creating a wearable handmade project.
With just four pieces of hemp cord, scissors, a ruler, and tape, you can create a colorful bracelet with a neat repeating knot pattern.
Once you understand the basic square knot, you can experiment with different hemp colors, metallic cords, bracelet sizes, and other macrame-style jewelry projects.
If you are working through a collection of bracelet tutorials, this is a useful beginner project to learn before moving on to more detailed macrame bracelet patterns.
