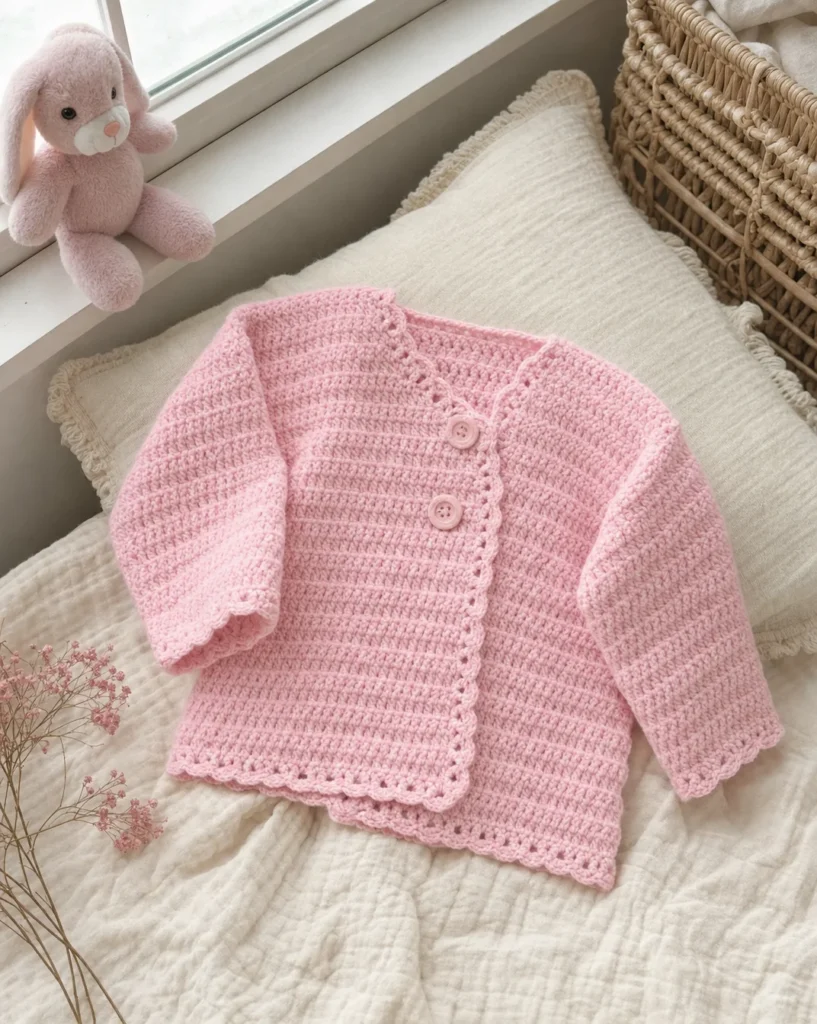
Crochet Baby Girl Sweater Pattern
Crocheting a baby girl sweater is a delightful project that not only keeps little ones warm but also makes for a perfect gift or keepsake. In this article, we will explore a detailed crochet pattern for a charming baby girl sweater, along with insights into the materials and instructions you will need to create your own version.

Materials Needed
Before you start crocheting, gather the following materials:
- Yarn:
- RED HEART® Super Saver®: 1 (1, 1, 2) skeins in color 724 Baby Pink.
- Crochet Hook:
- 5.5mm [US 9]
- Tools:
- Stitch marker
- Yarn needle
- Buttons:
- 2 buttons, each measuring 7/8”
Instructions
Sweater – Body (Worked in One Piece to Underarms)
Body:
- Chain 58 (62, 66, 70).
- Half double crochet (hdc) in the 3rd chain from the hook and in each chain across; mark this side as the RIGHT SIDE; turn — totaling 56 (60, 64, 68) hdc.
- Chain 2, hdc in each stitch across; turn.
- Continue working evenly until the piece measures 4½ (4½, 4½, 5¼)” from the beginning, ending with a wrong side row.
Right Front:
- Chain 2, hdc in the next 14 (15, 16, 17) stitches; turn.
- Work evenly on these stitches until the piece measures 7 (7½, 8, 9)” from the beginning, ending with a wrong side row.
- Chain 1, slip stitch in the next 4 stitches, chain 2, hdc to end; turn.
- Chain 2, hdc to the last 2 stitches, hdc2tog; turn.
- Chain 2, hdc to end; turn.
- Repeat the last 2 rows once more — 8 (9, 10, 11) stitches.
- Work evenly until the piece measures 9 (9½, 10, 11)” from the beginning.
- Fasten off.
Back:
- With the right side facing, rejoin yarn in the next body stitch; chain 2, hdc in the next 28 (30, 32, 34) stitches; turn.
- Work evenly on these stitches until the piece measures 9 (9½, 10, 11)” from the beginning.
- Fasten off.
Left Front:
- With the right side facing, rejoin yarn in the next body stitch; chain 2, hdc to end — 14 (15, 16, 17) stitches.
- Work evenly until the piece measures one row less than the Right Front for neck shaping.
- Chain 2, hdc to the last 4 stitches; turn.
- Chain 2, hdc2tog, hdc to end; turn.
- Chain 2, hdc to end; turn.
- Repeat the last 2 rows once more — 8 (9, 10, 11) stitches.
- Work evenly until the piece measures 9 (9½, 10, 11)” from the beginning.
- Fasten off.
Sleeves
- Chain 18 (19, 20, 22).
- Hdc in the 3rd chain from the hook and in each chain across; turn — totaling 16 (17, 18, 20) hdc.
- For Rows 1 and 2: Chain 2, hdc in each hdc across; turn.
- For Row 3 — increase row: Chain 2, 2 hdc in the first stitch, hdc in each hdc to the last stitch, 2 hdc in the last stitch; turn — totaling 18 (19, 20, 22) hdc.
- Continue to increase 1 stitch on each side every 2 (2, 2, 3) rows, 4 (5, 6, 6) more times — totaling 26 (29, 32, 34) stitches.
- Work evenly until the piece measures 6½ (7½, 8½, 12)” from the beginning.
- Fasten off.
Finishing
Assembly:
- Sew shoulder seams.
- Set in sleeves and sew sleeve seams.
Edging:
- With the right side facing, join yarn at the lower edge under the right underarm; working evenly along the lower edge,
- (sc in next 2 stitches, chain 3) to corner;
- Working evenly in a similar manner along the right front, neck and left front edges, skipping stitches under the chain-space where necessary to allow edging to lie flat,
- (2 sc, chain 3) to the lower left front edge;
- Working evenly along the remaining lower edge,
- (sc in next 2 stitches, chain 3) to beginning.
- Join with a slip stitch to the first sc.
- Fasten off.
- Sew buttons on the left front edge to correspond with the 2 loops on the right front.
Conclusion
This sweet crochet baby girl sweater pattern not only provides warmth and comfort but also creates an adorable fashion piece. Whether you are a beginner or an experienced crocheter, this pattern is a fulfilling project that can be customized with different colors and embellishments. Happy crocheting!