
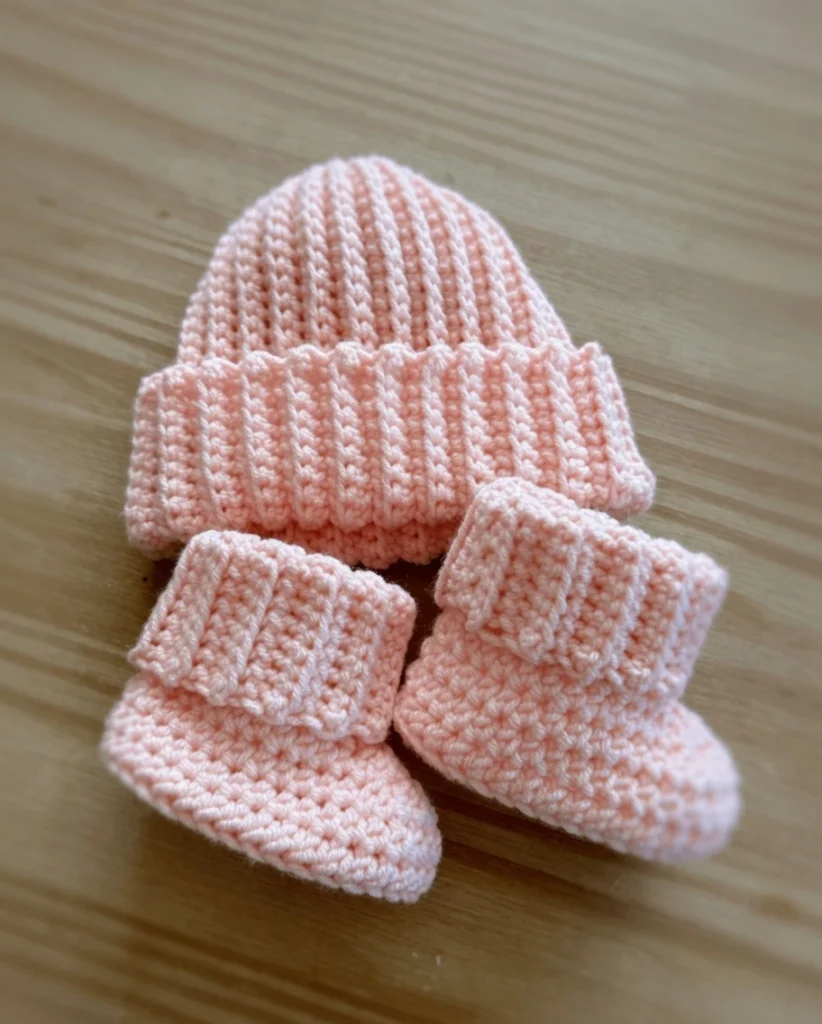
Few things are as heartwarming as handmade baby gifts, and a cozy pair of booties is the ultimate staple for any new arrival. These ribbed cuff baby booties are not only incredibly adorable but are also highly functional, designed to actually stay on tiny, active feet. The unique, stretchy ribbing hugs the ankle perfectly, keeping little toes warm and snug.
Crafted with simple stitches, this is a wonderfully beginner-friendly project that you can easily finish in just an hour or two. Whether you are making them for your own little one, gifting them at a baby shower, or donating them to a hospital, these booties are sure to be a hit.
Materials Needed
- Yarn: DK / Light Worsted weight baby yarn (soft acrylic or cotton blends work best)
- Crochet Hook: 4.00 mm (G/6) size
- Yarn Needle: For sewing in ends and closing the ribbing
- Scissors: A sharp pair for snipping yarn
- Stitch Markers: Optional, but helpful to mark the beginning of rounds
- Non-slip Soles: Optional, but recommended for walking babies (use leather, suede, or puff paint grips)
Abbreviations Used
- sl st – slip stitch
- ch – chain
- sc – single crochet
- hdc – half double crochet
- dc – double crochet
- 2 sc tog – single crochet decrease (work 2 sc together)
- 2 dc tog – double crochet decrease (work 2 dc together)
- bl-hdc – back loop half double crochet (work hdc into the back loop only)
This pattern uses USA crochet terminology
Size & Gauge
Gauge: 5 dc = 1 inch (2.5 cm)

The written pattern below is for the 0–3 Months size. To achieve other sizes, simply change your hook size and adjust the sole length accordingly:
- Newborn: 3.5 in (9 cm) sole length – use a 3.50 mm hook
- 0–3 Months: 3.75 in (9.5 cm) sole length – use a 4.00 mm hook
- 3–6 Months: 4.25 in (10.5 cm) sole length – use a 4.50 mm hook
- 6–12 Months: 4.75 in (12 cm) sole length – use a 5.00 mm hook
Tip: Measure the sole length at the end of Round 3 (toe to heel) to check that you’re on track before adding the cuff.
Pattern Instructions
Sole
Row 1: Ch10. starting in the base of the chain, Sc in the 2nd chain from the hook, and work sc in the next 7chs, work 5sc in the last ch, TURN your work 180 degrees and work back along the opposite side of the chain, sc in the next 7 chs, working 2sc in the last ch, slst to Join (22sts)
Row 2: Ch1, starting in the base of the chain 2hdc in the first stitch, hdc in the next 7 sts, 2hdc in the next 5 stitches, hdc in the next 7sts, 2hdc in each of the last 2 stitches. Join. (30sts)
Row 3: Ch1, starting in the base of the chain, 2hdc in the first stitch, hdc in the next 12 sts, 2hdc in each of the next 3 stitches, hdc in the next 12sts, 2hdc in each of the last 2 stitches. Join. (36sts) MEASURE SOLE HERE
Sides and Front Shaping
Pay attention to where to start and finish your rounds. To stop the slip-to-join seam shifting diagonally on each round you will skip working in the base of the chain start the round in the next stitch, and complete the LAST stitch of that round into the previous round slip st to join.
Row 4: Ch1, starting in the base of the chain, working in back loops only, bl-hdc in each st around slst to Join. (36sts)
Row 5: Ch1, skip the base chain stitch, hdc in each stitch around. *The last hdc is made in the join of the previous row slst to Join. (36sts)
Row 6: Ch1, skip the base chain stitch, hdc in the first 12sts, work 2dctog 6 times, hdc in the remaining 12sts *The last hdc is made in the join of the previous row, slst to Join. (30sts )
Row 7: Ch1, skip the base chain stitch, hdc in the next 11sts, work 2dctog 4 times, hdc in the remaining 11sts. *The last hdc is made in the join of the previous row, slst to Join. (26sts)
Row 8: Ch1, skip the base chain stitch, sc in the next 11sts, 2sctog TWICE, sc in remaining 11sts, Join. The last sc is made in the join of the previous row, slst to Join (24sts) DO NOT FASTEN OFF
Booties Ankle Ribbing
Hold the bootie with the right side of the ankle facing you (IF you feel the ribbing is getting TOO tight, then only slip stitch 1 st, every couple of ribs)
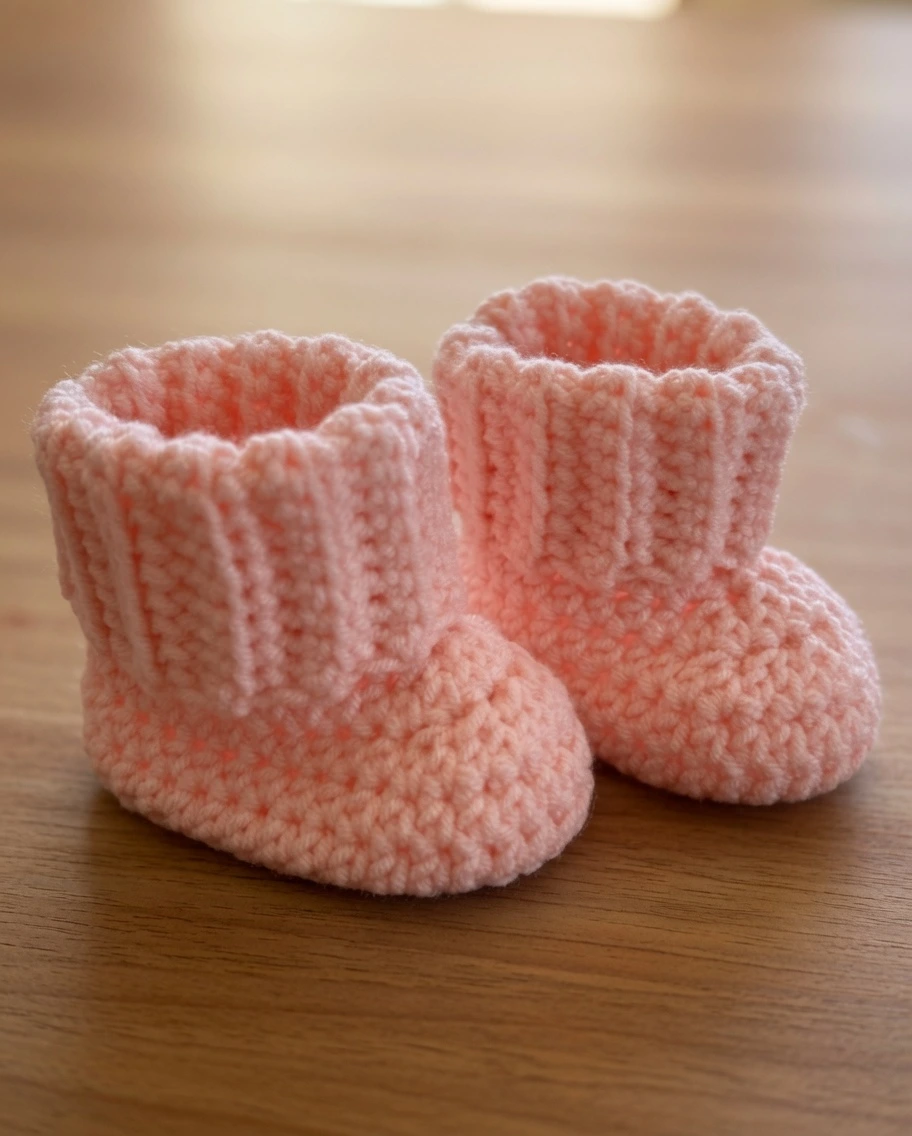
Row 1: Ch 15, sc in 2nd ch from hook and each rem ch-14 sc, sl st, to join in next st of ankle, slst in next st, Ch1 Turn.
Row 2: Skip the 2 slip stitches and only work in the ribbing sts, working in BLonly, sc in each sc. Turn. (14sts)
Row 3: Ch 1, working in BLs only, sc in each sc; working through both lps, sl st in next 2 sc on bootie. Turn.
Row 4: Rep rows 2 and 3 around the top of the bootie, ending last rep with sl st in last sc.
Row 5: Fasten off and sew first and join the last row of ribbing tog.
Tips
The ribbed cuff on these booties uses a clever, beginner-friendly technique that completely avoids complex front post and back post stitches. Instead of working in the round, you will chain the height of the cuff, single crochet down the chain, slip stitch across the ankle, and then single crochet back up. By working exclusively in the back loops during this up-and-down motion, you create a highly stretchy, professional-looking ribbed band that naturally hugs the baby’s ankle and keeps the booties securely in place.
FAQ
Can I make these booties bigger? Yes! You can easily adjust the booties for older babies by increasing your hook size, going up a yarn weight, or simply adding extra rounds to the sole before starting the upper section. These adjustments work perfectly for babies up to 6-12 months who are not yet walking.
Are these booties easy to crochet? Absolutely. If you know how to work in rounds, increase, decrease, and single crochet, you can make these. The ribbing technique is explained step-by-step and requires no prior post-stitch experience.
Do I need to add grips to the bottom? For newborns and young babies who are not yet mobile, standard yarn is perfectly fine. However, if you are making the 6-12 month size for a baby who is pulling up or walking, it is highly recommended that you glue on leather, suede, or apply puff paint dots to the soles to prevent slipping.
More Beginner-Friendly Patterns to Try
- Easy Textured Crochet Baby Blanket Free Pattern
- Baby Grinch Crochet Pattern
- Small Leggy Frog Crochet Pattern Free No Sew Pattern with Amigurumi Heart
- Free Crochet Fairy Pattern
Conclusion
Congratulations on completing your adorable baby booties! This stretchy, ribbed-cuff design makes a perfectly practical and cozy gift for any new parents. Share your finished booties in the comments below!
