
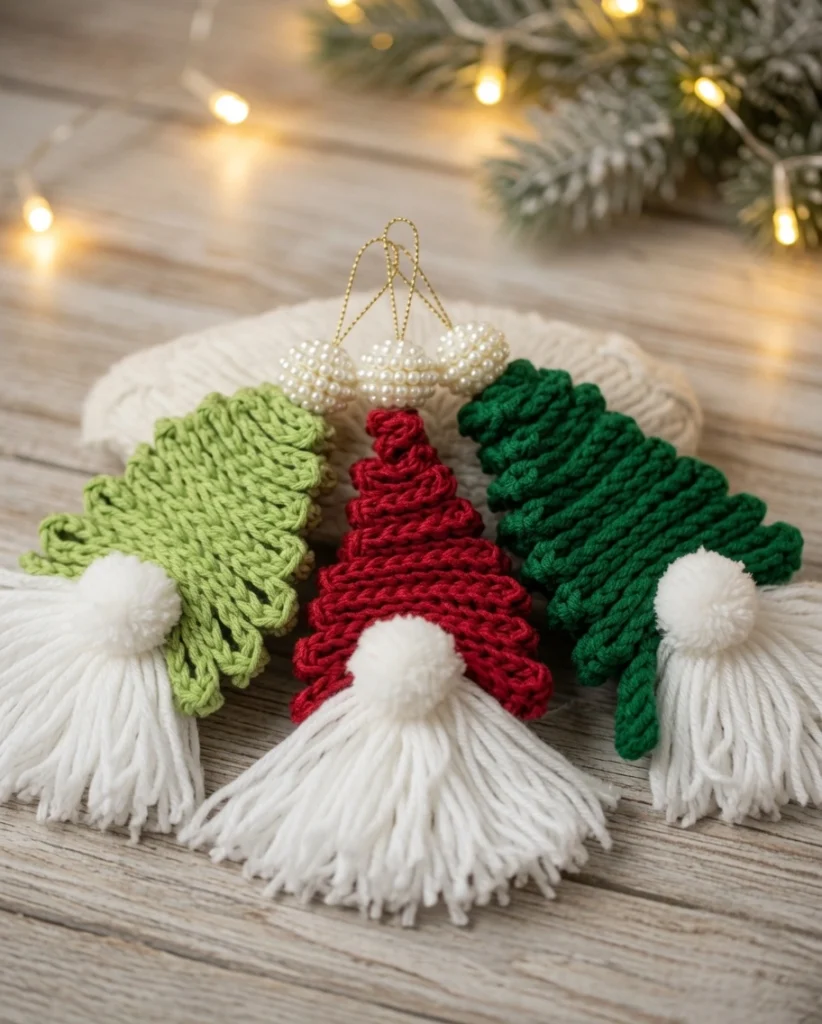
Holiday crafting brings a special kind of magic, and nothing says “festive” quite like a cute, bearded gnome sitting on your mantle. This crochet Christmas gnome pattern offers a delightful and incredibly easy way to add a personal, handmade touch to your holiday decorations. Because it uses a clever folding technique rather than complex, continuous amigurumi shaping, it is a fantastic project for absolute beginners looking for a quick win.
These adorable gnomes are highly customizable with different yarn colors, making them a versatile addition to your holiday decor. Whether you stick to traditional reds and greens or try a modern winter palette of blues and silvers, they are guaranteed to bring a smile to your face. They make perfect Christmas tree ornaments, gift toppers, or handmade treasures to share with loved ones this season. If you love adding charming crochet decor to your home, you’ll want to make a whole village of these little guys!
Materials Needed
- Yarn or wool: Choose festive colors for the hat/body (e.g., red, green) and a fluffy white or cream for the beard
- 2.5mm crochet hook
- Scissors
- Tapestry needle: For weaving in ends
- Hot glue or craft glue: For quick and secure assembly
- This pattern uses USA crochet terminology
Pattern Instructions
Forming and Assembling the Gnome
Note: This pattern begins with a pre-crocheted flat piece. A simple rectangle or triangle worked in single crochet works perfectly as your base.
Form the Gnome’s Body: Fold the crocheted piece into a pine tree shape, making it smaller as you go.
Attach the Gnome’s Nose: Pass a new piece of yarn through the center of the folded piece and tie a knot at the desired height to form a nose
Create the Pom-pom for the Hat: Wrap yarn around your fingers about 45 times. Tie a knot around the center of the bundle. Cut the loops on both sides to create a pom-pom.
Assemble the Gnome: Glue the pom-pom to the top of the folded gnome body. Trim the bottom of the gnome to make it even and trim the yarn below the nose to form a beard.
Assembly
Because this pattern utilizes a folding method rather than working in the round, the assembly is where your gnome truly comes to life. Once you have folded your base piece into that distinct triangular “pine tree” shape, use a small dab of hot glue at the back seam to hold the fold securely in place.
After tying the nose knot, make sure it is centered and pushed forward slightly to give your gnome that characteristic profile. When gluing the pom-pom to the top, fluff it out evenly so it looks like a fluffy winter hat. If you plan to use these as tree ornaments, simply tie a loop of coordinating yarn through the back of the folded piece before gluing down the pom-pom to hide the knot.
Tips
- Yarn Selection for Beards: While you can use the same yarn for the whole project, holding a fluffy white eyelash yarn together with a standard worsted weight yarn creates an incredibly realistic, textured beard for your gnome.
- Sizing: The size of your gnome is entirely dependent on the size of the crocheted piece you start with. For a tiny 3-inch ornament, start with a chain of 15. For a shelf sitter, start with a chain of 30 or more.
- Expanding Your Holiday Creations: Once you master this quick folding technique, you might find yourself hooked on holiday amigurumi. If you are looking for a slightly more complex holiday character to sit next to your gnomes, try our baby Grinch crochet pattern for another fun pop-culture addition to your decor.
FAQ
What kind of crocheted piece do I start with? This pattern assumes you have a flat piece of crochet fabric. A simple rectangle or a wide triangle works best. To make one quickly, just chain your desired width, then single crochet in rows until you have a piece about twice as tall as you want your finished gnome to be.
Can I use a different size hook? Absolutely! While a 2.5mm hook creates a tight, neat fabric that holds its shape well for small ornaments, you can use a larger hook and bulkier yarn to create giant gnomes for your front porch. Just adjust your starting chain width accordingly.
How do I make the beard look fuller? The secret to a great gnome beard is in the trimming! When you trim the yarn below the nose to form the beard, cut it at an angle rather than straight across. This creates a layered, tapered look that is much fuller and more realistic. If you want even more ideas for festive household items, check out our guide to cozy crochet home decor patterns.
Conclusion
Congratulations on creating your adorable Christmas gnome! This quick, customizable decoration brings a touch of handmade magic to your holiday setup. Share your festive gnomes in the comments below!
