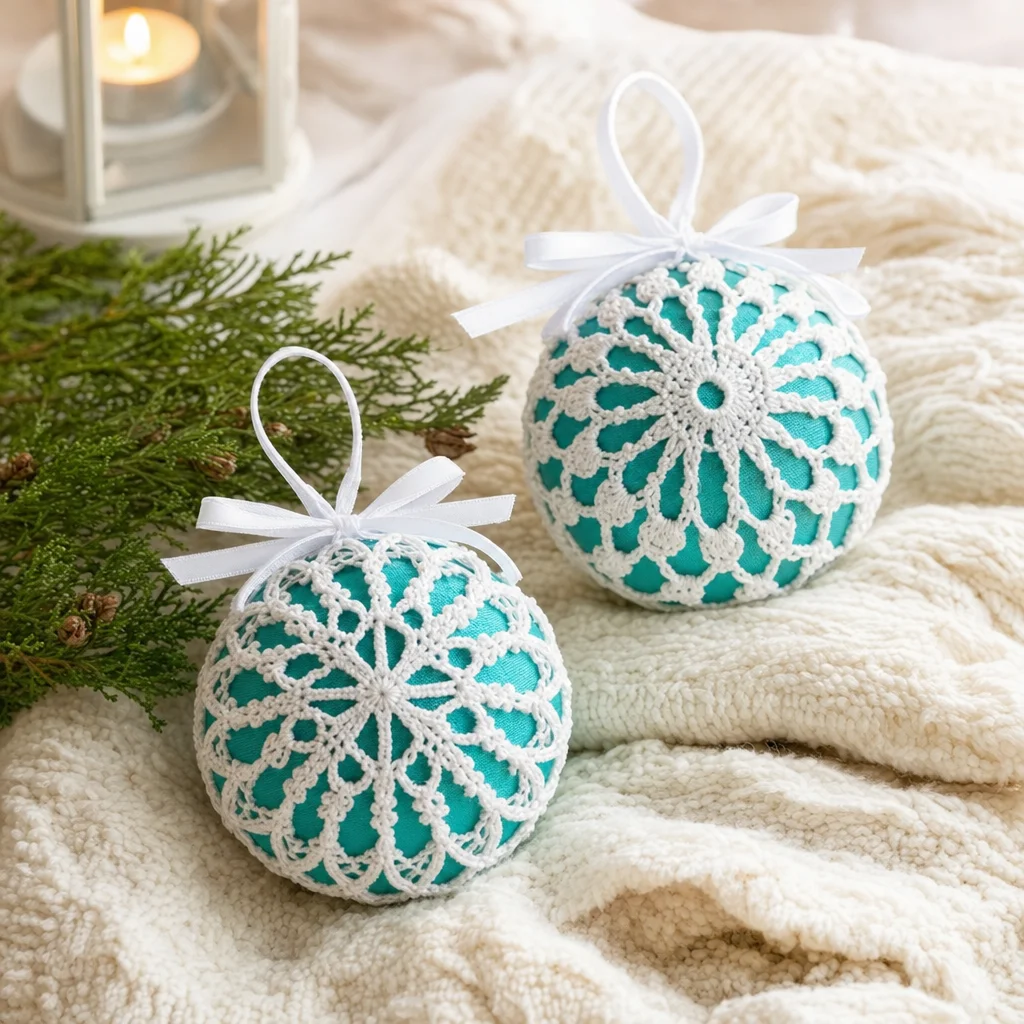
Crochet Decorative Christmas Ornaments Pattern
Crocheting decorative Christmas ornaments is a delightful way to bring festive cheer to your home during the holiday season. Not only does this crochet project allow you to create beautiful decorations, but it also gives you a chance to express your creativity. In this article, we’ll explore the steps to make stunning ornaments using Aunt Lydia’s® Classic Crochet Thread and unique stitching techniques. If you’re looking for more inspiration for your holiday crafting, consider checking out these festive Christmas crochet patterns to make your holidays merry!
About the Crochet Project
The crochet decorative Christmas ornaments we will create consist of two designs: the Diamond Spoke Stitch Ornament and the Picot Spoke Stitch Ornament. These ornaments are made over a Styrofoam ball and a satin Christmas ball, allowing for a delightful mixed-media effect. The use of a combination of stitches gives a unique texture and intricate look, perfect for hanging on your Christmas tree.
Materials

To get started, gather the following materials:
- Yarn: Aunt Lydia’s® Classic Crochet Thread, Size 10: 1 ball White
- Crochet Hook: 1.5mm [US 7]
- Ornament Bases:
- 1 3” diameter Styrofoam ball (for forming crochet piece)
- 1 3” satin Christmas ball (for final ornament)
- Other Supplies:
- Plastic wrap
- Fabric stiffener
- 7/8” ribbon
- Ornament hanger
- Thread needle
These materials will ensure that your ornaments are both lightweight and durable, making them ideal for any holiday decorations.
Crochet Abbreviations
Before you dive into the patterns, familiarize yourself with these common crochet abbreviations used in the instructions:
- ch = chain
- sl st = slip stitch
- tr = double treble crochet
- dc = double crochet
- hdc = half double crochet
- sc = single crochet
With your materials ready and abbreviations understood, you’re all set to start creating your ornaments.
Diamond Spoke Stitch Ornament
Let’s start with the Diamond Spoke Stitch Ornament, which has a visually appealing design.
Instructions
Round 0 (Ring)
- Ch 10; join with sl st in first ch to form a ring.
Round 1
- Ch 6 (counts as first trtr), trtr in ring,
- [ch 3, tr in ring, ch 3, 2 trtr in ring] 5 times,
- ch 3, tr in ring, ch 3; join with sl st in top of beginning ch-6.
This round results in: 12 trtr, 6 tr, and 12 ch-3 spaces.
Round 2
- Ch 4 (counts as first tr), tr through the top of post (under 3 loops) of next trtr,
- ch 10,
- [tr through post of each of the next 2 trtr, ch 10] 5 times;
- join with sl st in top of beginning ch-4.
This round results in: 12 tr and 6 ch-10 spaces.
Round 3 (Spoke Round)
- [Ch 5, sl st in 3rd ch from hook, ch 2, skip next ch, tr in next ch] 8 times,
- ch 10, sl st in top of last tr made,
- [ch 5, sl st in 3rd ch from hook, ch 2, sl st in ch under tr] 8 times,
- sl st through post of next tr of Round 2 (spoke completed);
- sl st in each of the first 4 ch of next ch-10 space, ch 5,
- sl st in 3rd ch from hook, ch 2, skip next 2 ch of same ch-10 space,
- sl st in each of last 4 ch of same ch-10 space;
- sl st through post of next tr;
- repeat from * around ending last repeat at *;
- join with sl st in base of beginning ch.
This round results in: 6 spokes.
Fasten Off
Fasten off and weave in ends.
Picot Spoke Stitch Ornament
Now, let’s move on to the Picot Spoke Stitch Ornament. This design offers a lovely and delicate appearance.
Instructions
Round 0 (Ring)
- Ch 10; join with sl st in first ch to form a ring.
Round 1
- Ch 3 (counts as first dc), 2 dc in ring,
- ch 3,
- [3 dc in ring, ch 3] 5 times;
- join with sl st in top of beginning ch-3.
This round results in: 18 dc and 6 ch-3 spaces.
Round 2
- Slip st in next 2 dc,
- (sl st, ch 3, 2 dc) in first ch-3 space,
- ch 6,
- [3 dc in next ch-3 space, ch 6] 5 times;
- join with sl st in top of beginning ch-3.
This round results in: 18 dc and 6 ch-6 spaces.
Round 3 (Spoke Round)
- Slip st in next dc,
- [ch 5, triple-picot] 5 times,
- ch 14,
- hdc in 12th ch from hook and in next 2 ch,
- [triple-picot, hdc in next 5 ch] 5 times (spoke completed),
- (4 sc, triple-picot, 4 sc) in the next ch-6 space;
- repeat from * around;
- join with sl st in same st as first sl st.
This round results in: 6 spokes.
Fasten Off
Fasten off and weave in ends.
Finishing (For Both Ornaments)
- Cover the 3” Styrofoam ball with plastic wrap.
- Saturate the crochet piece in stiffener and shape around the ball.
- Allow to dry completely.
- When the piece is rigid, remove the Styrofoam ball and insert the satin ball.
- Tie or sew loops together at the top.
- Using the ribbon, tie a bow at the top of the ornament and attach an ornament hanger.
Creating these decorative Christmas ornaments can be a joyful activity, perfect for gifting or as a cherished addition to your holiday decorations. For further inspiration and patterns, check out this collection of free crochet Christmas ornament patterns.
Frequently Asked Questions
What yarn is used for these ornaments?
The pattern specifies using Aunt Lydia’s® Classic Crochet Thread, Size 10 in white.
Do these ornaments require assembly?
Yes, the ornaments require assembly as they are worked around a Styrofoam ball and then fitted onto a satin Christmas ball.
What crochet hook size is recommended for this pattern?
A 1.5mm crochet hook (US size 7) is recommended for this crochet project.
Are the ornaments made using rounds or rows?
Both ornament patterns are made using rounds for a seamless look.
Creating these ornaments not only enhances your festive decor but also cultivates a sense of joy and creativity that comes from crafting. Enjoy the process and happy crocheting!