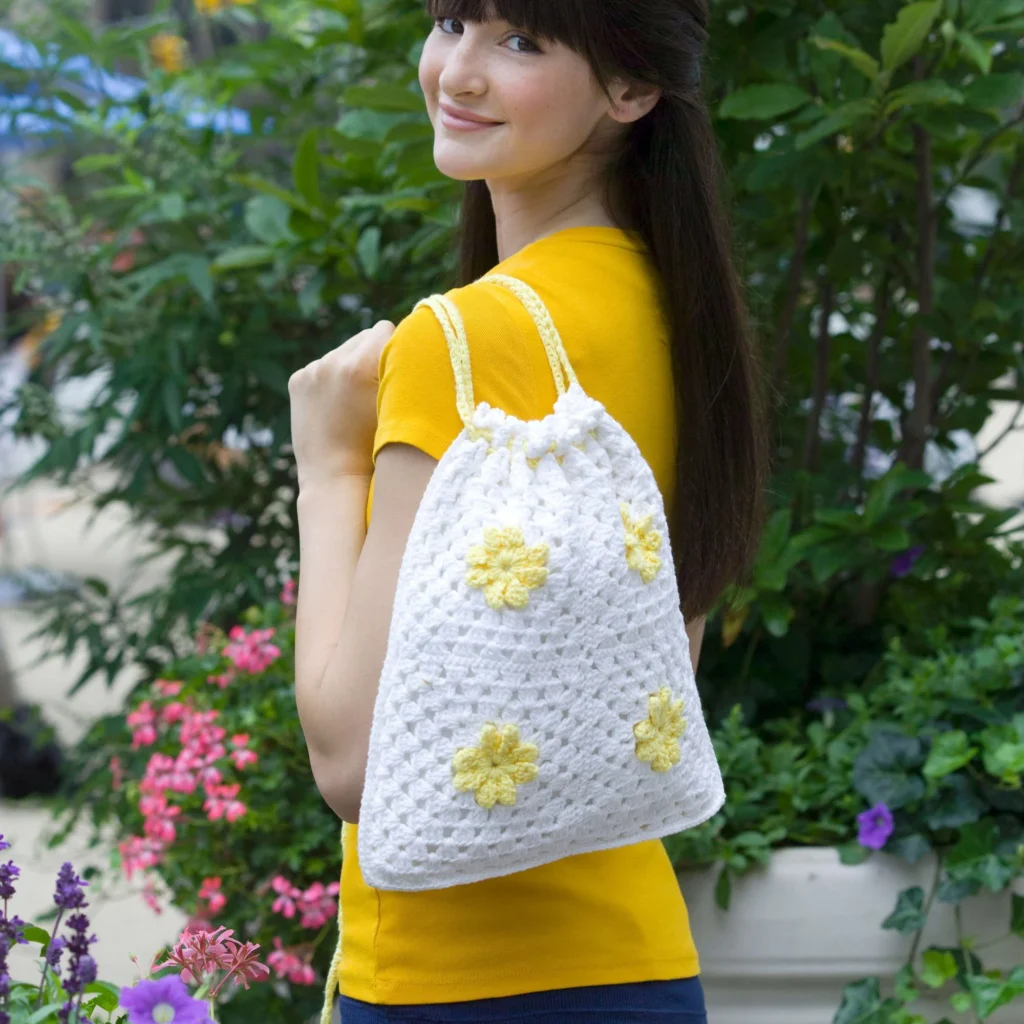
Crochet Daisy Drawstring Bag Pattern
Creating a crochet bag can be a delightful experience, especially when using playful designs like the Daisy Drawstring Bag. This charming crochet project features a lovely daisy pattern and is made with Coats® “Crème De La Crème™” yarn, making it both beautiful and functional. In this article, we’ll guide you through the materials needed, the crochet instructions, and helpful tips for completing your very own Daisy Drawstring Bag.

About the Bag
The Daisy Drawstring Bag is not just a stylish accessory; it’s also a practical item for everyday use. With its vibrant colors and daisy motif, it can be a perfect addition to your outfit or a unique gift for friends and family. The bag features a drawstring closure that makes it easy to open and close while ensuring your belongings are secure.
Materials
Before starting, gather the following materials:
Yarn
- Coats® “Crème De La Crème™”
- 2 balls Color A: White
- 1 ball Color B: 205 Golden Yellow
Crochet Hook
- 4mm [US G-6]
Notions
- Yarn needle
- White fabric for lining: 14” x 28”
- Matching sewing needle and thread
Crochet Abbreviations
In this pattern, the following abbreviations will be used:
- ch: chain
- dc: double crochet
- sc: single crochet
- st: stitch
- sl st: slip stitch
- *( … ) : repeat instructions in parentheses
Instructions
Square (Make 8)
To create the daisy squares that will form the body of the bag, follow these instructions:
Start with Color B:
- Forming the Ring: With B, ch 6, slip st in first ch to form a ring.
Round 1
- (Ch 3, 2 dc in ring, turn, ch 3, dc in next 2 sts, dc in top of turning ch, turn – beginning petal made), holding petal to front,
- [(work 3 dc in ring, turn, ch 3, dc in next 3 sts, turn – petal made)] 7 times,
- slip st to top of beginning ch – 8 petals.
Fasten off.
Round 2
- Join A in any space between petals,
- (ch 3, 2 dc, ch 2, 3 dc) in same space, ch 2, sc in next space between petals, ch 2,
- [(3 dc, ch 2, 3 dc) in next space, ch 2, sc in next space, ch 2] 3 more times,
- slip st to top of beginning ch.
Round 3
- Slip st to ch-2 corner space,
- *(3 dc, ch 2, 3 dc) in corner ch-space, [ch 1, 3 dc in next space] twice, ch 1;
- repeat from * 3 more times,
- slip st to first dc to join.
Round 4
- Slip st to corner ch-space,
- *(3 dc, ch 2, 3 dc) in corner ch-space, [ch 1, 3 dc in next space] 3 times, ch 1;
- repeat from * 3 more times,
- slip st to first st to join.
Round 5
- Slip st to corner ch-space,
- *(3 dc, ch 2, 3 dc) in corner ch-space, [ch 1, 3 dc in next space] 4 times, ch 1;
- repeat from * 3 more times,
- slip st to first st to join.
Fasten off.
Finishing (Assembly of Squares)
Now that you have made the squares, it’s time to assemble them into the bag:
- Sew 4 Squares together to make a larger square for the front.
- In the same manner, sew the remaining 4 Squares together for the back.
Edging
Round 1
- Join A in any corner space of Front,
- *(3 dc, ch 2, 3 dc) in corner space, [ch 1, 3 dc in next space] 5 times, [2 dc in next corner space] twice, [ch 1, 3 dc in next space] 5 times, ch 1;
- repeat from * around;
- slip st to first dc to join.
Round 2
- Slip st to corner space,
- *(3 dc, ch 2, 3 dc) in corner space, [ch 1, 3 dc in next space] to next corner;
- repeat from * around,
- slip st to first dc to join.
Fasten off.
Joining (Front to Back)
To finish the bag, you need to join the front to the back pieces:
- With wrong sides of Front and Back pieces together, join A in any corner space, working through both layers,
- sc pieces together along 3 sides.
Fasten off.
Top Edge
Round 1
- Join A in any st, sc in each st around, slip st in first sc to join.
Round 2
- [Ch 5, skip next st, slip st in next st] around, slip st to first st to join.
Fasten off.
Weaving in Ends
Be sure to weave in all the loose ends to tidy up your beautiful bag.
Lining
To give your bag a finished look, you’ll want to line it:
- Fold the fabric in half and cut to the same dimensions as the bag, keeping the fold at the lower edge and adding a ½” seam allowance all around.
- With right sides facing, sew the bag closed along the side seams using a ½” seam allowance.
- Fold ½” to the wrong side along the top edge and press.
- With wrong sides together, fit the lining inside the bag and sew together along the top edge.
Drawstring (Make 2)
To create the drawstrings that will allow you to close the bag securely:
- With B, make a ch 40” long, turn, sc in 2nd ch from hook and in each ch across.
- Fasten off.
Drawstring Placement
Weave the drawstrings into the bag as follows:
- Starting at the side edges, weave 1 Drawstring in and out of ch-spaces on Round 2 of Edging from side edge to side edge.
- Repeat with the second Drawstring on the opposite side.
Frequently Asked Questions
What crochet hook is used for this pattern?
The pattern requires a 4mm [US G-6] crochet hook.
Is this project worked in rows or rounds?
The project is worked in rounds, specifically to create motifs that are then assembled into the bag.
Does this crochet project require assembly?
Yes, the project requires assembly where the squares are sewn together to create the front and back of the bag.
What fabric is used for lining the bag?
The lining is made from white fabric, cut to 14” x 28”.
Are there specific yarn colors used in this pattern?
Yes, the pattern uses Coats® “Crème De La Crème™” yarn in Color A: White and Color B: 205 Golden Yellow.
Conclusion
The Crochet Daisy Drawstring Bag is a delightful project that brings whimsy and functionality together. With vibrant colors and a fun daisy motif, this bag is perfect for carrying essentials or as a stylish accessory. Follow the provided instructions carefully, and enjoy the process of making your unique crochet piece. Happy crocheting!