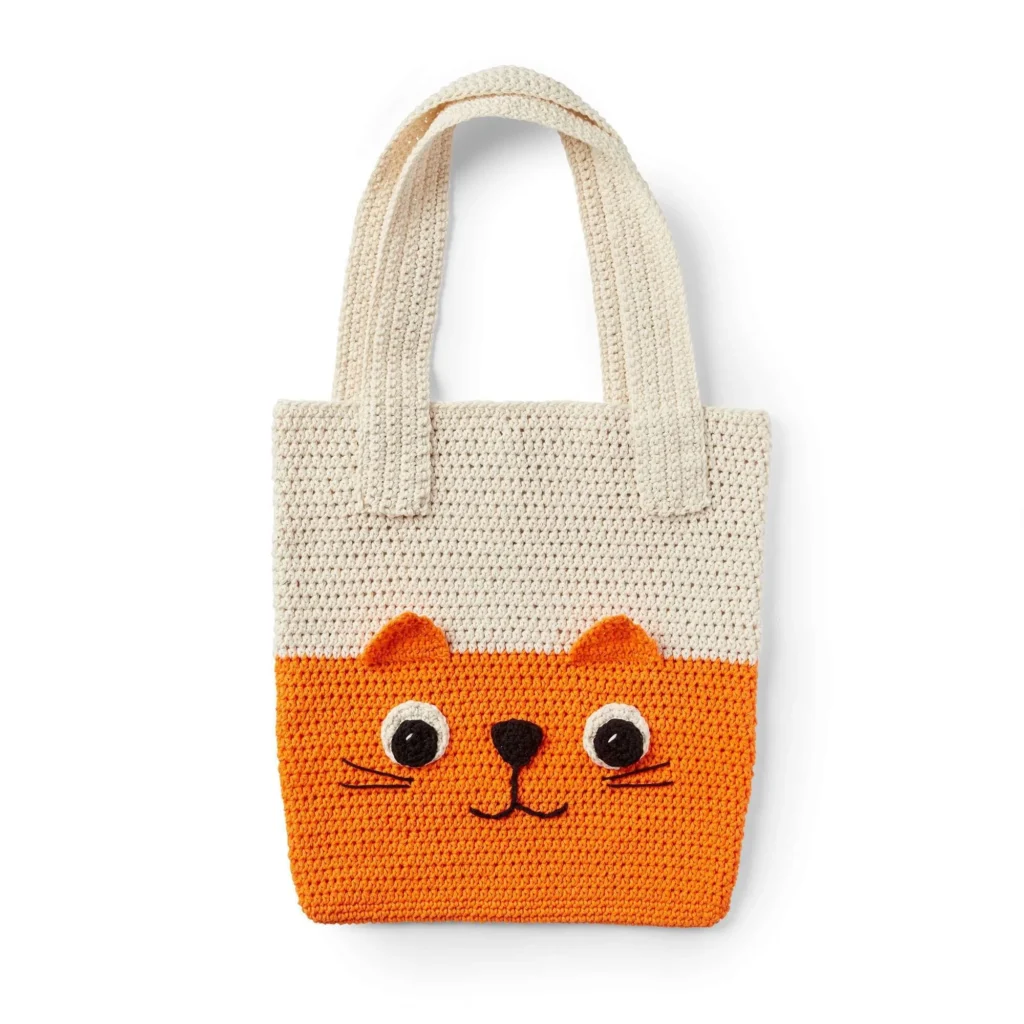
Crochet Kitty Tote Pattern
Creating your very own Crochet Kitty Tote is a fantastic project that combines functionality with adorable design. This tote bag is not just a practical accessory but also a fun, whimsical piece showcasing your love for cats. Made with Lily® Sugar’n Cream® yarn, this bag is durable and perfect for carrying everyday items.
In this article, we will guide you through the materials needed, a comprehensive breakdown of the instructions, and additional tips to enhance your crafting experience.

About the Bag
The Crochet Kitty Tote is designed to be spacious and stylish with artistic detailing, including cute cat ears, expressive eyes, and a charming triangular nose that adds personality to your bag. This project involves basic crochet techniques suitable for those with some experience in crochet, and the finished bag can be tailored with your choice of colors.
Crafting this kitty tote not only allows you to express your creativity but also results in a practical bag that can be used for shopping, as a purse, or even as a gift.
Materials
Before diving into the pattern, gather the following materials:
Yarn
- Lily® Sugar’n Cream® (2.5 oz/70.9 g; 120 yds/109 m)
- Contrast A Hot Orange (01628): 2 balls or 230 yds/210 m
- Contrast B Ecru (00004): 3 balls or 350 yds/320 m
- Contrast C Black (00002): 1 ball or 17 yds/16 m
Crochet Hook
- Size U.S. H/8 (5 mm) Susan Bates® Silvalume® crochet hook, or size needed to obtain gauge.
Notions
- Susan Bates® steel yarn needle for weaving in ends and attaching parts.
Instructions
Bag
Begin your tote by creating the base and sides with the following steps:
- With Contrast A, ch 49.
Round 1
- 1 sc in 2nd ch from hook.
- 1 sc in each ch to last ch.
- 3 sc in last ch.
- Do not turn.
- Working in remaining loops of foundation ch, 1 sc in each ch to last ch.
- 2 sc in last ch.
- Join with sl st to first sc. (98 sc)
Round 2
- Ch 1.
- 2 sc in first sc.
- 1 sc in each of next 46 sc.
- 2 sc in each of next 3 sc.
- 1 sc in each sc to last 2 sc.
- 2 sc in each of last 2 sc.
- Join with sl st to first sc. (104 sc)
Round 3
- Ch 1.
- 1 sc in each sc around.
- Join with sl st to first sc.
Round 4
- Ch 2 (does not count as hdc).
- 1 hdc in each sc around.
- Join with sl st to first hdc.
Round 5
- Ch 2 (does not count as hdc).
- 1 hdc in each hdc around.
- Join with sl st to first hdc.
Continue repeating the last round until the bag measures approximately 8″ (20.5 cm).
- Break Contrast A, join Contrast B.
Continue in even rounds until the bag measures 16″ (40.5 cm).
- Fasten off.
Handles (Make 2)
Next, we will make the bag’s handles:
- With Contrast B, ch 105.
Row 1
- 1 sc in 2nd ch from hook.
- 1 sc in each ch to end of ch.
- Turn. (104 sc)
Row 2
- Ch 1.
- 1 sc in each sc to end of row.
- Turn.
Continue repeating the last row until the handle measures 2″ (5 cm) wide.
- Fasten off.
Ears (Make 2)
Now for the cute kitty ears:
- With Contrast A, ch 12.
Row 1
- 1 sc in 2nd ch from hook.
- 1 sc in each ch to end of ch.
- Turn. (11 sc)
Row 2
- Ch 1.
- 1 sc in each sc to end of row.
- Turn.
Row 3
- Ch 1.
- Sc2tog.
- 1 sc in each of next 7 sc.
- Sc2tog.
- Turn. (9 sts)
Row 4
- Ch 1.
- Sc2tog.
- 1 sc in each of next 5 sc.
- Sc2tog.
- Turn. (7 sts)
Row 5
- Ch 1.
- Sc2tog.
- 1 sc in each of next 3 sc.
- Sc2tog.
- Turn. (5 sts)
Row 6
- Ch 1.
- Sc2tog.
- 1 sc in next sc.
- Sc2tog.
- Turn. (3 sts)
Row 7
-
Ch 1.
-
Sc3tog.
-
Fasten off, leaving a long end.
Eyes (Make 2)
Make the adorable eyes with the following instructions:
Outer Eye
- With Contrast B, ch 2.
Round 1
- 8 sc in 2nd ch from hook. Join. (8 sc)
Round 2
- Ch 1.
- *2 sc in next sc. Repeat from * around. Join. (16 sc)
Round 3
-
Ch 1.
-
*2 sc in next sc, 1 sc in next sc. Repeat from * around. Join. (24 sc)
-
Fasten off.
Pupil (Make 2)
- With Contrast C, ch 2.
Work from 1st–3rd round as given for Outer Eye.
- Fasten off.
Highlight the pupil with a straight stitch using Contrast B as shown in the photos, and sew the pupil to the Outer Eye.
Nose
Create a cute nose with the following instructions:
- With Contrast C, ch 4.
Row 1
- 1 sc in 2nd ch from hook.
- 1 sc in each of last 2 ch.
- Turn. (3 sc)
Row 2
- Ch 1.
- Sc3tog.
- Do not turn.
Edging
- Ch 1.
- Working around Nose, work 1 round of sc, having 1 sc in each side, and 2 sc in each ‘corner’ of Nose to create a triangle.
- Join with sl st to first sc.
- Fasten off, leaving a long end.
Finishing
The final steps involve assembling your gorgeous kitty tote:
- Sew the handles to the bag as shown in the picture.
- Attach the ears to the front of the bag at the top edge of the cat’s head.
- Sew the eyes and nose to the front of the bag.
- Embroider the snout and whiskers with Contrast C using the outline stitch.
Outline Stitch
Refer to your crochet reference for the outline stitch to add final detailing to the snout.
Frequently Asked Questions
What crochet hook is used for this pattern?
You will need a size U.S. H/8 (5 mm) crochet hook or the size needed to obtain gauge.
Is this project worked in rows or rounds?
This project is primarily worked in rounds, especially for the base and body of the bag.
Does this crochet project require assembly?
Yes, there is minor assembly required to sew the handles, ears, eyes, and nose to the bag.
What are the finished dimensions of the Crochet Kitty Tote?
The finished bag measures approximately 16″ (40.5 cm) in height and has a base that expands as described in the rounds.
Can I modify the colors used in this pattern?
Absolutely! Feel free to experiment with different colorways to make the tote uniquely yours.
Conclusion
The Crochet Kitty Tote is a delightful crochet project that results in a functional and playful bag. Following the provided pattern and instructions, you can create a charming tote that showcases your crochet skills while adding flair to your accessory collection. Have fun with color variations, and enjoy the process of crafting this adorable bag!