Crochet Christmas Tree Pattern
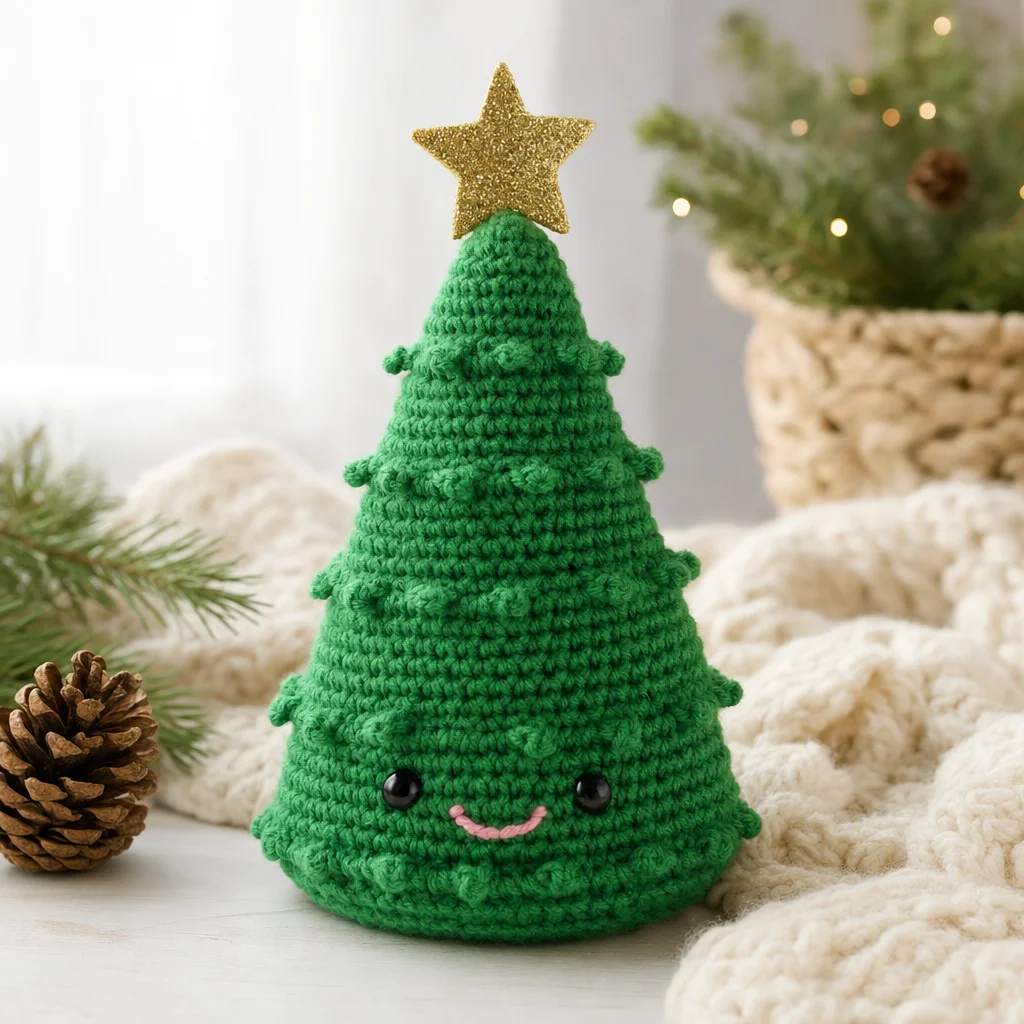
The Crochet Christmas Tree Pattern is a delightful project that will brighten up your holiday decor. This charming little tree can be made using just a few materials, leaning into the fun of amigurumi. Whether you’re an experienced crocheter or just starting out, this pattern will guide you step-by-step to create a cute, festive decoration that can be displayed all season long.

About This Crochet Project
This project is an amigurumi crochet pattern designed specifically to resemble a classic Christmas tree. It features a sturdy base, adding a whimsical touch with safety eyes and a star topper. Each tree is filled for a delightful three-dimensional texture and form. You can customize the look further with embellishments or by varying yarn choices, giving you a truly unique piece for your holiday celebrations.
To complement your Christmas crafting, you might also find inspiration in other projects like these free crochet ornament patterns.
Materials
To create your Crochet Christmas Tree, you will need the following materials:
Yarn
- Red Heart® Amigurumi™ (3.5 oz/100 g; 239 yds/219m), Santa (9962): Only green is used for this design. You will need one ball.
Crochet Hook
- Size U.S. B/1 (2.25 mm): Or size needed to obtain gauge.
Notions
- Stitch Marker
- Fiberfill Stuffing
- Two 6 mm Safety Eyes
- Small Amount of Pink Embroidery Floss for Mouth
- Knee High Stockings for Weighted Stuffing
- Weighted Stuffing: Such as aquarium gravel, plastic pellets, or rice.
- Two 1½” [4 cm] Self-Stick Glitter Foam Stars
- Toothpick for Star Topper
Crochet Abbreviations
Understanding crochet abbreviations will help you navigate the pattern more easily. Here are the main abbreviations used in this pattern:
- sc: single crochet
- pm: place marker
- st(s): stitch(es)
- tog: together
- rnd(s): round(s)
Pattern Notes
This pattern primarily utilizes rounds for construction, creating an adorable 3D effect. It includes stuffing for added weight, enhancing the overall visual appeal of your tree. Additionally, the pattern incorporates safety eyes, ensuring it is suitable for all ages.
Instructions
TREE
Beginning at the base of the tree, ch 2.
- 1st rnd: 6 sc in 2nd ch from hook. Do not join. PM for the beginning of the round. (6 sc)
- 2nd rnd: 2 sc in each of next 6 sc. (12 sc)
- 3rd rnd: (1 sc in next sc. 2 sc in each of next sc) 6 times. (18 sc)
- 4th rnd: (1 sc in each of next 2 sc. 2 sc in next sc) 6 times. (24 sc)
- 5th rnd: (1 sc in each of next 3 sc. 2 sc in next sc) 6 times. (30 sc)
- 6th rnd: (1 sc in each of next 4 sc. 2 sc in next sc) 6 times. (36 sc)
- 7th rnd: (1 sc in each of next 5 sc. 2 sc in next sc) 6 times. (42 sc)
- 8th rnd: (1 sc in each of next 8 sc. 2 sc in next sc) 6 times. (48 sc)
- 9th rnd (Bottom ridge): Working in back loops only, 1 sc in each sc around.
For the sides of the tree:
- 10th to 12th rnds: Working in both loops, 1 sc in each sc around.
- 13th rnd: Working in back loops only, 1 sc in each sc around.
- 14th rnd: As 10th rnd.
- 15th rnd: (Sc2tog. 1 sc in each of next 14 sts) 3 times. (45 sts)
- 16th rnd: As 10th rnd.
- 17th rnd: As 13th rnd.
- 18th rnd: (Sc2tog. 1 sc in each of next 13 sts) 3 times. (42 sts)
- 19th rnd: As 10th rnd.
- 20th rnd: (Sc2tog. 1 sc in each of next 12 sts) 3 times. (39 sts)
- 21st rnd: As 13th rnd.
- 22nd rnd: As 10th rnd.
Attach Safety Eyes
Attach safety eyes between 21st and 22nd rnds approximately 9 sts apart. Stuff with weighted stuffing placed in the toe of a knee-high. Start stuffing the piece firmly and continue stuffing as work progresses.
- 23rd rnd: (Sc2tog. 1 sc in each of next 11 sts) 3 times. (36 sts)
- 24th rnd: As 10th rnd.
- 25th rnd: As 13th rnd.
- 26th rnd: (Sc2tog. 1 sc in each of next 4 sts) 6 times. (30 sts)
- 27th rnd: As 10th rnd.
- 28th rnd: (Sc2tog. 1 sc in each of next 3 sts) 6 times. (24 sts)
- 29th rnd: As 13th rnd.
- 30th rnd: (Sc2tog. 1 sc in each of next 2 sts) 6 times. (18 sts)
- 31st rnd: As 10th rnd.
- 32nd rnd: (Sc2tog. 1 sc in next st) 6 times. (12 sts)
- 33rd rnd: As 13th rnd.
- 34th rnd: (Sc2tog. 1 sc in next st) 4 times. (8 sts)
Finish stuffing the piece. - 35th rnd: 1 sc in each st around. Fasten off, leaving a long end. Thread through remaining stitches. Pull tightly and fasten securely.
TREE NEEDLES
Note: The needles are worked into the front loops only of 13th, 17th, 21st, 25th, 29th, and 33rd rnds.
- 1st rnd: With tree tip facing down, join yarn with a sl st to any front loop of the 13th rnd. Ch 3. Sl st in front loop of the next st. Repeat from * around, working the last sl st in the same space as the first sl st. Fasten off.
- 2nd rnd: With tree tip facing down, join yarn with a sl st to any front loop of the 17th rnd. Repeat as given for the 1st rnd.
- Note: In the 21st row, needles are not worked on the “face” of the tree, just along the sides and back.
- 3rd rnd: Join yarn with a sl st in the front loop of the second st from the outside edge of one eye of the 21st rnd. Working around the side and back of the tree towards the other eye, Ch 3. Sl st in front loop of the next st. Repeat from * to 1 front loop before the second eye. Fasten off.
- 4th, 5th, and 6th rnds: With tree tip facing down, join yarn with a sl st to any front loop of the corresponding 25th, 29th, and 33rd rnds. Repeat as given for the 1st rnd.
Finishing
Smile
Separate 4 of the 6 strands from pink embroidery floss. Embroider a small upturned arc that spans 5 sts for the mouth.
Star Topper
With the glue side up, place one end of the toothpick in the middle of the star. Place the second star glue side down on the glue side of the first star. Press firmly to ensure a bond. Stick the toothpick of the star topper down into the top of the tree.
Frequently Asked Questions
What type of crochet project is this?
This project is an amigurumi crochet pattern, specifically designed to create a cute Christmas tree decoration.
What materials do I need for this crochet pattern?
You will require Red Heart® Amigurumi™ yarn, a crochet hook, safety eyes, stuffing, and embellishments such as glitter stars.
Does this crochet project require assembly?
Assembly is minimal; however, you will need to attach safety eyes and ensure the stuffing is adequate before closing up the project.
To wrap up the joy of creating this festive piece, you can explore more creative ideas in seasonal crochet patterns, such as these festive free Christmas crochet patterns.
By following this pattern, you’ll create not just a Christmas tree, but also a cherished piece that brings warmth and joy to your holiday season.