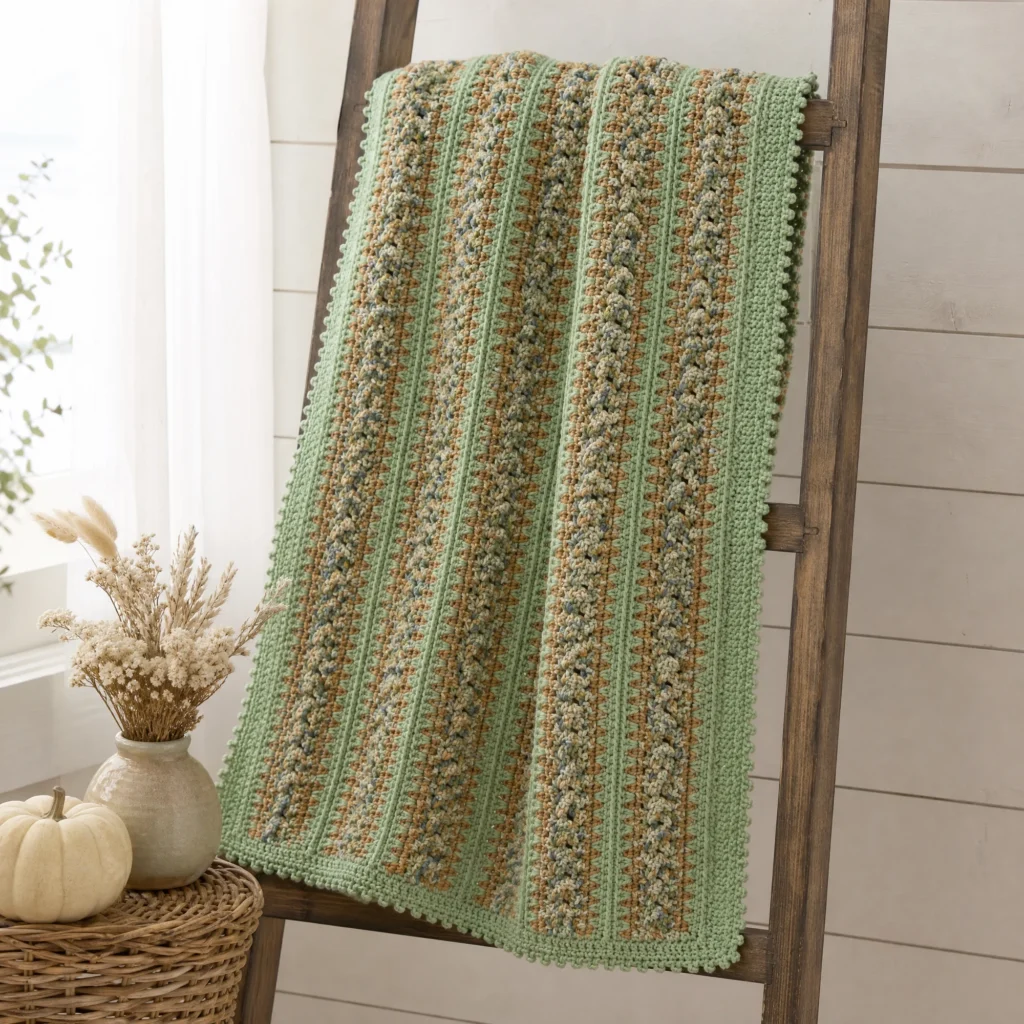
Country Home Crochet Throw Pattern
Create a cozy and inviting addition to your living space with the Country Home Crochet Throw. This warm-toned throw is perfect for snuggling on chilly nights or adding a decorative touch to your home. Below, you’ll find detailed instructions, essential materials, and helpful tips to successfully complete this project.

About the Blanket
The Country Home Crochet Throw showcases a beautifully textured design made from striking color blocks that intertwine to create a harmonious look. The stripes consist of rich browns and soft greens, evoking a sense of tranquility and warmth that fits seamlessly into any country-style decor. The throw is constructed from 13 strips that are combined and bordered, resulting in a finished piece that is both practical and aesthetically pleasing.
Finished Measurements
While the pattern does not specify exact measurements, the finished blanket measures a comfortable size suitable for draping over furniture or wrapping around yourself on cooler evenings.
Materials
Yarn
- RED HEART® “Super Saver®”
- 2 skeins each of:
- 336 Warm Brown (Color A)
- 661 Frosty Green (Color B)
- 4 skeins of:
- 305 Aspen Print (Color C)
- 2 skeins each of:
Crochet Hook
- 6.5 mm (US K-101/2)
Notions
- Yarn needle
Crochet Abbreviations
- ch = chain
- dc = double crochet
- sc = single crochet
- st(s) = stitch(es)
- rnd = round
- hdc = half double crochet
- sl st = slip stitch
-
- = repeat instructions between the asterisks
Pattern Notes
In this project, the throws are created using repetitive strip techniques, each associating colors in blocks. The use of different colors creates a textured and visually appealing design. There are several stages in the creation process, including making strips, working border sections, and assembly.
Pattern Instructions
Strip (Make 13)
With Color C, ch 9.
Row 1: Work (2 dc, ch 3, 2 dc) in 6th ch from hook, skip next 2 ch, dc in last ch, turn.
Rows 2–85: Ch 3 (counts as first dc), skip next 2 dc, (2 dc, ch 3, 2 dc) in ch-3 space, skip next 2 dc, dc in top of beginning ch, turn.
Fasten off.
Side Border
Work Side Border along each long edge of each Strip.
With right side facing, join Color A in last st to work along one long edge of each Strip.
Row 1: Ch 1, 2 sc in first row, [ch 1, sc] in each row to last row, 2 sc in last row, turn.
Row 2: Ch 1, sc in each of first 2 sc, *ch 1, skip next ch-1 space, sc in next sc; repeat from * across to last sc, sc in last sc.
Fasten off.
Strip Border
Work Strip Border around each Strip.
With right side facing, join Color B in beginning st to work along one long edge of each Strip.
Rnd 1: Ch 1, sc in first 2 sc, *[work 2 hdc in each corresponding ch-1 space 2 rows below (Row 1 of Side Border) pulling st up to current level] across to last 2 sc, sc in last 2 sc, ch 2, 2 sc in edge of Row 2 of Side Border, 2 sc in edge of Row 1 of Side Border, turn to work along short end of Strip, skip next 2 dc, 2 sc in next ch-3 space, skip next 2 dc, turn to work along opposite long edge of Strip, 2 sc in edge of Row 1 of Side Border, 2 sc in edge of Row 2 of Side Border, ch 2; repeat from *, join with a slip st to beginning sc.
Finishing
Assembly
With right side facing and holding 2 Strips together along long edges, join Color B in one corner with a slip st.
Row 1: Working in back loops only and working through sts of both Strips, slip st across to opposite corner to join Strips together. Repeat to join all Strips.
Border
With right side facing, join Color B in top right-hand corner ch-2 space with a slip st.
Rnd 1: Ch 3 (counts as first dc), 2 dc in corner ch-2 space, dc in each st and each ch-space around, working 3 dc in each corner ch-2 space, join with a slip st to beginning ch.
Rnd 2: Ch 1, sc in first 2 sts, (ch 3, slip st in last ch for picot), *sc in next 2 sts, (ch 3, slip st in last ch); repeat from * around, join with a slip st to beginning sc.
Fasten off and weave in ends.
Frequently Asked Questions
What crochet hook is used for this pattern?
The pattern recommends using a 6.5 mm (US K-101/2) crochet hook.
Is this project worked in rows or rounds?
The Country Home Crochet Throw is primarily worked in rows to create the strips, which are then assembled and bordered using rounds.
Do I need to assemble the strips?
Yes, the strips are joined together, and additional border work is performed to complete the throw.
How many strips are needed for this pattern?
You will need to make 13 strips in total for this throw.
Are there specific colors referenced in this pattern?
Yes, the pattern specifies using RED HEART® “Super Saver®” yarn in Warm Brown (Color A), Frosty Green (Color B), and Aspen Print (Color C).
Conclusion
The Country Home Crochet Throw combines rich colors and cozy textures to create a beautiful and functional piece for your home. Whether draped over your sofa or used as a warm blanket, this throw is sure to bring comfort and warmth. Follow the detailed instructions above and enjoy every step of creating your handmade crochet throw!