
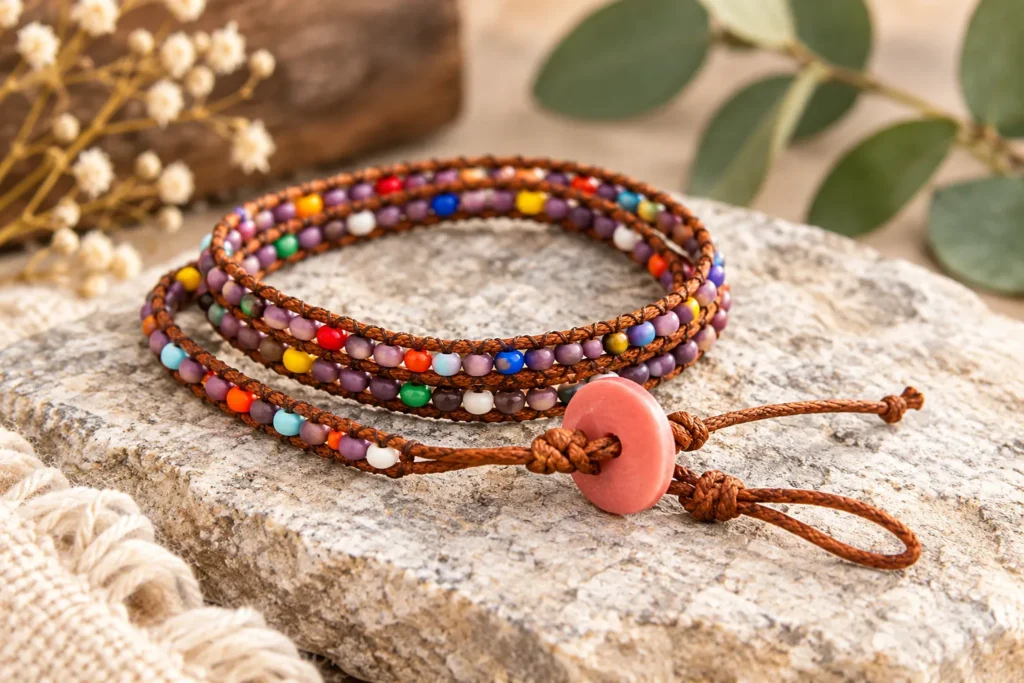
If you love relaxed, layered jewelry, this bohemian wrap bracelet with beads is a simple handmade project that combines seed beads, leather or waxed cotton cord, and a button closure.
The bracelet wraps around the wrist two or three times, giving it that classic boho look without requiring advanced jewelry-making skills. Once you understand the beading sequence, the method is repetitive and easy to customize with different bead colors, cord types, and button styles.
Why You’ll Love This Boho Wrap Bracelet
This project is:
- beginner-friendly
- easy to personalize
- lightweight and comfortable
- perfect for stacking
- ideal for friendship bracelets and handmade gifts
- easy to adapt with different beads and cord colors
You can keep the design neutral and earthy or make it brighter with colorful seed beads.
Materials
You will need:
- glass seed beads or larger beads if using thicker cord
- leather cord or waxed cotton cord, around 1 mm
- button for the closure
- strong polyester sewing thread in a color that coordinates with the cord
Equipment
You will also need:
- clipboard or a piece of cardboard with a paper clamp, optional
- thin needle
- scissors
How to Make a Bohemian Style Wrap Bracelet with Beads

Step 1: Measure and Cut the Cord
Start by measuring around your wrist.
The cord should be long enough to wrap around your wrist at least two or three times, plus about 3 cm extra for the closure.
Then double that amount because the bracelet uses the cord folded in half.
It is better to cut a little extra than to end up short.
Step 2: Fold the Cord and Make the Closure Loop
Fold the cord in half.
At the folded end, create a loop large enough for your button to pass through.
Tie a knot directly below the loop to secure it.
This loop will become one side of the bracelet closure.
Before tightening completely, check that the button can pass through the loop without being too loose.
Step 3: Secure the Bracelet to Your Work Surface
If you are using a clipboard, clamp the loop under the clip.
You can also secure the bracelet to a piece of cardboard with a paper clamp.
The two cord strands should hang straight downward.
Keeping the bracelet secure makes it much easier to maintain even tension while adding the beads.
Step 4: Attach the Beading Thread
Tie the sewing thread onto the right cord.
Leave a fairly long thread tail.
Do not trim it yet because you will use this loose end later to secure the beginning of the bracelet.
Thread your needle onto the working thread.
You are now ready to begin adding beads.
Step 5: Add the First Seed Bead
Pick up one seed bead with the needle.
Position the bead between the two cord strands.
To secure it, follow this thread path:
- Pass the thread under the right cord.
- Pass the needle through the bead.
- Bring the thread over the left cord.
- Now reverse the direction.
- Pass the thread under the left cord.
- Go back through the same bead.
- Bring the thread over the right cord.
Repeat this process until the thread has passed through the bead a total of four times — twice in each direction.
This secures the bead firmly between the two cords.
Step 6: Continue Adding Beads
Pick up the next bead.
Position it directly below the first bead.
Repeat the same stitching process:
- under one cord
- through the bead
- over the opposite cord
- reverse direction
- pass back through the bead
Continue adding beads one at a time.
As the bracelet grows, the beads should form a neat row between the two outer cords.
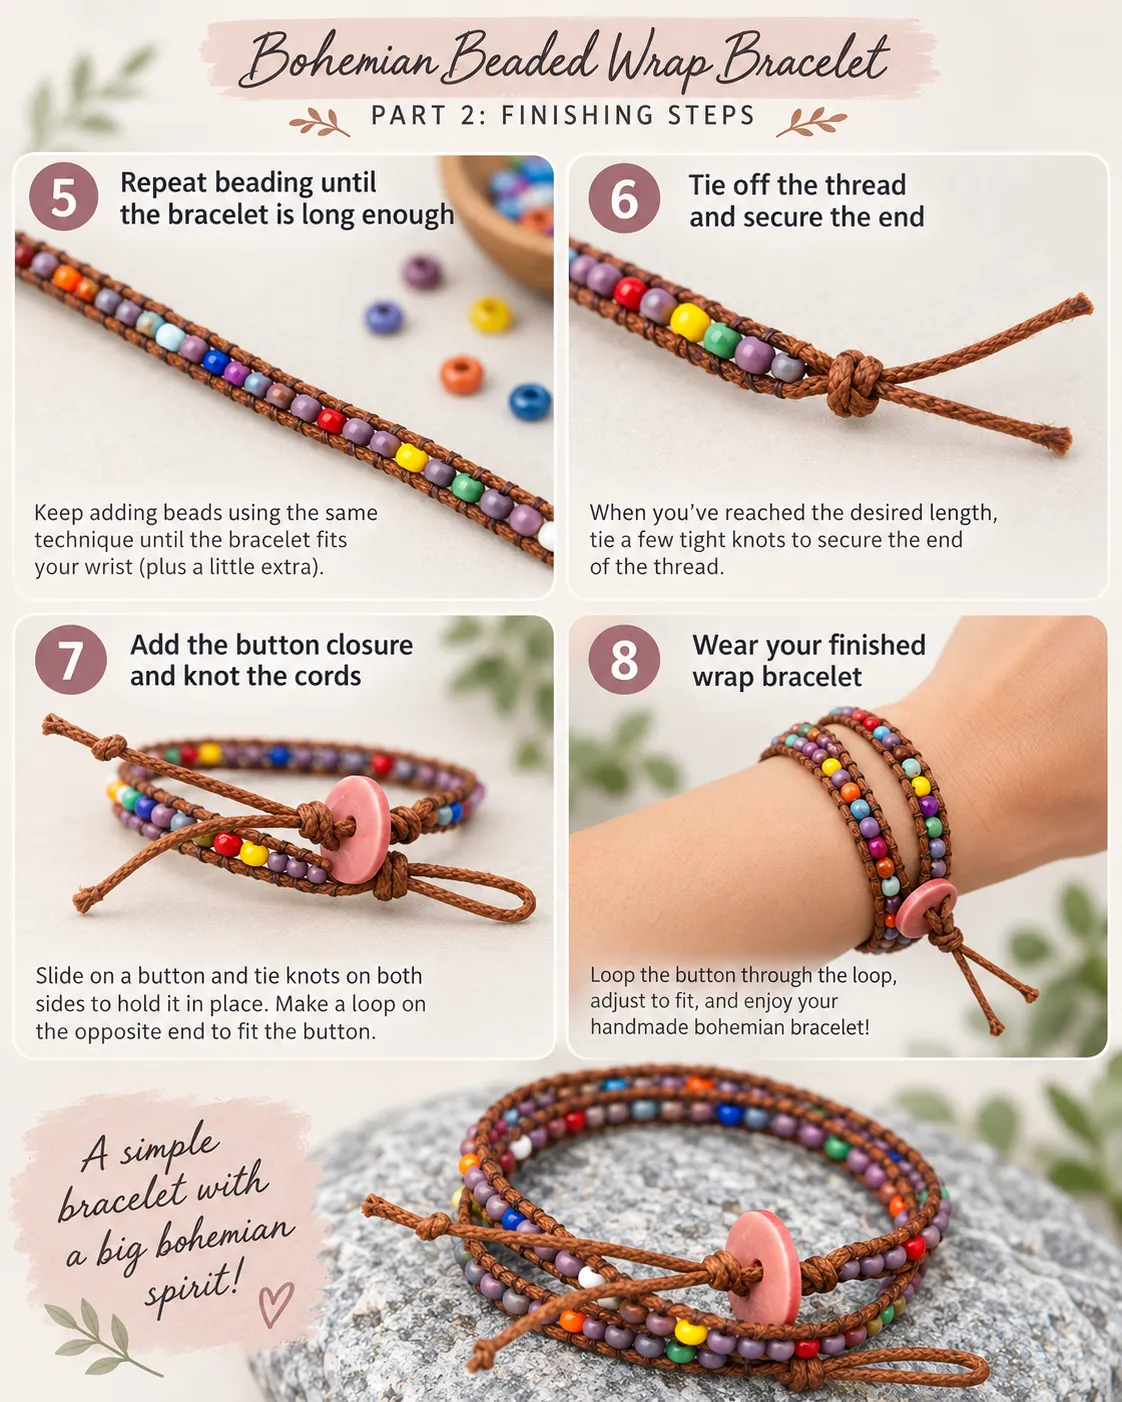
Keep working until the bracelet reaches the length you need for two or three wraps around your wrist.
Keep the Beadwork Even
Try to maintain consistent tension throughout the bracelet.
If the thread is too loose, the beads may shift.
If it is too tight, the cords may pull inward.
A neat bracelet should have:
- evenly spaced beads
- straight outer cords
- consistent tension
- a flexible feel
Check the bracelet against your wrist occasionally as you work.
Step 7: Secure the Working Thread
When the bracelet has reached the desired length, tie off the working thread.
Then pass the needle back through approximately three beads.
This helps secure the thread end inside the beadwork.
Once the thread feels stable, trim off the excess.
Step 8: Add the Button Closure
Tie a knot in the two cord ends near the final bead.
Slide the button onto the cords.
Then tie another knot below the button to hold it securely in place.
Trim the cords, leaving approximately 3 cm beyond the button knot.
The button should fit easily through the loop you created at the beginning.
Step 9: Finish the Cord Ends
Tie a small knot at the end of each loose cord.
These knots help keep the ends neat and reduce the chance of the cord unraveling.
Trim any excess if necessary.
Step 10: Secure the Beginning Thread Tail
Return to the long loose thread tail you left at the beginning of the bracelet.
Thread it through the needle.
Pass it back through a few beads several times to secure it.
Trim the excess thread.
Your bohemian wrap bracelet is now finished.
How the Beading Technique Works
The bead sits between two parallel cords.
The sewing thread travels:
under one cord → through the bead → over the other cord
and then returns in the opposite direction.
Repeating this several times locks the bead in place.
The result is a row of beads framed by two cords.
Choosing Beads for a Boho Bracelet
You can use many different bead styles.
Good options include:
- glass seed beads
- metallic seed beads
- matte beads
- faceted beads
- gemstone beads
- wooden beads
- ceramic beads
If you use thicker cord, choose beads with larger holes.
Bohemian Color Ideas
For a classic earthy look, try:
- turquoise and brown
- cream and bronze
- amber and tan
- black and gold
- olive green and beige
For something brighter:
- coral and turquoise
- rainbow beads
- pink and gold
- blue and silver
- purple and cream
How Long Should a Wrap Bracelet Be?
The finished bracelet should wrap comfortably around your wrist two or three times.
The exact length depends on:
- wrist size
- cord thickness
- bead size
- desired number of wraps
Measure around your wrist first and check the fit as you work.
Tips for a Neat Boho Wrap Bracelet
Keep the Cord Tension Even
The two outer cords should stay parallel.
Avoid pulling one side tighter than the other.
Secure the First Beads Carefully
The first few beads set the alignment for the rest of the bracelet.
Take your time at the beginning.
Check the Button Loop
Before finishing the bracelet, confirm that the button fits through the closure loop.
It should pass through securely without being too loose.
Use Strong Thread
The thread passes through each bead multiple times, so strong polyester sewing thread is a good choice.
Frequently Asked Questions
Is this wrap bracelet beginner-friendly?
Yes. The main technique is repetitive and becomes easier after the first few beads.
What size cord should I use?
The original version uses approximately 1 mm leather or waxed cotton cord.
How many times should the thread pass through each bead?
Pass through each bead a total of four times — twice in each direction.
Can I use larger beads?
Yes. If you use thicker cord, larger beads may work better because they usually have larger holes.
How does the bracelet close?
A loop is created at one end and a button is attached at the other.
The button passes through the loop to secure the bracelet.
Can I make a single-wrap version?
Yes. Simply shorten the bracelet so it wraps around the wrist once instead of two or three times.
Quick Pattern Summary
- Measure the cord for two or three wraps.
- Add 3 cm for the closure and double the length.
- Fold the cord in half.
- Create a button loop.
- Secure the bracelet to a clipboard.
- Tie the thread to the right cord.
- Add the first bead.
- Stitch through it four times.
- Continue adding beads.
- Work until the bracelet reaches the desired length.
- Tie off the thread.
- Weave the thread through three beads.
- Add the button.
- Tie the button securely.
- Trim the cords, leaving about 3 cm.
- Tie small knots at the cord ends.
- Secure the beginning thread tail.
- Trim and wear your bracelet.
Make Your Own Bohemian Wrap Bracelet
This bohemian style wrap bracelet with beads is a simple way to create handmade jewelry with a layered, relaxed look.
The basic technique can be reused with many different beads and color combinations, so once you understand the method, you can make several versions that look completely different.
It is a great project for friendship gifts, summer jewelry, festival-inspired accessories, or simply adding a handmade boho piece to your own collection.
