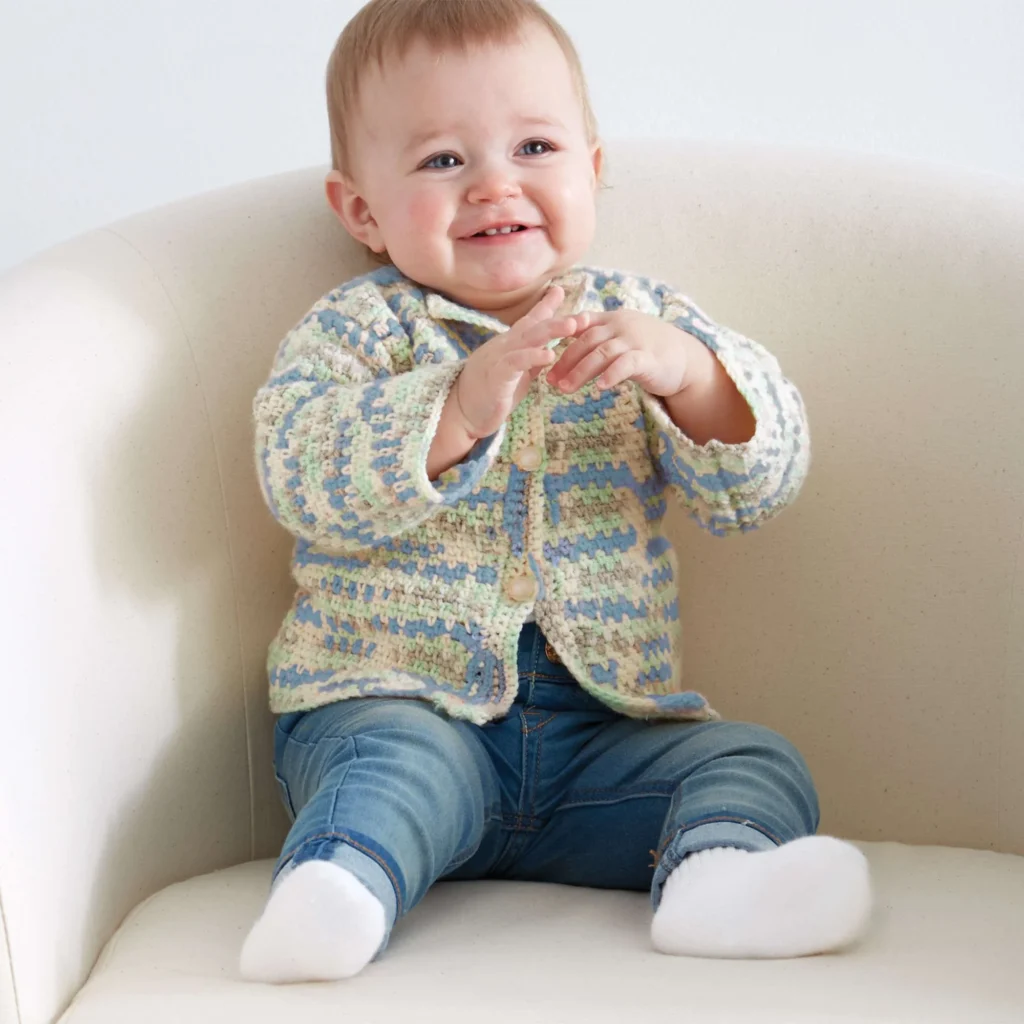
Baby’s First Crochet Cardigan Pattern
Looking for a delightful project to crochet for your little one? This Baby’s First Crochet Cardigan pattern is perfect for beginners and those who love creating cute garments. With its comforting Cool Blue Ombre hues, this cardigan will keep your baby snug and stylish!
About the Design
This cardigan features a simple yet elegant stitch pattern, ideal for infants aged 6 to 12 months and 18 to 24 months. The unisex design makes it suitable for both boys and girls, while the button-up feature allows for easy dressing. The ombre yarn creates a beautiful gradient effect, giving the cardigan a unique and eye-catching look that is perfect for any occasion.
Sizes
The pattern is designed for the following sizes:
- 6 to 12 months
- 18 to 24 months
Finished Measurements
- Baby size 6-12 months: approximately 12 inches (30.5 cm) in length
- Baby size 18-24 months: approximately 15.5 inches (39.5 cm) in length
Materials

To create this beautiful cardigan, you will need the following materials:
Yarn
- Bernat® Baby Sport™ (Ombres)
- Cool Blue Ombre (24129): 1 ball (for sizes 6/12 and 18/24 months)
- Weight: 9.8 oz/280 g
- Length: 893 yds/816 m
Crochet Hook
- U.S. G/6 (4 mm) crochet hook or size needed to obtain gauge
Notions
- Stitch markers: 4
- Buttons: 3 (or 4 for variation)
Gauge
Make sure to obtain the correct gauge for the cardigan:
- 49 (57) actual stitches + ch-1 spaces in the pattern to a specified measurement.
Crochet Abbreviations
Familiarize yourself with these common crochet abbreviations as you work the pattern:
- Ch: Chain
- Sc: Single crochet
- RS: Right side
- St: Stitch
- Rep: Repeat
Pattern Notes
- The cardigan is constructed in separate pieces and assembled at the end.
- The pattern relies on keeping track of stitches with stitch markers, especially for the shoulder seams and sleeve attachments.
Back Panel
Instructions
-
Chain: Ch 50 (58).
1st row (RS): 1 sc in 2nd ch from hook.
*Ch 1. Skip next ch. 1 sc in next ch. Rep from * to end of chain. Turn.
49 (57) sts (sc and ch-1 sps). -
2nd row: Ch 1. 1 sc in first sc.
*1 sc in next ch-1 sp. Ch 1. Skip next sc. Rep from * to last ch-1 sp and sc.
1 sc in last ch-1 sp. 1 sc in last sc. Turn. -
3rd row: Ch 1. 1 sc in first sc.
*Ch 1. Skip next sc. 1 sc in next ch-1 sp. Rep from * to last 2 sc. Ch 1.
Skip next sc. 1 sc in last sc. Turn. -
Continue: Last 2 rows form pat.
Continue in pat until work from beg measures 12 (15½)” [30.5 (39.5) cm], ending on a 3rd row.
Fasten off.
Right and Left Fronts (Make 2 Pieces Alike)
Instructions
-
Chain: Ch 26 (30).
Work from 1st to 3rd row as given for Back.
25 (29) sts at end of row. -
Fasten off.
Sleeves
Instructions
-
Chain: Ch 48 (54).
Work from 1st to 3rd row as given for Back.
47 (53) sts at end of row. -
Continue: Continue in pat until work from beg measures 8 (9)” [20.5 (23) cm], ending on a 3rd row.
Fasten off.
Finishing (Assembly)
-
Shoulder Seams: Place markers 2¾ (3¼)” [7 (8.5) cm] from side edges along last row for shoulders on Back and Fronts. Sew shoulder seams.
-
Sleeve Insertion: Place markers 5 (5½)” [12.5 (14) cm] down from shoulders on Front and Back for sleeves. Sew in Sleeves between markers.
-
Side and Sleeve Seams: Sew side and sleeve seams.
Button and Buttonhole Edging
Note: Place top marker 5” [12.5 cm] down from top edge, bottom marker 1” [2.5 cm] up from bottom edge, and remaining 1 (2) markers spaced evenly between.
Left Front Edging (RS)
-
1st row (RS): Join yarn with sl st to top of Left Front corner. Ch 1. Work 51 (66) sc evenly down Left Front. Turn.
-
2nd row: Ch 1. 1 sc in each sc to end of row. Turn.
-
3rd row: Ch 1. 1 sc in each sc to marked sc.
(Ch 2. Skip next 2 sc. 1 sc in each sc to next marked sc) 2 (3) times.
Ch 2. Skip next 2 sc. 1 sc in each sc to end of row. Turn. -
4th row: Ch 1. 1 sc in each sc to end of row. Fasten off.
-
Buttons: Sew buttons over buttonholes on:
- Left Front for Girl’s Version
- Right Front for Boy’s Version
Frequently Asked Questions
What is the best yarn for this cardigan?
BDetailed instructions specify the use of Bernat® Baby Sport™ (Ombres) in Cool Blue Ombre for this pattern.
What crochet hook do I need?
You will need a U.S. G/6 (4 mm) crochet hook or whatever size you need to obtain gauge.
Does this project require assembly?
Yes, you will need to assemble the different pieces of the cardigan once you complete them.
Can I adjust the size of the cardigan?
Yes, you may adjust the chain counts in each section to accommodate the desired size, but make sure to maintain the stitch pattern.
Conclusion
This Baby’s First Crochet Cardigan Pattern serves as a wonderful guide for anyone looking to create a special garment for babies. The combination of the lovely ombre yarn and simple construction makes it an enjoyable project to whip up. So gather your materials, follow the steps, and soon you’ll have a beautiful cardigan ready for your little one! Happy crocheting!