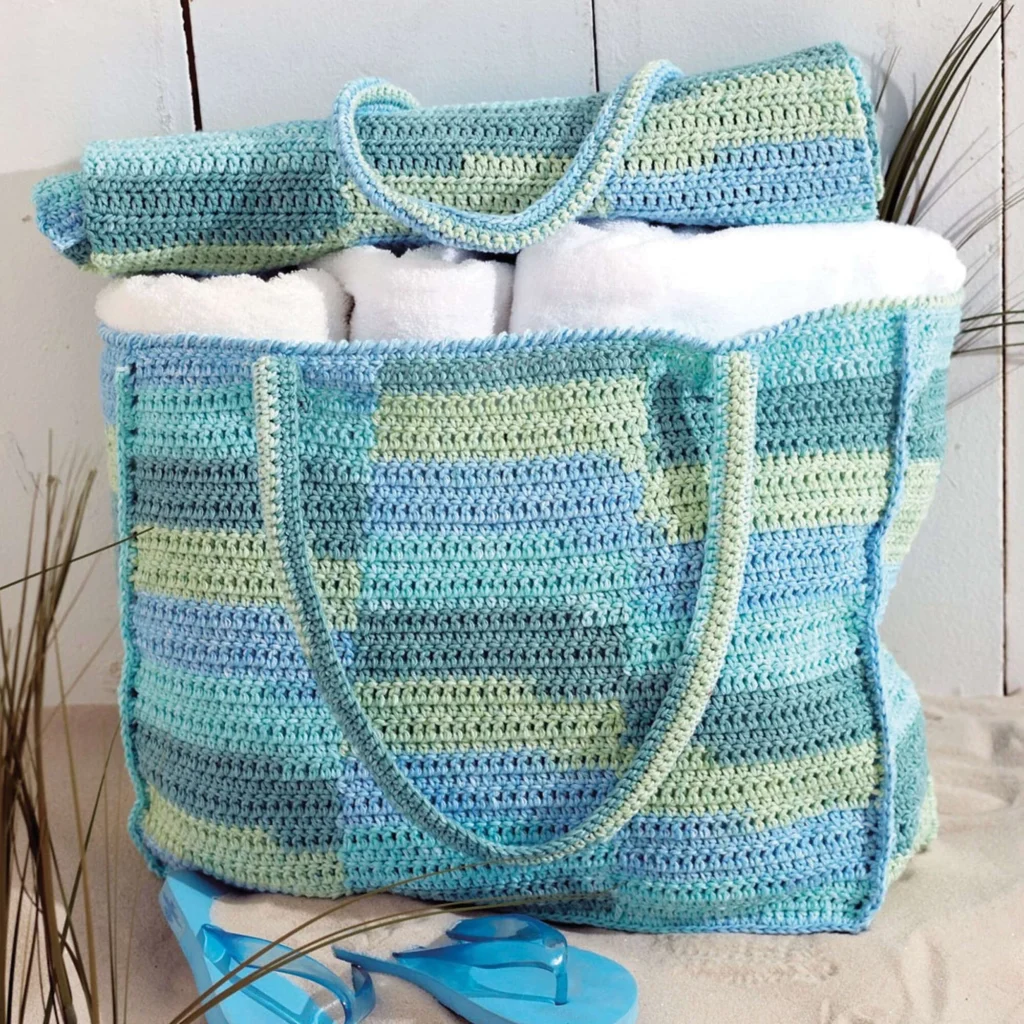
Beach Bag & Mat Pattern
Transform your summer outings with this versatile Beach Bag & Mat pattern! This functional crochet bag not only allows you to carry your essentials but also features a detachable mat for lounging on the beach or park. This beach bag design combines style and practicality, making it a delightful addition to your warm-weather adventures.
About the Bag
The Beach Bag & Mat is perfect for carrying your beach day essentials, such as towels, sunscreen, snacks, and even a good book. With its sturdy design and roomy interior, you’ll find it easy to transport everything you need for a full day of fun in the sun.
The accompanying mat unfolds easily, providing a comfortable space to relax. Whether you’re picnicking or sunbathing, this mat ensures you have a cozy spot to enjoy your day.
Materials

To create this beautiful and functional Beach Bag & Mat, you will need the following materials:
Yarn
- Lily Sugar’n Cream Stripes (56.7 g / 2 oz): 21143 (Country Stripes) — 16 balls
Crochet Hook
- Size 4 mm (U.S. G or 6), or size needed to obtain gauge
Crochet Abbreviations
Familiarize yourself with the following crochet abbreviations before getting started:
- ch: chain
- hdc: half double crochet
- dc: double crochet
- sc: single crochet
- sl st: slip stitch
Finished Measurements
The finished dimensions of your Beach Bag & Mat will be approximately:
- Bag Width: Varies (customizable depending on bag body)
- Bag Height: 14 inches (35.5 cm)
- Mat Length: 45 inches (114.5 cm)
Construction Overview
The Beach Bag & Mat is constructed in several parts: the front and back panels of the bag, the side/bottom panel, the straps, and the mat. Each panel is worked separately and then assembled. The design utilizes color changes, which add a beautiful striped pattern to the project.
Instructions
Front Panel
- With the 1st ball, starting at the beginning of contrast 1 section, ch 22.
- With the 2nd ball, starting at the beginning of contrast 2 section, ch 23.
- With the 3rd ball, starting at the beginning of contrast 3 section, ch 26.
- Total ch: 71 ch.
1st row: (RS)
- With the 3rd ball, 1 hdc in the 3rd ch from the hook.
- 1 hdc in each of the next 22 ch.
- With the 2nd ball, 1 hdc in each of the next 23 ch.
- With the 1st ball, 1 hdc in each of the next 23 ch.
- Turn.
Total: 69 hdc.
2nd row:
- With the 1st ball, ch 3 (counts as dc).
- 1 dc in each of the next 22 hdc.
- With the 2nd ball, 1 dc in each of the next 23 hdc.
- With the 3rd ball, 1 dc in each of the next 23 hdc.
- Turn.
3rd row:
- With the 3rd ball, ch 2 (do not count as st).
- 1 hdc in each of the first 23 dc.
- With the 2nd ball, 1 hdc in each of the next 23 dc.
- With the 3rd ball, 1 hdc in each of the next 23 dc.
- Turn.
Last 2 rows form pattern.
Continue working in pattern until the work from the beginning measures 14 inches (35.5 cm), ending with the 2nd row. Fasten off.
Back Panel
- Work from “” to “” as given for the Front.
- Continue working in pattern until the work from the beginning measures 64 inches (162.5 cm), ending with the 2nd row. Fasten off.
Side/Bottom Panel
- Ch 18.
1st row: (RS)
- 1 hdc in the 3rd ch from the hook.
- 1 hdc in each ch to the end of ch.
- Turn.
Total: 16 hdc.
2nd row:
- Ch 3 (counts as dc).
- 1 dc in each hdc to the end of the row.
- Turn.
3rd row:
- Ch 2 (do not count as st).
- 1 hdc in each dc to the end of the row.
- Turn.
Repeat the last 2 rows until the work from the beginning measures 45 inches (114.5 cm), ending with the 2nd row. Fasten off.
Straps (Make 2)
- Ch 113.
1st row: (RS)
- 1 sc in the 2nd ch from the hook.
- 1 sc in each ch to the end of ch.
- Turn.
2nd to 5th rows:
- Ch 1.
- 1 sc in each sc to the end of the row.
- Turn.
Fold Handle in half lengthwise and work through both thicknesses, 1 sc in each st to the end of the row. Fasten off.
Finishing
Pinning/Covering
- Pin pieces to measurements.
- Cover with a damp cloth, leaving the cloth to dry.
Bag Assembly
- With WS of Front and Side together, join yarn with sl st to the top left corner.
- Ch 1.
- Working through both thicknesses, work 1 row of sc down the left side, across the bottom, and up the right side of the Bag. Fasten off.
Mat Attachment Allowance
- Repeat for the Back, leaving remaining fabric free for the Mat.
Front Edging
- With RS facing, join yarn with sl st to the top of the Front.
- Ch 1.
- 1 sc in the same space as sl st.
- Work 1 row of sc across the top of the Front. Do not turn.
2nd row:
- Working from left to right instead of right to left as usual, work 1 reverse sc in each sc to the end of the row. Fasten off.
Handle and Mat Finishing
- Sew Handle to Front as shown in the picture.
- Roll Mat inside of the bag.
- Sew Handle to Back at the same position as for Front.
Frequently Asked Questions
What crochet hook is used for this pattern?
The pattern requires a Size 4 mm (U.S. G or 6) crochet hook or a size needed to obtain gauge.
Is this project worked in rows or rounds?
This Beach Bag & Mat project is worked in rows, allowing for a flat and substantial structure for both the bag and the mat.
Does this crochet project require assembly?
Yes, the project requires assembly to join the individual panels of the bag together, as well as sewing the handles into place.
What materials are required to complete the project?
You will need Lily Sugar’n Cream Stripes yarn (16 balls), a size 4 mm crochet hook, and basic sewing materials for finishing the project.
Conclusion
This Beach Bag & Mat Pattern offers a delightful project that combines functionality with beautiful design. It’s versatile, allowing you to utilize the bag for various outdoor activities while providing a comfy mat for rest. Enjoy crafting this stylish accessory for your summer outings! Make it in your favorite colors and share your creations with family and friends. Happy crocheting!