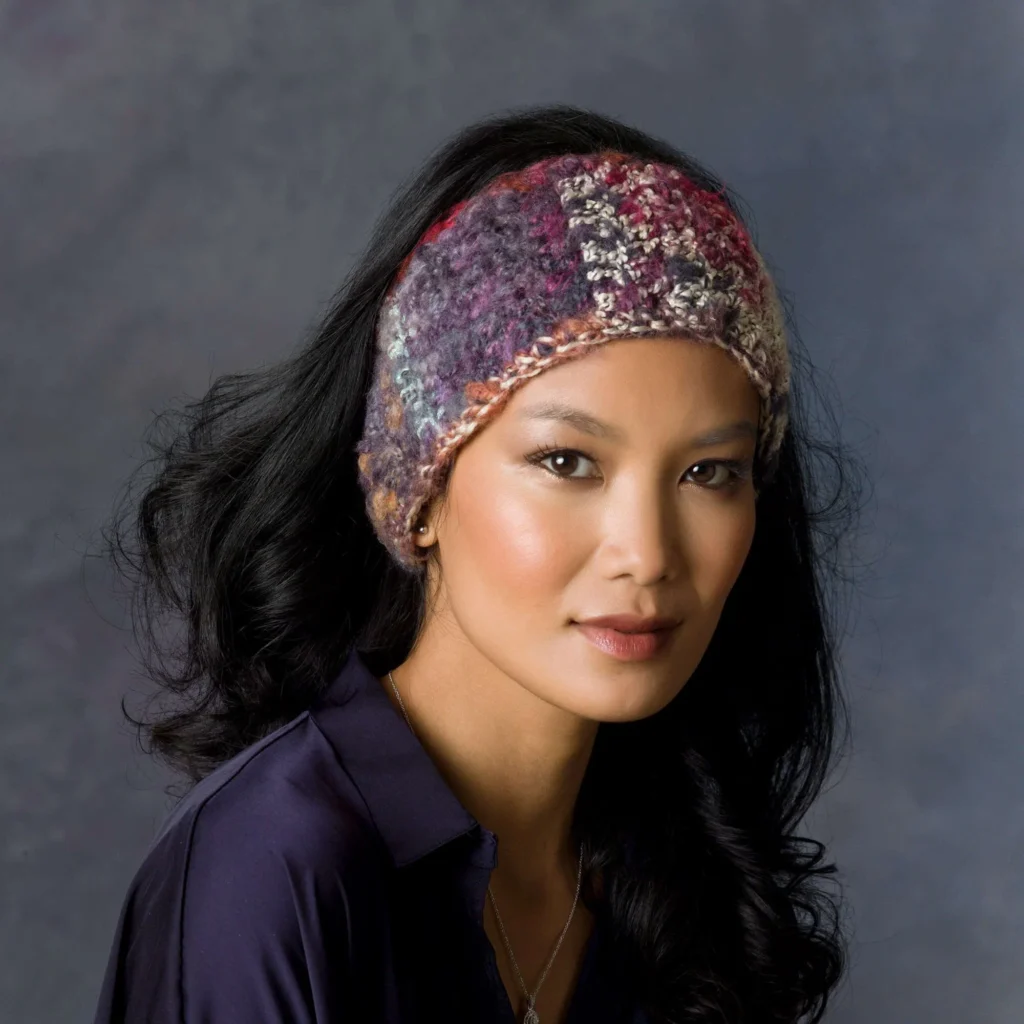
Crochet Artsy Headband Pattern
Creating a unique accessory like a crochet headband is both fun and rewarding. This Crochet Artsy Headband Pattern combines vibrant colors and creative design, perfect for anyone looking to enhance their crochet collection or add a stylish touch to their outfits. In this article, you will discover a step-by-step guide to making this fashionable headband using RED HEART® Boutique™ Magical™ yarn.
About the Crochet Project
The Crochet Artsy Headband is a simple yet chic accessory that can be worn in various styles. The use of two beautiful colorways — Crystal Ball A (1101) and Hocus Pocus B (1406) — creates a playful look that stands out. Whether you’re wearing it to keep your hair in place while exercising or as a trendy fashion statement, this headband is sure to turn heads.
Materials

Before diving into the crochet instructions, you’ll need to gather your materials.
Yarn
- RED HEART® Boutique™ Magical™ yarn:
- 1 ball of 1101 Crystal Ball A
- 1 ball of 1406 Hocus Pocus B
Crochet Hook
- 6.5mm [US K-10½] crochet hook
Notions
- Yarn needle
Crochet Abbreviations
To help you navigate the pattern, here are some common crochet abbreviations used in this project:
- Ch: Chain
- Dc: Double crochet
- Sc: Single crochet
- Sl st: Slip stitch
Pattern Notes
The headband is created using a technique that combines two strands of yarn, which adds bulk and texture, making it perfect for colder seasons. The pattern is primarily worked in rows, allowing for easy adjustments in width.
Headband Instructions
Starting the Headband
The headband begins with a simple foundation chain that sets the base for the project.
-
Ch 12.
-
Row 1:
- Dc in the 4th ch from the hook and each ch across – 10 dc.
Continuing the Rows
For the main body of the headband, you will be repeating the same stitch across several rows.
-
Rows 2–26: (repeat instruction exactly for every row from 2 through 26)
- Ch 3 (counts as dc here and throughout), turn,
- Dc in each dc across – 10 dc.
-
Fasten off.
Finishing (Ties)
The headband is completed with ties at both ends for a comfortable fit.
Top Row (Right Side)
- With 1 strand of A and B held together:
- Ch 28,
- Slip stitch in the 6th stitch on the last row of the headband,
- Sc in each stitch across to the first corner,
- Ch 1, turn to work along the long edge,
- Sc evenly spaced to the opposite short edge,
- Ch 1, turn to work along the short edge and sc in each stitch to the 6th stitch,
- Ch 28.
- Fasten off.
Bottom Row (Wrong Side)
- With 1 strand of A and B held together:
- Join yarn in the same stitch as the first stitch of the Top Row,
- Ch 1,
- Sc in each unworked stitch of the short end to the first corner,
- Ch 1, turn to work along the opposite long edge of the headband,
- Sc evenly spaced along the long edge to the opposite short edge,
- Ch 1, turn to work along the short edge,
- Sc in each unworked stitch to the center stitch,
- Slip stitch in the center stitch.
- Fasten off.
Assembly / Finishing
After crocheting, ensure to weave in any loose ends to give your headband a clean finish. This step is essential for a polished look, especially if you plan to gift the headband or wear it yourself.
Understanding the Construction
This headband pattern is straightforward, making it an enjoyable project for crocheters. Using double crochet stitches creates a stretchy fabric that molds comfortably around your head. The addition of ties allows for easy adjustment, making it suitable for different head sizes.
The combination of colors not only adds visual interest but also provides a soft texture typical of the RED HEART® Boutique™ Magical™ yarn. The colors blend seamlessly, transitioning beautifully thanks to the multicolor effect of the yarn.
Variations and Customizations
If you’re looking to customize your headband, consider experimenting with additional yarn colors or patterns. Adding embellishments such as buttons or flowers can also bring a unique flair to your design. For instance, using a single strand of yarn instead of holding two together can create a thinner, more delicate headband for warmer months.
Frequently Asked Questions
What crochet hook is used for this pattern?
The pattern uses a 6.5mm [US K-10½] crochet hook.
Is this project worked in rows or rounds?
This project is worked in rows.
Does this crochet project require assembly?
Yes, there is a finishing process that involves creating ties at the ends of the headband.
How many yards of yarn are needed?
For this project, you will need 1 ball each of 1101 Crystal Ball A and 1406 Hocus Pocus B in the RED HEART® Boutique™ Magical™ yarn.
Can I adjust the size of the headband?
Yes, you can adjust the size of the headband by increasing or decreasing the number of foundation chains.
Conclusion
The Crochet Artsy Headband Pattern is a delightful and stylish project perfect for anyone looking to express their creativity. With vibrant color combinations and simple construction, this pattern is perfect for adding a personal touch to your accessory collection or gifting to a loved one. So grab your yarn and hook, and enjoy the process of creating something beautiful today!