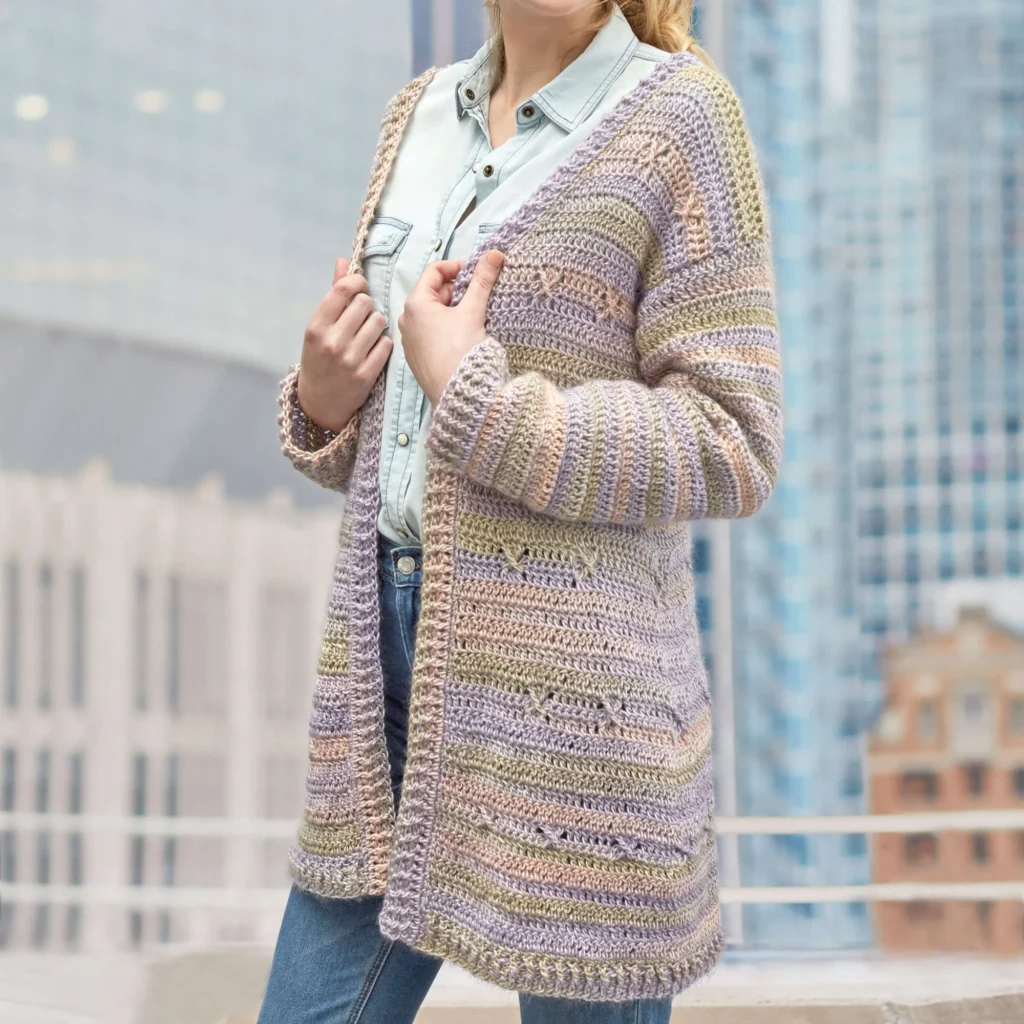
Around-Town Crochet Cardigan Pattern: A Cozy Guide
Welcome to my crochet blog! Today, we’re diving into the delightful Around-Town Crochet Cardigan Pattern. This cardigan is perfect for layering and showcases a beautiful texture thanks to the combination of stitches used throughout. Grab your supplies and let’s get started on crafting this wearable piece of art!
Materials Needed

To create your Around-Town Crochet Cardigan, gather the following materials:
-
Yarn:
- RED HEART® Unforgettable™
- You will need 5 (6, 7, 8, 9, 10, 11) balls of yarn in the color 3932 Springtime (Art. E793).
- Each ball weighs 3.5 oz (100 g) and has a length of 270 yd (247 m).
-
Crochet Hook:
- Susan Bates® Crochet Hook, size 5.5 mm [US I-9].
-
Notions:
- 4 locking stitch markers
- Yarn needle.
Understanding the Pattern
Pattern Notes
- The cardigan is constructed in five pieces: the back, left front, right front, and two sleeves.
- Don’t fret if the fronts seem a bit narrow while you are crocheting. A 2” [5 cm] edging will be added during the finishing process.
- It’s essential to read through each row’s instructions before you begin to avoid any confusion while stitching.
Gauge and Stitch Counts
This pattern includes detailed stitch counts and variations for sizes X-Small, Small, Medium/Large, X-Large, 2X-Large, 3X-Large, and 4X/5X-Large, which can make it a bit tricky, so pay close attention to the notes as you move through the instructions.
Step-by-Step Instructions
BACK
Lower Ribbing
- Row 1 (wrong side): Fdc 81 (91, 101, 111, 121, 131, 141).
- Row 2: Start with stacked-dc in the first stitch, followed by alternating Fpdc and Bpdc until the end, turning when done.
- Continue with this established pattern for the next rows, incorporating Field stitches and Cross stitches at specific intervals as noted in the detailed instructions above.
Keep following the provided instructions for filling in the Field and Cross stitch rows, decreasing stitches as necessary, until you reach the desired length and shape of the back.
LEFT FRONT
- Start similarly with the lower ribbing: Row 1 (wrong side): Fdc 31 (37, 41, 47, 51, 57, 61).
- Follow through to shape the neck after establishing the ribbing with decreases, Field stitches and Cross stitches.
Take note of the specific rows for shaping the neck, as they differ slightly from the back.
RIGHT FRONT
- The right front follows the same instructions as the left but remember to mirror any shaping as required.
SLEEVES (Make 2)
- Begin at the top of the sleeve with Fdc 55 (55, 63, 63, 67, 69, 73).
- The sleeves will require you to work standard dc rows and then do decreases to create a tailored fit.
Cuff Ribbing
- Finish the sleeves with a ribbing that contrasts the body stitches, giving it a polished finish.
Finishing Touches
- Block all pieces to meet schematic measurements for optimal fit.
- Join the shoulder seams and sleeves, ensuring everything aligns perfectly.
- Add the front edging around the cardigan for that perfect finish.
Conclusion
The Around-Town Crochet Cardigan Pattern is a charming project that’s not only cozy but also stylish. Whether you’re new to crochet or looking for a project to enjoy on a quiet evening, this cardigan is perfect. Wear it during chilly evenings out or simply around the house as a cozy piece.
Make sure to share your project images and experiences in the comments. Happy crocheting! Don’t forget to visit my blog for more crochet tips and patterns, and if you’d like to dive deeper into the world of crochet techniques, check our other sections.
Additional Resources
For more details on various crochet techniques, check out this Red Heart crochet guide.
Happy crafting!