
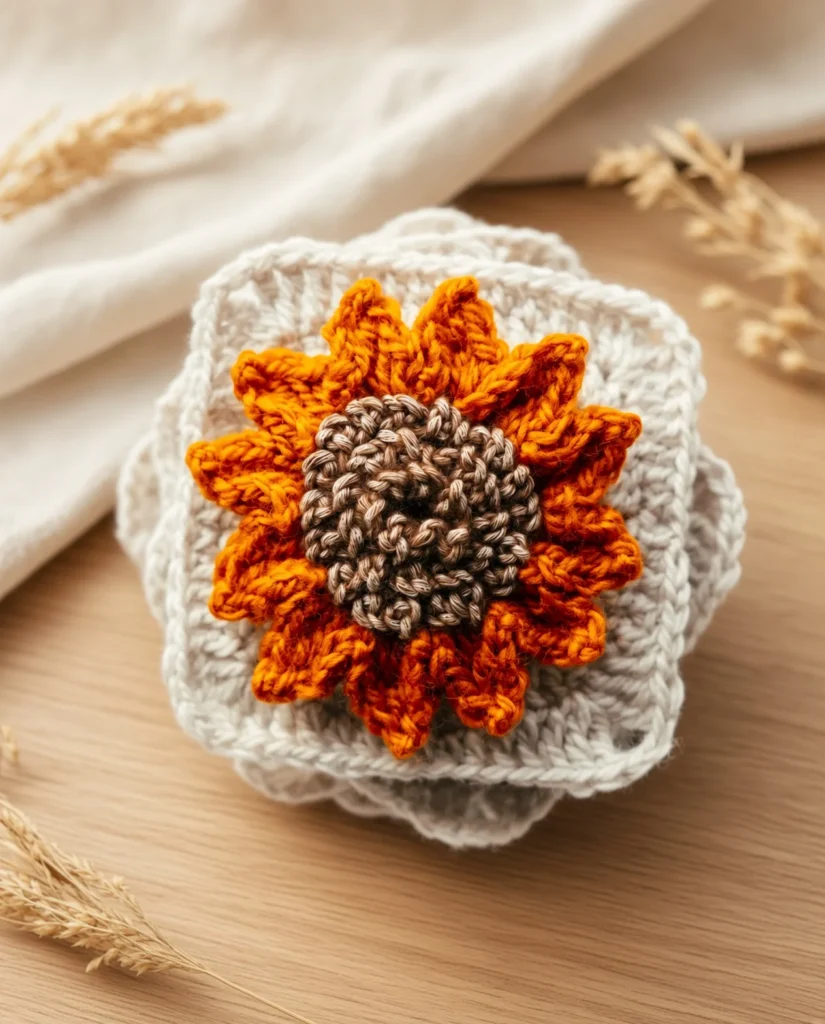
Bring a touch of summer sunshine into your crochet projects with this breathtaking 3D Sunflower Granny Square. Unlike flat, color-work motifs, this pattern uses clever stitching techniques to create a truly dimensional flower that pops right off your hook. The design features a highly textured, raised seed center worked exclusively in the front loops, surrounded by beautifully layered and pointed petals.
This square perfectly bridges the gap between art and functionality by placing this stunning, botanical 3D motif on a classic, sturdy granny square background. The result is a deeply textured square that is incredibly satisfying to make and even more satisfying to look at. Whether you are building a summer-themed blanket, creating a rustic pillow cover, or just want to make a standalone coaster, this pattern is a fantastic way to showcase your crochet skills.
Because this pattern utilizes a unique method of working back and forth between front and back loops across multiple rounds, it is best suited for intermediate crocheters or adventurous beginners who are comfortable reading patterns and managing multiple loop layers. If you love floral and dimensional designs, you will absolutely adore working on this cheerful sunflower motif!
Materials Needed
- Yarn of Your Choice- 3 colors, the sample is made with dk sport wool yarn
- Crochet Hook, we used a 3.50 mm hook
- Darning Needle
- Scissors
Abbreviations Used
- BLO – Back Loop Only
- FLO – Front Loop Only
- ch – Chain
- dc – Double crochet
- hdc – Half double crochet
- inc – Increase (2 stitches in one stitch)
- pic – Picot
- sc – Single crochet
- slst/sl st – Slip stitch
- st(s) – Stitch(es)
- tr – Treble crochet
This pattern uses USA crochet terminology.
Pattern Notes
Working with front and back loops creates the magic behind this 3D effect. When instructed to work in the BLO, you are leaving the front loop completely untouched to be used in a later round. This builds layers. Additionally, when creating the petals, you will be working a picot stitch (denoted as ch-2 pic) which gives the tip of each sunflower petal a distinct, pointy shape. Take your time when transitioning between the front and back loops, and keep your tension even to ensure your flower lays flat against the granny square border once assembled.
Pattern Instructions
Sunflower Center
Round 1-Sunflower Center: Magic loop, ch1 as a standing st, 6sc, slst to the first sc. Round 1 finished.
Round 2: BLO. Ch1 as a standing st, sc inc in the same st, sc inc in each of the remaining sts, slst to the first sc. Round 2 finished.
Round 3: BLO. Ch1 as a standing st, 1sc in the same st, sc inc; [1sc, sc inc] repeat 5 times, slst to the first sc. Round 3 finished.
Round 4: BLO. Ch1 as a standing st, 1sc in the same st, 1sc, sc inc; [2sc, sc inc] repeat 5 times, slst to the first sc. Fasten off, Round 4 finished.
Create the Seed Center
Round 5-7-Create the Seed Center: We will now work in the unused front loops (FLO) from Rounds 1-3. (R5 in R1’s FLO, R6 in R2’s FLO, R7 in R3’s FLO).
For each round: Join yarn in any unused FL of the corresponding round, then repeat [ch3, slst to the next FL] all the way around. Fasten off at the end.
Sunflower Petals
Round 8-Sunflower Petals: Work in stitches from Round 4. Add new yarn in any st, repeat [ch2+1hdc+1dc+1tr+(ch-2 pic), 1tr+1dc+1hdc+ch2 in the next st, slst to the next st] 12 times. Fasten off at the end. Round 8 finished.
The Base of Border
Round 9-The Base of Border: Work this round into the back side of each petal, using a loop at the center height, but closer to the flower center.
Join new yarn in the loop behind any petal, ch1 as a standing st, 1sc in the same loop, ch3; [1sc in the loop of next petal, ch3] repeat 11 times, slst to the first sc. Round 9 finished.
Round 10: Slst to the next ch-sp, ch3 as a standing st (count as 1dc), 3dc in the same ch-sp; 4dc in each of the remaining ch-sp, slst to the top of the first ch3. Round 10 finished.
Turn It Into a Square
Round 11-Turn It Into a Square: Ch2 as a standing st (count as 1hdc), 2hdc, 3dc, 2tr+ch2+2tr, 3dc, 2hdc. [3hdc, 3dc, 2tr+ch2+2tr, 3dc, 2hdc] repeat 3 times, slst to the top of the first ch2. Fasten off.
Tips for Working 3D Stitches
Creating three-dimensional crochet motifs requires a slightly different approach than standard flat work. When you are working in the Back Loop Only during the first few rounds of the sunflower center, try to keep your tension slightly looser than usual. Because the front loop is left unworked, it can sometimes pull the stitch downward if crocheted too tightly. A relaxed tension ensures that when you finally go back to work those front loops in Rounds 5 through 7, your hook will glide through easily without fighting the yarn.
When executing the petals in Round 8, pay close attention to the picot stitch at the very top of the petal. A picot is essentially a tiny chain loop that acts as a decorative point. To make this point really “pop” and look like a true sunflower petal tip, use your non-hook hand to gently pinch the base of the chain-2 picot as you slip stitch into it. This forces the chain to bulge outward, giving you that perfect, sharp, dimensional point rather than a floppy loop.

Frequently Asked Questions
Can I make this square bigger? Yes! To increase the size of this sunflower granny square, you simply need to add additional traditional granny square rounds after completing Round 11. You can continue adding rounds of (3dc, ch2, 3dc) in each corner space, and 3dc in each side space, until the square reaches your desired dimensions.
Why do I have to work into the back of the petal for Round 9? Working into the loops at the center base of the back of the petal is crucial for the structural integrity of the square. If you try to work the border directly into the stitches at the base of the flower center, your petals will flop downward. By anchoring your border to the middle-back of the petals, you force the petals to stand straight up and outward, preserving the 3D effect while creating a stable foundation for your granny square border.
What is the best yarn for this pattern? The sample uses a DK sport wool yarn, which is an excellent choice because wool has a natural “memory” that helps the 3D petals hold their shape. However, a high-quality cotton or cotton-blend yarn also works beautifully for sunflowers, as it provides a sturdy stitch definition that makes the seed center and pointed petals look incredibly crisp and structured.
More Unique Granny Square Patterns
If you had fun making this dimensional floral motif, you will love exploring other textured and unique square designs! For another beautiful nature-inspired theme, check out the rustic star granny square pattern, which features amazing multi-toned bobbles.
If you enjoy designs that mix delicate and edgy elements, the skull and flower granny square is an absolute must-try. For holiday crafting, you can switch up your seasonal decor by making a 3D Christmas tree granny square pattern or a stunning Christmas star granny square. And if you want to carry the 3D theme into the spooky season, be sure to try the incredibly fun spooky ghost granny square!
Conclusion
Congratulations on completing your 3D Sunflower Granny Square! This highly textured, dimensional motif is a beautiful way to capture the joy of summer in your crochet projects. Share your sunny creation in the comments below!

1 thought on “3D Sunflower Granny Square Pattern”