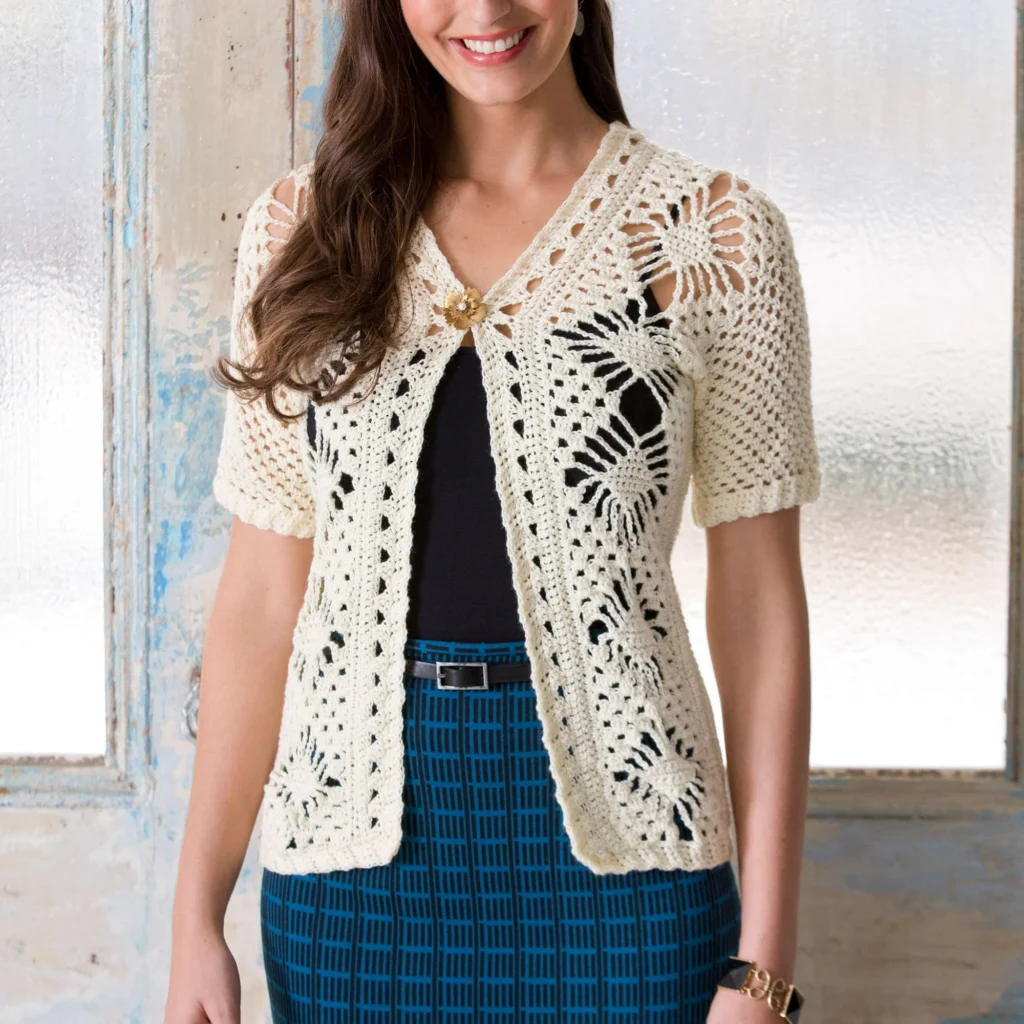
Crochet Spider Lace Jacket Pattern: A Beautiful Creation
Crocheting a jacket is a fulfilling project, and nothing compares to the elegance of the Crochet Spider Lace Jacket. With its airy design and stylish look, this jacket is perfect for any occasion. Below, I’ll provide a detailed guide to help you through this delightful pattern.
Materials Needed

To create your Crochet Spider Lace Jacket, you will need the following materials:
-
Yarn: RED HEART® Luster Sheen®
- Solid color: 3.5 oz (100 g), 307 yd (281 m)
- Multicolor: 3 oz (85 g), 261 yd (239 m)
- Yarn amount: 4 (5, 5, 6, 6, 6, 6) balls of Vanilla
-
Crochet Hook:
- Susan Bates® Crochet Hook: 3.25 mm [US-D-3]
-
Yarn Needle
Finished Measurements
When completed, this jacket will fit the following measurements:
- To Fit Bust: 35 (37, 39, 41, 43, 45)” [89 (94, 99, 104, 109, 114.5) cm]
- Finished Bust/Chest Measurement: 34½ (37, 39½, 41½, 43, 46)” [86.5 (94, 100.5, 105.5, 109, 117) cm]
- Length: 23” [58.5 cm]
Special Abbreviations
- Back post single crochet (bpsc): Insert hook from back to front to back again, around the post of next stitch.
- Front post single crochet (fpsc): Insert hook from front to back to front again, around the post of next stitch.
- Shell: 3 double crochets in the same stitch.
- Linked double crochet (ldc): A special stitch that links previous double crochet to the current one.
Pattern Instructions
Jacket Construction
Side Panel (Make 2)
- Starting at the bottom edge of fronts, chain 27.
- Follow the established rows, using shells and linked double crochets, to build the pattern. Specific row instructions are detailed in the original pattern.
Underarm Panel
- Place markers and join yarn to the bottom right-hand corner of one Side Panel.
- Work linked double crochets across the designated space sequentially.
Center Back Panel
- Begin by chaining 27 and following the initial rows.
- Repeat a similar process with the last row linking to previous construction.
Side Edging
- With the right side facing, work linked double crochets across the side edges of the back panel, fastening off as necessary.
Assembly Instructions
- Fold side panels and whipstitch underarm panels to the tops of side panels.
- Align bottom edges and stitch the center back panel to the inside edges of side panels.
Sleeve Creation
- Start from the armhole and work single crochets in a spiral, moving markers as needed to track progress.
- Follow the pattern closely for a perfectly fitted sleeve.
Sweater Trim
- Join yarn in the corner of the front edge and work evenly spaced linked double crochets around the front and neck.
- Proceed to create the ribbing for a polished finish.
Final Touches
When your Spider Lace Jacket is fully assembled, your carefully woven ends should be tidied up. This elegant piece not only showcases your crochet skills but also offers a stylish addition to your wardrobe.
Conclusion
The Crochet Spider Lace Jacket Pattern is a delightful project that results in a stunning garment. With careful attention to detail and consistent practice, you can create a beautiful piece that’s both fashionable and functional. Happy crocheting!
For any additional insights or to view the original pattern, check out the pattern resource here.