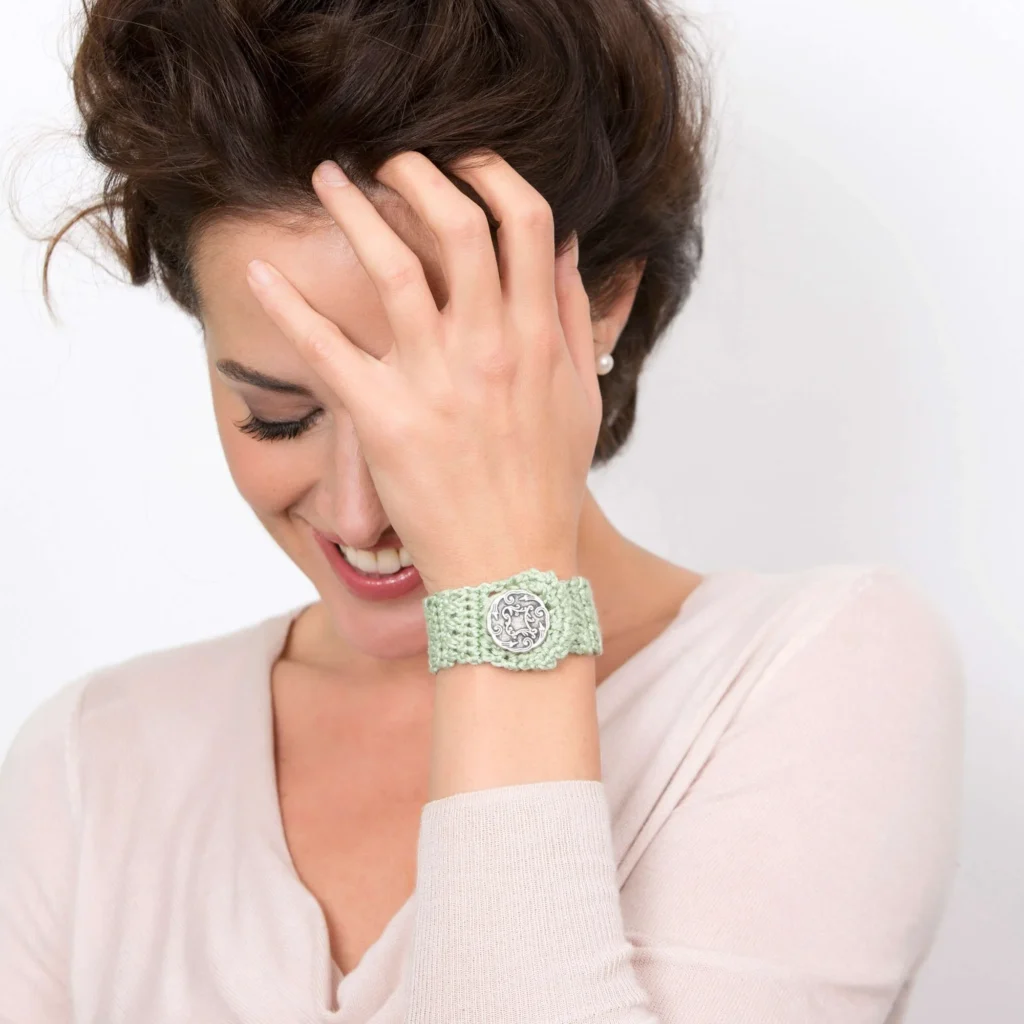
Crochet Button Showcase Bracelet Pattern
Creating your own handmade accessories can be a rewarding and enjoyable experience, and what better way to start than with this beautiful Crochet Button Showcase Bracelet? This pattern offers a lovely way to highlight a decorative button while showcasing your crochet skills. In this post, you’ll learn how to make this trendy bracelet step by step.
About the Crochet Project
This Crochet Button Showcase Bracelet is both a stylish and practical accessory. Using AUNT LYDIA’S® Bamboo Ice™ yarn in a captivating green hue, this bracelet is soft and lightweight, making it comfortable to wear all day. The pattern utilizes a simple combination of stitches such as single crochet (sc) and double crochet (dc), along with unique decreases for added detail. Whether worn alone or stacked with other bracelets, it adds a touch of elegance to any outfit.
Materials

Yarn
- AUNT LYDIA’S® Bamboo Ice™, Size 3: 1 ball, color 3631 Green Tea Ice
Crochet Hook
- Susan Bates® Crochet Hook: 3.25mm [US D/3]
Notions
- One 7/8” (2.2 cm) or 1” (2.5 cm) decorative button
- Yarn needle
- Stitch markers
Crochet Abbreviations
This pattern uses the following abbreviations:
- dc2tog: [Yarn over, insert hook in next stitch, yarn over and draw up a loop, yarn over and draw through 2 loops on hook] twice, yarn over and draw through all 3 loops on hook.
- dc3tog: [Yarn over, insert hook in next stitch, yarn over and draw up a loop, yarn over and draw through 2 loops on hook] 3 times, yarn over and draw through all 4 loops on hook.
Pattern Notes
This bracelet is constructed in two main components: the Button Circle and the Band. The Button Circle is made in continuous rounds, while the Band is worked in turned rows. Be sure to leave a long tail for sewing when starting the Button Circle.
Bracelet Instructions
Button Circle (Continuous Rounds)
- Round 1: Leaving a long tail for sewing, ch 2, 6 sc in 2nd ch from hook—6 sc.
- Round 2: Work 2 sc in each st around—12 sc.
- Round 3: [Sc in next st, 2 sc in next st] 6 times; join with slip st in next st—18 sc.
Band (Turned Rows)
- Row 4: Ch 2 (counts as hdc), hdc in the same st, sc in the next st, 2 sc in the next st, sc in the next st, 2 hdc in the next st, leaving remaining sts unworked—4 hdc and 4 sc.
- Row 5: Ch 1, turn, sc in each st across—8 sts.
- Row 6 (Right Side): Ch 3 (counts as dc), skip the first st, [skip the next st, dc in the next st, dc in skipped st] 3 times, dc in the last st.
- Row 7: Repeat Row 5.
- Rows 8-27: Repeat Rows 6-7, 10 times.
- Row 28: Ch 2, turn, skip the first st, dc2tog, ch 3, skip 2 sts (button hole made), dc3tog—2 sts and 1 ch-3 space.
- Row 29: Ch 1, turn, sc in first st, 5 sc in ch-3 space, sc in the next st, slip st in the top of the beginning ch-2—8 sts.
Finishing
Using the photo as a guide, sew the button to the center of the Button Circle with the Right Side facing. Weave in ends.
Understanding the Construction
The Button Circle forms the focal point of the bracelet, providing a sturdy base to attach your decorative button. The Band is then worked from this base, creating a snug fit around the wrist. The combination of stitches and techniques used in this pattern makes it an enjoyable project to tackle.
Here’s a breakdown of each section:
-
Button Circle: This section is crucial as it sets the foundation of the bracelet. It is created in continuous rounds, which allows for a seamless finish. The increasing stitches provide a circular shape that perfectly fits the button.
-
Band: The band is created in turned rows, which gives it a unique texture. With a mix of hdc (half double crochet) and sc, it provides stability and comfort when worn.
-
Finishing Touches: Sewing on the button securely is important, as it becomes an essential part of the bracelet. Use a yarn needle to weave in any loose ends, which will keep your project looking polished.
Frequently Asked Questions
What crochet hook is used for this pattern?
You will need a Susan Bates® Crochet Hook size 3.25mm [US D/3] for this bracelet.
Is this project worked in rows or rounds?
The bracelet uses both rows and rounds. The Button Circle is worked in continuous rounds, while the Band is created from turned rows.
How many components does this bracelet have?
This bracelet consists of two main components: the Button Circle and the Band.
What type of stitch techniques are used in this bracelet?
The pattern includes single crochet (sc), half double crochet (hdc), and double crochet (dc) along with specific decreases: dc2tog and dc3tog.
Does this project require assembly?
No additional assembly is required beyond sewing the button onto the bracelet.
Conclusion
This Crochet Button Showcase Bracelet Pattern is a delightful project that highlights your crocheting skills while resulting in a stylish accessory. The combination of the soft yarn and decorative button makes this bracelet both functional and beautiful, perfect for any occasion. Enjoy crafting your bracelet and wear it proudly, knowing you made it yourself! Happy crocheting!