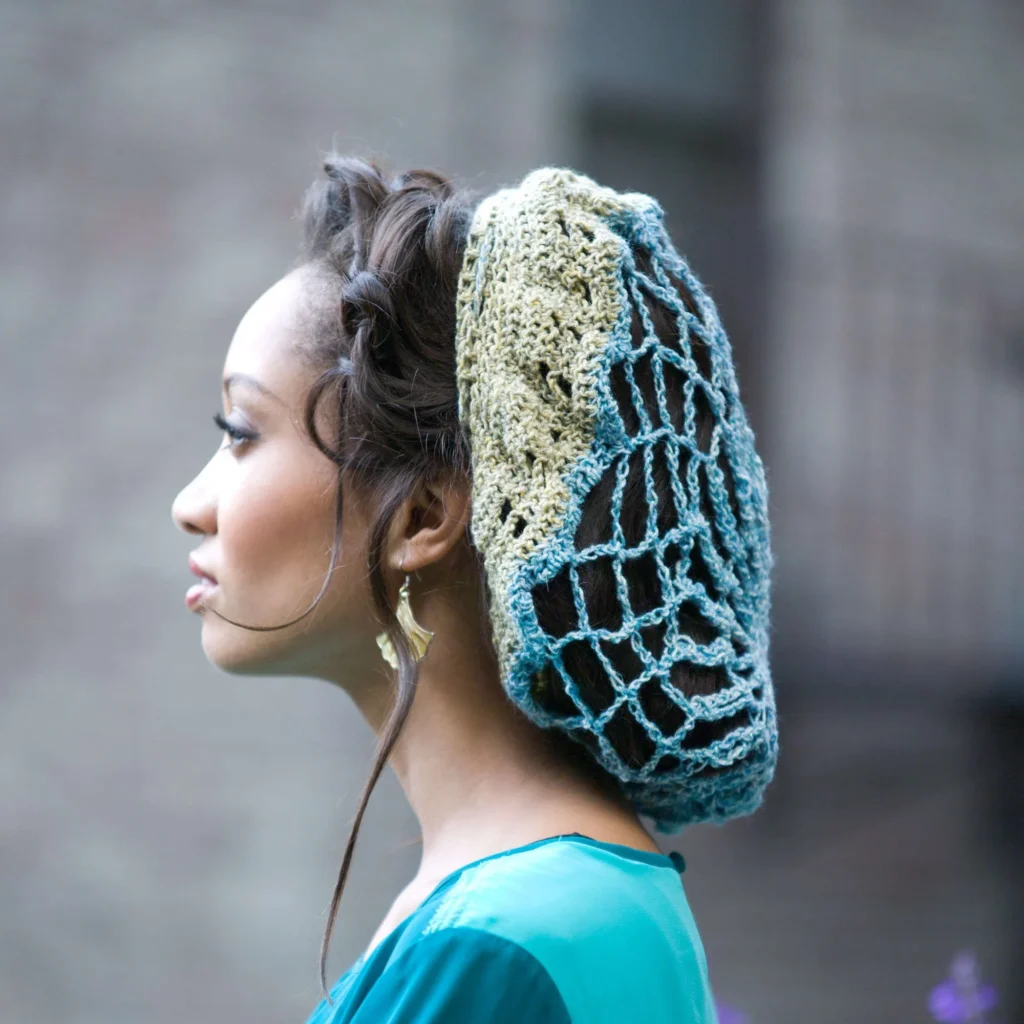
Crochet Glitz n’ Glamour Hairnet Pattern
Creating glamorous accessories can elevate any outfit, and this Crochet Glitz n’ Glamour Hairnet Pattern is a perfect example of how a simple accessory can sparkle. With its shimmering yarn and intricate design, this hairnet can be worn for special occasions or even for a stylish everyday look. In this guide, we’ll walk you through everything you need to know to create your own stunning hairnet.
About the Project
The Glitz n’ Glamour Hairnet is a beautifully designed accessory that combines elegance with fun. It can be used to keep hair neatly in place while also showcasing your crochet skills. This glam hairnet features a unique twist in crochet stitches that will leave the onlookers in awe. The choice of RED HEART® Stardust™ yarn not only adds a delightful sparkle but also contributes to the structure and flexibility of the finished piece.
This pattern is worked entirely in rounds, meaning you won’t need to deal with sewing seams at the end. This makes the project more enjoyable and less complicated, allowing you to focus on the fun part of crochet—creating beautiful stitches!
Materials

To complete this crochet project, you will need the following materials:
Yarn
- RED HEART® Stardust™ (sparkle yarn)
- 1 ball each
- Color A: 1805 Blue
- Color B: 1623 Green
Crochet Hook
- 4 mm [US G-6]
Notions
- Yarn needle (for weaving in ends)
Crochet Abbreviations
Understanding crochet abbreviations will enhance your experience as you work on this pattern. Here are some abbreviations used in the Glitz n’ Glamour Hairnet pattern:
- dtr (double treble crochet): Yarn over 3 times, insert hook in stitch, draw up a loop (5 loops on hook), [yarn over and draw through 2 loops] 4 times.
- dtr2tog: *Yarn over 3 times and insert the hook in the next stitch, [yarn over and draw through 2 loops] 3 times; repeat from * once more, yarn over and draw through all loops on hook.
Pattern Structure
Special Instructions
Before starting, make sure you are familiar with the special stitches defined above. This will be essential, especially for Round 3, which includes the dtr2tog stitch.
HAIRNET
- With Color A, ch 6, slip stitch in the first ch to form a ring.
Round 1
- Ch 5 (counts as tr here and throughout), work 19 tr in first ch, slip stitch to top of the beginning ch – 20 tr.
Round 2
- Ch 8 (counts as dtr and ch 3), [dtr in next tr, ch 3] 19 times, slip stitch in the 5th ch of beginning ch – 20 spaces.
Round 3
- Slip stitch in first ch-3 space, ch 5 (counts as dtr here and throughout), dtr in the same space, ch 6, [dtr2tog in next ch-3 space, ch 6] 19 times, slip stitch in top of beginning ch.
Round 4
- Slip stitch to center of first ch-6 space, ch 1, sc in same space, [ch 8, sc in next ch-6 space] 19 times, ch 4, tr in first sc (counts as ch 6 space and sc) – 20 ch-6 spaces.
Round 5
- Ch 1, sc in same stitch, ch 9, [sc in next ch-8 space, ch 9] 19 times, slip stitch in the first sc.
Round 6
- Ch 1, sc in the same stitch, ch 10, [sc in next ch-9 space, ch 10], slip stitch in the first sc.
Round 7
- Ch 3 (counts as dc here and throughout), *9 dc in next ch-10 space, dc in the next sc; repeat from * 18 more times, 9 dc in last ch-10 space, slip stitch in the first sc – 200 dc.
Round 8
- Join Color B in any stitch, ch 3, dc in each dc around, slip stitch in the top of beginning ch.
Rounds 9-10
- Ch 3, dc in next 2 dc, *ch 2, skip 2 dc, dc in next 3 dc; repeat from * to last 2 dc, ch 2, skip 2 dc, slip stitch in the top of beginning ch.
Round 11
- Ch 3, dc in each dc and ch around, slip stitch in the top of beginning ch.
Round 12
- Ch 3, dc in next 7 dc, *skip next dc, dc in next 5 dc; repeat from * around, slip stitch in the top of beginning ch – 167 dc.
Round 13
- Ch 2, hdc in next stitch, *skip next stitch, hdc in next 4 sts; repeat from * around, slip stitch in the top of beginning ch – 134 hdc.
Round 14
- Ch 2, *skip next stitch, hdc in next 3 sts, skip next stitch, hdc in next 2 sts; repeat from * 18 more times, slip stitch in top of beginning ch – 96 hdc.
Round 15
- Ch 3, dc in next 2 hdc, *ch 1, skip next 2 hdc, dc in next 3 hdc; repeat from * around to last stitch, skip the last hdc, slip stitch in the top of beginning ch.
Round 16
- Ch 3, dc in each dc and ch-1 space around, slip stitch in the top of beginning ch.
- Fasten off.
Finishing
After completing the crocheted part, it’s crucial to weave in any loose ends for a clean finish.
Drawstring Tie
- With 1 strand of Color A and B held together, ch 150, fasten off.
- Begin and end at the back of the hairnet, weave the Drawstring Tie through the ch-1 spaces of Round 15.
Frequently Asked Questions
What crochet hook is used for this pattern?
You will need a 4 mm [US G-6] crochet hook.
Is this project worked in rows or rounds?
This project is entirely worked in rounds.
Does this crochet project require assembly?
No, the hairnet is worked continuously in rounds, so there is no assembly required.
What kind of yarn is recommended for this pattern?
The pattern recommends RED HEART® Stardust™ (sparkle yarn), which adds sparkle and structure to the hairnet.
What is the finished size of the unmeasured hairnet?
While specific measurements are not provided, the design allows for flexibility. Ensure to follow the pattern closely for the best fit.
Conclusion
The Crochet Glitz n’ Glamour Hairnet Pattern is a delightful way to express your creativity while adding a stylish accessory to your collection. With easy-to-follow rounds and shimmering yarn, this pattern is perfect for those who love a touch of glamour in their crochet projects. Whether you’re heading to a party or simply want to feel fabulous at home, this hairnet is sure to shine! Enjoy your crafting and don’t forget to share your stunning creations with loved ones!