Crochet Beret Pattern
Crocheting a beret is a delightful project that combines style and comfort, making it a perfect accessory for any season. In this article, you will find a comprehensive guide for creating your own beret using the RED HEART® “Soft Yarn”. This project is suitable for crocheters of various skill levels, and we will ensure you have all the details to create a beautiful and cozy beret that can be a wonderful addition to your wardrobe or a thoughtful gift for someone special.
About the Crochet Project
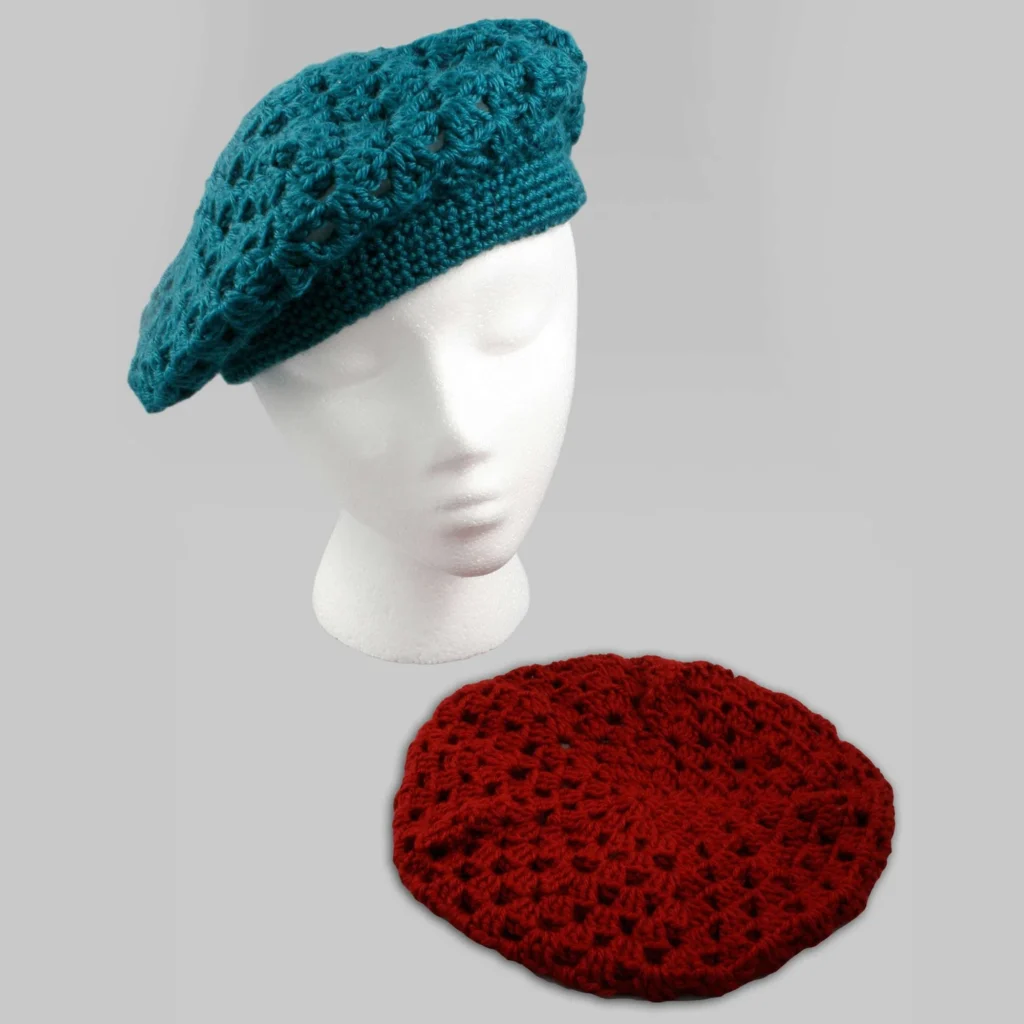
This crochet beret pattern features a stylish design that is perfect for layering with various outfits. The finished beret will keep you warm and fashionable during chilly days. Additionally, you can personalize the color choice using either No. 4608 Wine or No. 9518 Teal yarn, allowing you to match the beret with your personal style.
Finished Measurements
While the specific measurements are not provided in the pattern, you can adjust the size by using different crochet hook sizes or by modifying the number of rounds worked, making it flexible for various head sizes.
Materials

To create your crochet beret, you will need the following materials:
Yarn
- RED HEART® “Soft Yarn” – 2 1/2 Ounces
- Colors: No. 4608 Wine OR No. 9518 Teal
Crochet Hook
- 5.5mm [US I-9] crochet hook
Optional
- 3/4 Yard of 1/2″ elastic
- Elastic finishing measurement: plus 1/2″
Crochet Abbreviations
Familiarize yourself with the following abbreviations that will be used throughout the pattern:
- Ch: Chain
- Dc: Double Crochet
- Sc: Single Crochet
- Sl St: Slip Stitch
- Rep: Repeat
- Inc: Increase
- Lp: Loop
Pattern Notes
This pattern is worked in rounds and incorporates increasing and decreasing techniques. Ensure to keep track of your stitch counts for a neat finish.
Pattern Instructions
Follow these round-by-round instructions to create your beret:
Rounds
-
Ch 5; join with a sl st to form a ring.
-
Rnd 1:
Ch 3, 2 dc in ring, ch 1, [3 dc in ring, ch 1] 4 times;
join with a sl st to top of ch-3. -
Rnd 2:
(Sl st, ch 3, 2 dc) all in next dc,- ch 1, 3 dc in next sp,
** ch 1, skip next dc, 3 dc in next dc;
rep from * around, end at **;
sc in top of ch-3 to join and form last ch-1 sp – ten 3-dc groups.
- ch 1, 3 dc in next sp,
-
Rnd 3:
Ch 3, 2 dc over sc;
[ch 1, 3 dc] twice all in next ch-1 sp – inc made;- ch 1, 3 dc in next sp, inc in next sp;
rep from * around;
sc in top of ch-3 to join – 15 3-dc groups.
- ch 1, 3 dc in next sp, inc in next sp;
-
Rnd 4:
Ch 3, 2 dc over sc, * ch 1, 3 dc in next sp;
rep from * around;
sc in top of ch-3 to join. -
Rnd 5:
Ch 3, 2 dc over sc, * ch 1, 3 dc in next sp, inc in next sp, ** ch 1, 3 dc in next sp;
rep from * around, end at **;
sc in top of ch-3 to join – twenty 3-dc groups. -
Rnd 6:
Rep Rnd 3 – thirty 3-dc groups. -
Rnds 7-10:
Rep Rnd 4. -
Rnd 11:
Rep Rnd 4 EXCEPT end with “ch 1, sl st in top of ch-3” instead of “sc in top of ch-3” to join. -
Rnd 12:
Ch 3, dc in next dc and in each dc around skipping all ch-1 sps;
join with a sl st in top of ch-3 – 90 sts. -
Rnd 13:
Ch 1, sc in same st as joining and in next 6 dc;
draw up a lp in next 2 dc, yo and through all 3 lps on hook – dec made;- sc in next 7 dc, dec over next 2 dc;
rep from * around;
join to first sc – 80 sc.
- sc in next 7 dc, dec over next 2 dc;
-
Rnds 14-21:
Ch 1, sc in each st around;
join to first sc.
Fasten off after Rnd 21 leaving a long (30″) end.
Band Folding and Stitching (After Fastening Off)
- Fold sc band in half to the wrong side and sl st in place to the wrong side of Rnd 13.
- Weave in ends.
Optional Elastic Assembly
- Cut elastic to head measurement plus 1/2″.
- Overlap ends of elastic by 1/2″ and sew together.
- Fold the sc band in half over the circle of elastic and sl st in place.
Finishing
- Weave in ends.
- If using elastic: Fold sc band in half over the circle of elastic and sl st in place.
Frequently Asked Questions
What crochet hook is used for this pattern?
The pattern specifies using a 5.5mm [US I-9] crochet hook.
Is this project worked in rows or rounds?
This crochet beret is worked entirely in rounds.
Does this crochet project require assembly?
The beret is crocheted as a single piece, but optional elastic assembly can be performed for a better fit.
Conclusion
Creating your own crochet beret is not only a fun and engaging project, but it also results in a useful and stylish accessory. By following this pattern using RED HEART® “Soft Yarn”, you can create a custom piece that enhances your wardrobe. Experiment with colors and modifications to express your unique style, and enjoy wearing your handmade creation or gifting it to someone special!