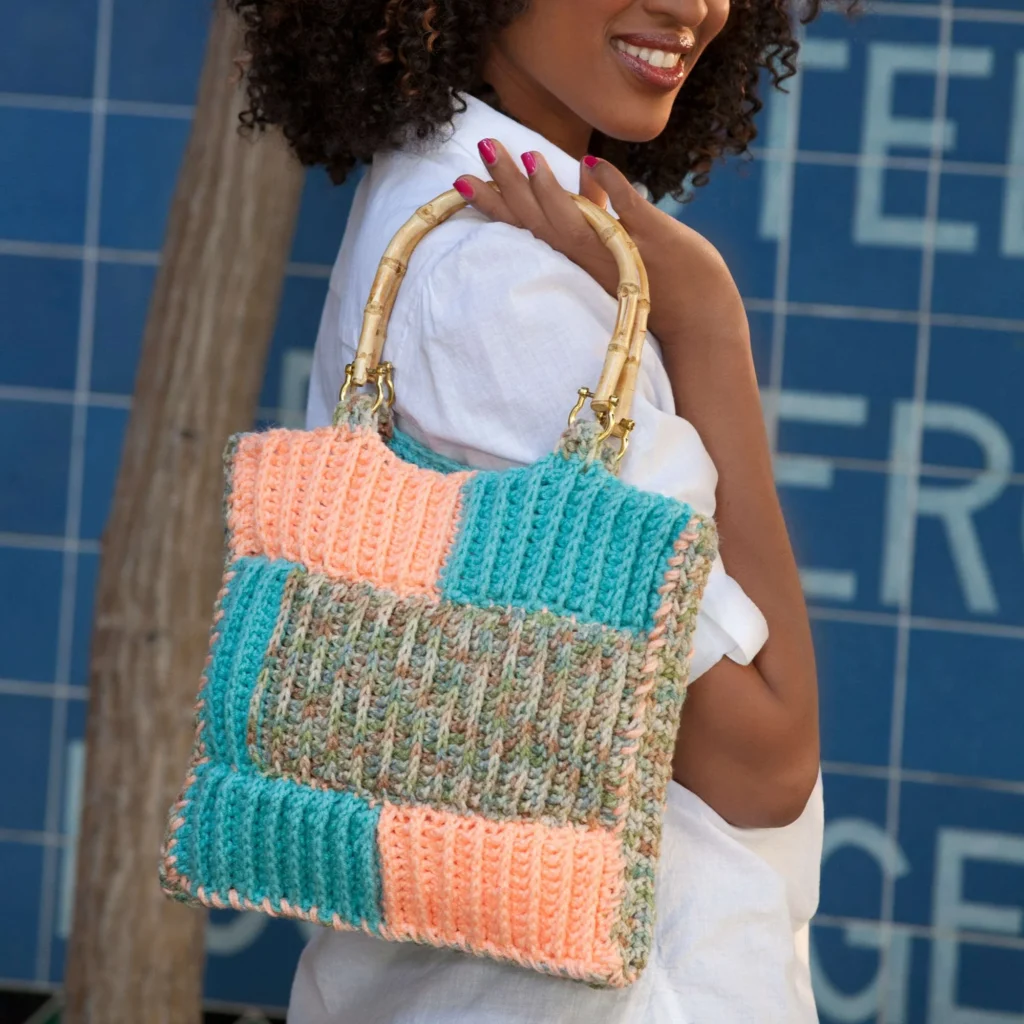
Create Your Own Ribbed Project Bag: A Crochet Guide
Are you looking for a functional yet stylish project bag to keep your crochet supplies organized? Look no further than the Ribbed Project Bag pattern! This delightful bag is not only practical but also showcases beautiful ribbed textures, making it a perfect accessory for crocheters on the go. Below, I’ll guide you through the materials needed, special stitches, and step-by-step instructions to create your very own Ribbed Project Bag.

Materials Needed
To get started, you’ll need the following supplies:
- RED HEART® “Classic™”: 1 skein in color 246 Sea Coral B
- RED HEART® “Super Saver®”:
- 1 skein each of color 505 Aruba Sea A
- 1 skein of color 305 Aspen Print C
- Crochet Hook: 5.5 mm [US I-9]
- Bamboo Purse Handles: 2 (for securing the bag’s design)
- Stitch Markers: A few (to help keep track of your rows)
- Yarn Needle: For weaving in ends
Special Stitch
For this pattern, you’ll be using the following special stitch:
- Front Post Double Crochet (Fpdc): Yarn over, insert the hook from front to back to front again around the post of the indicated stitch, yarn over and draw up a loop, then (yarn over and draw through 2 loops) twice.
Bag Construction
FRONT
Top Panel
- With color A, ch 13.
- Row 1: Dc in 3rd ch from hook and each ch across.
- Rows 2-17: Ch 2, turn, Fpdc in each st across, hdc in top of beginning ch (11 sts).
- Rows 18-34: Change to B and repeat Row 2.
- Fasten off.
Center Panel
- With color C, ch 20.
- Row 1: Dc in 3rd ch from hook and each ch across.
- Rows 2-28: Ch 2, turn, Fpdc in each st across, hdc in top of beginning ch (18 sts).
- Rows 29-34: Change to A and repeat Row 2.
- Fasten off.
Bottom Panel
- With color B, ch 13.
- Row 1: Dc in 3rd ch from hook and each ch across.
- Rows 2-17: Ch 2, turn, Fpdc in each st across, hdc in top of beginning ch (11 sts).
- Rows 18-34: Change to A and repeat Row 2.
- Fasten off.
BACK
- With color A, ch 37.
- Row 1: Hdc in 2nd ch from hook and each ch across.
- Rows 2-28: Ch 2 (counts as hdc), turn, hdc in each hdc across (36 hdc).
- Fasten off.
BOTTOM GUSSET
- With color C, ch 37.
- Row 1: Hdc in 2nd ch from hook and each ch across.
- Rows 2-4: Ch 2 (counts as hdc), turn, hdc in each hdc across (36 hdc).
- Fasten off.
SIDE GUSSET (Make 2)
- With color C, ch 35.
- Row 1: Hdc in 2nd ch from hook and each ch across.
- Rows 2-4: Ch 2 (counts as hdc), turn, hdc in each hdc across (34 hdc).
- Fasten off.
FINISHING
Assembly
To bring your bag together, follow these steps:
- Sew one long edge of the Top Panel to the Center Panel.
- Attach the opposite long edge of the Center Panel to the Bottom Panel.
- With the wrong sides together and using two strands of B, overhand stitch:
- Sew one long edge of the Bottom Gusset to the first row of the Back.
- Sew one long edge of each Side Gusset to the side edges of the Back.
- Sew the short edges of the Gussets together.
- Attach the opposite long edges of the Gusset to the Front.
- Leave the top edge unsewn for easy access.
Handle Tabs
- Mark the top edge of the Front and Back for the placement of the purse handle rings.
- For each tab:
- Row 1: With the right side facing, join B at the right edge where marked for handle rings, ch 1, and hdc in the next 3 sts.
- Rows 2-5: Ch 1, turn, hdc in each hdc across (4 hdc).
- Fasten off, leaving a long tail.
- Pull the Tab through the purse handle ring and sew the opposite end to the wrong side to secure the handles along the top edge of the bag.
- Weave in all ends.
Conclusion
With this Ribbed Project Bag pattern, you can express your creativity while crafting a functional accessory! Whether you’re heading to a crochet club or simply need a cozy place to keep your yarn, this bag is sure to turn heads. Don’t forget to share your finished projects on social media and inspire other crafters in the community! Happy crocheting!