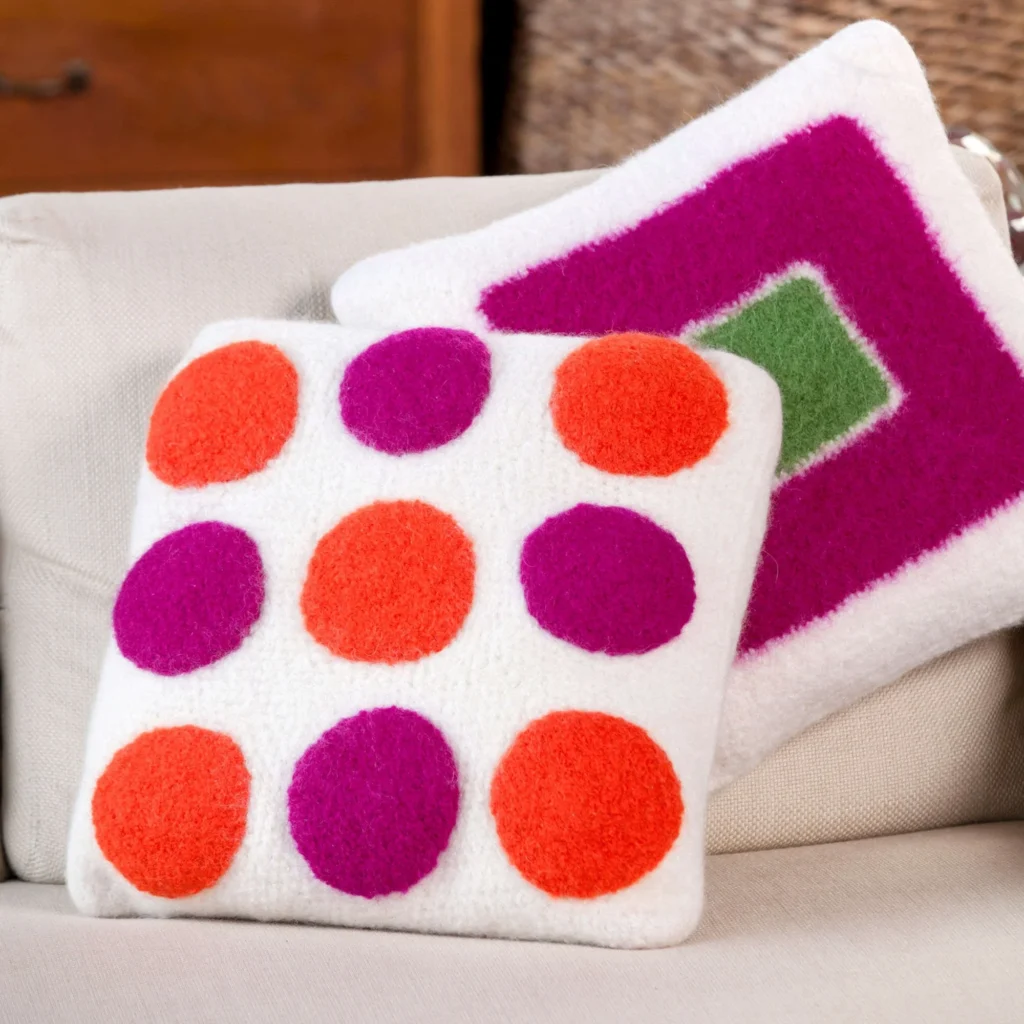
Crochet Square Pegs Round Holes Pattern
Welcome to this exciting crochet project featuring the Square Pegs Round Holes pattern! This design is perfect for creating two stylish pillows: the Square Peg Pillow and the Round Holes Pillow. Not only will you enjoy working with vibrant colors, but you’ll also learn some essential crochet techniques along the way. Let’s dive into the materials needed and the step-by-step instructions!

Materials Required
For Both Pillows
- Crochet Hook: 8mm [US L-11]
- Stitch Markers
- 3 yards heavy cotton yarn in a contrasting color
- 16” x 16” pillow form
- Yarn Needle
Square Peg Pillow — STITCH NATION by Debbie Stoller™ “Full o’ Sheep™”
- 3 balls of 2205 Little Lamb (Color A)
- 3 balls of 2925 Passionfruit (Color B)
- 1 ball of 2640 Thyme (Color C)
Round Holes Pillow — STITCH NATION by Debbie Stoller™ “Full o’ Sheep™”
- 1 ball of 2205 Little Lamb (Color A)
- 1 ball of 2925 Passionfruit (Color B)
- 1 ball of 2260 Clementine (Color C)
- Total: 7 balls
Instructions
Square Peg Pillow
Squares (Make 2)
-
Round 1 (Right Side)
With C, ch 3 (beginning ch counts as hdc), then make 7 hdc in the 3rd ch from the hook.
Join with a slip stitch in the top of the beginning ch—8 hdc. -
Round 2
Ch 2 (counts as hdc here and throughout),
[3 hdc in next st (corner made), hdc in next st] 3 times,
3 hdc in the next st (corner made).
Join with a slip stitch in the top of the beginning ch—16 hdc. -
Round 3
Ch 2, hdc in the next st,
[3 hdc in next st, hdc in next 3 sts] 3 times,
3 hdc in the next st, hdc in the next st.
Join with a slip stitch in the top of the beginning ch—24 hdc.
Place a marker in the center hdc of each 3-hdc corner. -
Round 4
Ch 2,
[hdc in each st to next marker, 3 hdc in marked st, move marker to center hdc of 3-hdc corner just made] 4 times,
hdc in each remaining st to end of round.
Join with a slip stitch in the top of the beginning ch—32 hdc.Repeat Round 4 until the square measures 5” across.
Fasten off C. -
Next Steps:
Change colors to build up the size.
With Right Side facing, join A with slip stitch in the top of the beginning ch.
Repeat Round 4 once. Fasten off A.
With Right Side facing, join B with slip stitch.
Repeat Round 4 until the square measures 16” across. Fasten off B.
With Right Side facing, join A with slip stitch.
Repeat Round 4 until the square measures 25” across.
Fasten off the first square.
Do not fasten off the second square.
FINISHING
Hold the squares with Wrong Sides together.
Working through both thicknesses,
sc in each st to next corner st, sc in corner st 2 times,
sc in each st to about 2” from the edge.
With a doubled strand of heavy cotton yarn, baste the top edge and corners together.
(This basting yarn is crucial for felting, and it should be cotton for easy removal later.)
Felt Pillow Instructions
- Weave in ends (except ends of basting yarn).
- Place pillow in the washing machine.
Wash using hot water, maximum agitation, and a small amount of laundry soap.
Check the progress of felting every 3-5 minutes until desired felting is achieved.
Rinse in the sink and gently squeeze excess water out. - Pull into shape and allow the pillow to dry.
Once dry, remove basting cotton and insert the pillow form.
With A, sew the top edge and corners closed.
Felting Hints
- Add a few pairs of jeans or old bath towels (avoid very fluffy ones) to increase agitation in the wash cycle.
- Place the pillow in a lingerie bag or pillowcase before felting to catch any lint.
Round Holes Pillow
Squares (Make 2)
Follow the same steps as the Square Peg Pillow, but with Color A.
Circles (Make 9 – 4 with B and 5 with C)
-
Round 1 (Right Side)
Ch 3 (beginning ch counts as hdc), then make 7 hdc in the 3rd ch from the hook.
Join with a slip stitch in the top of the beginning ch—8 hdc. -
Round 2
Ch 2 (counts as hdc here and throughout), hdc in the same st as join,
2 hdc in each remaining st around.
Join with a slip stitch in the top of the beginning ch—16 hdc. -
Round 3
Ch 2, 2 hdc in next st (increase made),
[hdc in next st, 2 hdc in next st (increase made)] 7 times.
Join with a slip stitch in the top of the beginning ch—24 hdc.
Place a marker in the 2nd hdc of each 2-hdc increase. -
Round 4
Ch 2,
[hdc in each st to next marker, 2 hdc in marked st, move marker to 2nd hdc of 2-hdc increase just made] 8 times.
Join with a slip stitch in the top of the beginning ch—32 hdc.
Repeat Round 4 until the circle measures 5½” across, then fasten off, leaving a 20” tail for sewing.
FINISHING
Arrange the circles on the Right Side of one square into 3 rows of 3, alternating colors.
Sew the circles in place before holding the squares together with Wrong Sides together.
Seaming and Felting Instructions
Repeat the seaming and felting instructions as outlined for the Square Peg Pillow.
Conclusion
You now have a guide to creating two beautiful crocheted pillows! Whether you choose to make the Square Peg Pillow or the Round Holes Pillow, you’ll enjoy the satisfying feel of crafting with your own hands. Happy crocheting!