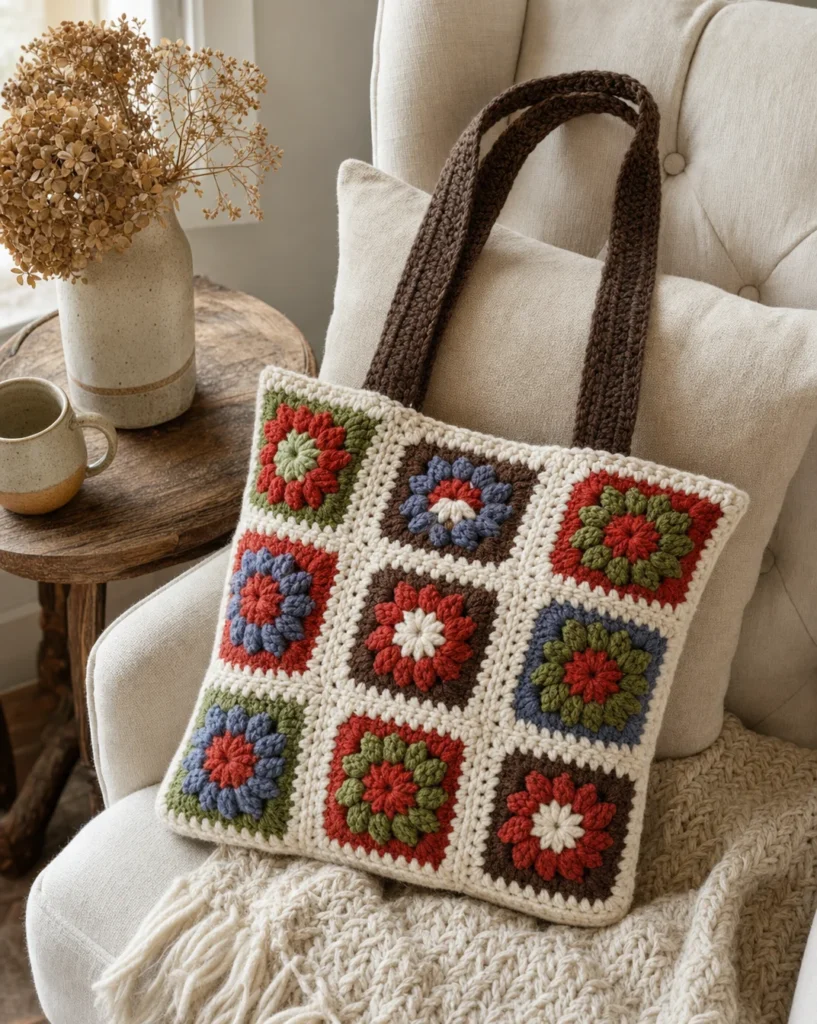
Crochet Felted Granny Tote Pattern
If you’re looking for a fun and practical crochet project that combines vibrant colors with a unique texture, the Crochet Felted Granny Tote is perfect for you! This pattern offers an engaging way to create a stylish tote bag that is not only eye-catching but also functional.
Materials Needed

To get started with this project, you will need the following supplies:
-
Yarn (RED HEART® “Eco-Ways™ Bamboo Wool™”):
- 3 balls each of:
- 3365 Cocoa
- 3650 Dill
- 3920 Cayenne
- 3845 Twilight
- 2 balls of:
- 3116 Ivory
- 3 balls each of:
-
Tools:
- Crochet Hook: 6.5mm (US K-10.5)
- Yarn needle (for weaving in ends and sewing)
Special Abbreviations
Throughout the pattern, you’ll encounter some special stitch abbreviations:
-
Beg PS (Beginning Puff Stitch):
Ch 2, [yo and draw up a long loop, yo and draw through 2 loops] twice all in space indicated, yo and draw through all 3 loops on hook. -
PS (Puff Stitch):
[Yo and draw up a long loop, yo and draw through 2 loops] 3 times all in stitch or space indicated, yo and draw through all 4 loops on hook.
Square (Make 12)
You’ll create a total of 12 squares in your chosen color combinations, making sure not to use Ivory in the last two rounds.
Setup
- With your first color, ch 4.
- Join with a slip stitch in the 4th chain from the hook to form a ring.
Rounds
-
Rnd 1: Work a Beg PS in the ring, ch 1, [PS in ring, ch 1] 7 times. Join with a slip stitch in the top of the Beg PS — 8 puff stitches. Fasten off.
-
Rnd 2: Slip stitch to the next ch-1 space. Work (Beg PS, ch 1, PS, ch 1) in the next ch-1 space. Repeat around, joining at the top of the Beg PS — 16 puff stitches. Fasten off.
-
Rnd 3: Join your second color in any ch-1 space. Work (Beg PS, ch 4, PS) in the same space. Continue with the given instructions, ending with a join — 20 puff stitches. Fasten off.
-
Rnds 4 and 5: Join the next color in any corner ch-4 space. Work (Beg PS, ch 4, PS) in the same space. Repeat directions as stated, joining at the end — 24 puff stitches. Fasten off.
-
Rnd 6: Join the last color in a corner ch-4 space. Work (ch 3, 2 dc, ch 3, 3 dc) in the same space, followed by 3 dc in each ch-1 space around, ending at the join.
-
Rnd 7: Ch 3, dc in each stitch to the corner, and work (3 dc, ch 3, 3 dc) in the corner space, repeating around and joining. Fasten off and weave in ends.
Strap (Make 2)
Using Cocoa, leave a long tail for sewing:
- Ch 96.
- Row 1: Sc in the 2nd ch from the hook and each ch across (95 sc).
- Rows 2-5: Ch 1, sc across.
- Fasten off leaving long tails for sewing.
Finishing Touches
To assemble your tote:
- With Ivory and right sides of squares together, slip stitch squares into a 3 x 4 rectangle.
- Fold in half and slip stitch sides together.
- Attach the ends of the straps to the top opening of the bag at the seams on each side of the center top square.
Felting Process
Felting adds a lovely texture to your finished bag. Here’s how to do it:
- Place bag and 1 or 2 bath towels in a washing machine on the smallest load with the hottest water setting and a small amount of liquid detergent, running it through two wash cycles.
- Avoid using fabric softener. Check the amount of felting during the cycles; multiple wash cycles may be necessary to achieve your desired look.
- Optionally, add one or two tablespoons of baking soda to speed up the felting process, checking frequently.
- Once felted to your liking, rinse in cool water to stop the felting process and remove soap.
- Shape the bag and let it dry away from direct sunlight or heat for a day or two.
Note that felting may cause pilling, which can be removed by brushing briskly with a hard nylon brush.
Conclusion
There you have it! Your Crochet Felted Granny Tote is ready to add a touch of handmade charm to your day-to-day life. This pattern allows for personal creativity and results in a beautiful, functional tote. Happy crocheting!