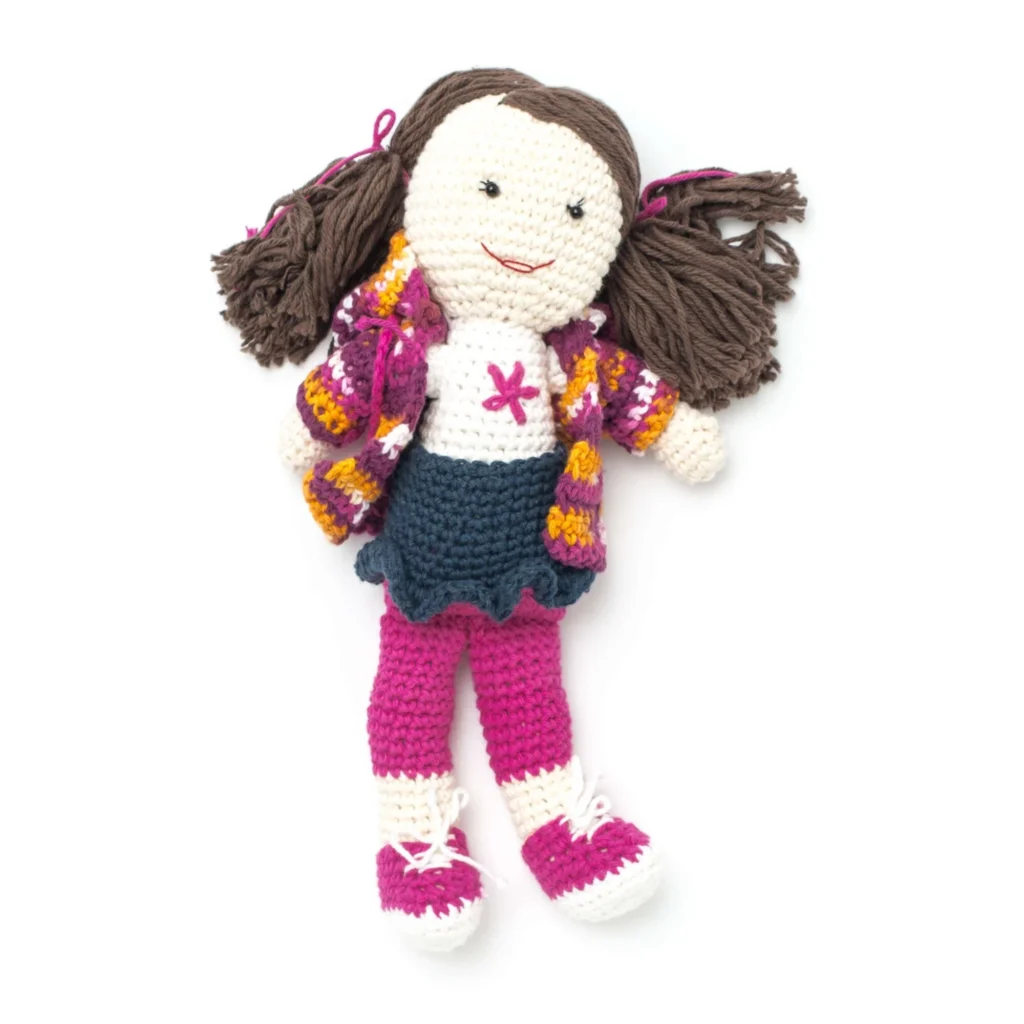
Crochet Blog Article: Create Your Own Back to School Lily Doll
It’s that time of year again—back to school! To celebrate, we have an adorable project for you: the Back to School Lily Doll! This fun crochet pattern combines vibrant colors and playful elements to create a charming doll that’s perfect as a gift or as a decorative piece for your home. Follow along as we break down the materials needed and provide a detailed overview of the crochet process.

Materials Needed
To make the Back to School Lily Doll, you will need the following materials:
Yarn
-
Lily® Sugar’n Cream® (Solids)
- Main Color (MC) (01004 Soft Ecru): 1 ball (70g/2.5 oz; 109 m/120 yds)
- Contrast A (00001 White): 1 ball
- Contrast B (01740 Hot Pink): 1 ball
- Contrast C (01114 Indigo): 1 ball
- Contrast D (01130 Warm Brown): 1 ball
-
Lily® Sugar’n Cream® (Ombres)
- Contrast E (02446 Batik): 1 ball (56.7g/2 oz; 86 m/95 yds)
Notions/Tools
- Stuffing
- 2 small black beads for eyes
- Small amount of red embroidery floss for mouth
- Small amount of black embroidery floss for eyelashes
- D-Ring
- Ribbon (short lengths of Contrast B)
Additional Tools for Hair Fringe Method
- Tape (a piece 5″ [12.5 cm] long, plus a 2″ [5 cm] piece)
- Tissue paper
- Sewing machine
The Doll Construction Process
Doll Head
Begin by crocheting the head using the main color. Start with a chain, and build rounds of single crochet to shape the head. Continue with rounds until it’s the desired height, stuff it to give it form, and finish by closing it up.
Body and Clothing
- Leggings: Crochet the leggings with Contrast B, connecting the last round without twisting the chain.
- T-shirt: Use Contrast A to create a t-shirt for your doll. Add fun details like lazy daisies on the front for decoration.
Arms and Legs
Arms are made similarly to the head but are shorter. Create hands by adding thumb stitches. The legs consist of a foot section worked in the main color, followed by the leggings in Contrast B.
Finishing Touches
Assemble the head, arms, and legs to the body. Use beads for eyes, and embroider facial features with wool and colors of your choice.
Accessories
Hair Fringe
Use 16″ lengths of yarn secured with tape to form the hair fringe, then stitch it onto the head. Add another layer of hair to frame the face for bangs.
Hoodie
Crochet a cute hoodie using the ombre yarn for added style. Included in the pattern are steps for creating the back, front, sleeves, and the hood, ensuring a cozy look for your doll.
Skirt and Sneakers
Complete the outfit with a flared skirt using Contrast C and make sneakers with A and B for a playful touch.
Back Pack
Craft a backpack for your doll using Contrast B. Here, you’ll learn how to create the bag’s body, straps, and closure using a D-ring.
Stitch Techniques
The pattern also includes diagrams for important stitch techniques such as:
- Whip Stitch: Essential for assembly.
- Back Stitch: Useful for embroidery.
- Lazy Daisy: Adds decorative flowers to your T-shirt.
Conclusion
The Back to School Lily Doll is a delightful crochet project that not only enhances your crochet skills but also allows you to create a charming keepsake that inspires joy. Gather your materials, follow the steps outlined, and show off your finished doll to friends and family!
For the full pattern and more details, check out the resources provided at your favorite craft supply store or online marketplace. Happy crocheting!