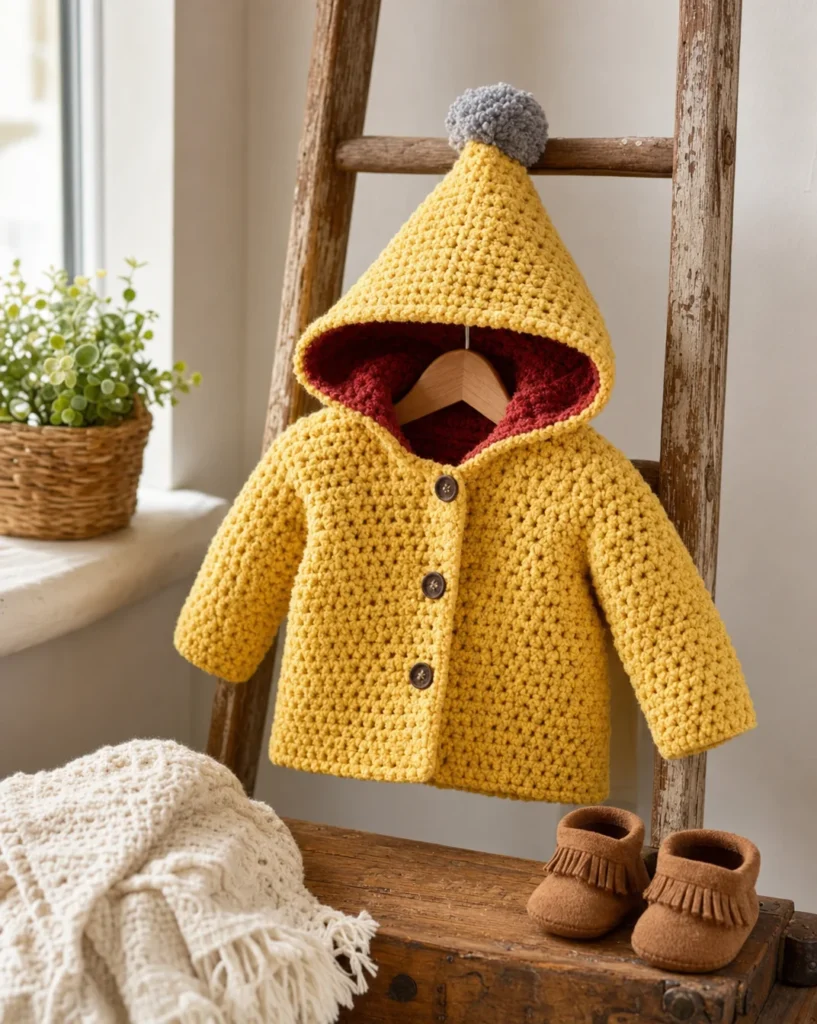
Elfin Crochet Cardigan Pattern: A Cozy Addition to Your Wardrobe
Crocheting can be a wonderful way to express creativity while also crafting unique garments for yourself or your loved ones. The Elfin Crochet Cardigan is a charming and cozy piece that will surely become a favorite in your collection. This blog post will guide you through the materials needed, stitching instructions, and the construction of this delightful cardigan.

Materials Required
Before you start, gather all the necessary supplies:
- Bernat® Baby Blanket Tiny™ (3.5 oz/100 g; 316 yds/288 m)
- Contrast A Sunflower (14007): 2 balls
- Contrast B Gray Owl (14002): 1 ball
- Size U.S. 7 (4.5 mm) Susan Bates® Silvalume® crochet hook (or size needed to obtain gauge)
- Susan Bates® stitch markers
- 3 buttons
- Stuffing for pompom
Stitching Instructions
The pattern is centered around a repetitive stitch sequence that adds texture and character to your cardigan. Here’s the main stitch pattern to follow:
-
1st Row (Right Side):
- With A, ch 72 (or 78 for a larger size).
- 1 sc in 2nd ch from hook, *1 dc in next ch, 1 sc in next ch; repeat from * to the end of the chain.
- Turn. You will have 71 (or 77) stitches.
-
2nd Row:
- Ch 3, *1 sc in next dc, 1 dc in next sc; repeat from * to end of row.
- Turn.
-
3rd Row:
- Ch 1, 1 sc in the first dc, *1 dc in next sc, 1 sc in next dc; repeat from * to end of row.
- Turn.
Continue repeating the last two rows until your work measures 7 inches (18 cm) total length, ending on a Wrong Side (WS) row.
Construction Instructions
Body (Worked in One Piece)
-
With A, chain 72 (or 78 for larger size).
-
Follow the stitch pattern as described above until you reach 7 inches [18 cm] total length.
-
Divide for Armholes:
-
Right Front: Chain 1, work across 15 (or 17) stitches, turn, and leave the remaining stitches unworked.
-
Continue in pattern on these 15 (or 17) stitches for 12 (or 14) more rows and fasten off.
-
Back: With Right Side facing, skip the next 7 stitches and join yarn with a slip stitch. Continue in pattern on the following 27 (or 29) stitches for 12 (or 14) more rows and fasten off.
-
Left Front: Repeat the process for the left, following the same pattern for the specified number of stitches.
-
-
Shoulder Seams: Use stitch markers to hold the shoulder seams together, positioned 6 (or 7) stitches in from the armhole edges. Sew these seams.
Sleeves
- With A, chain 30 (or 34).
- Follow the main body stitching to reach 7.5 (or 8.5) inches [19 (or 21.5) cm] in length.
- Fasten off and place stitch markers 1 inch [2.5 cm] down from the final row on both sides.
Hood
- Starting at the face edge, chain 54 (or 58).
- Work to form the main body pattern, reaching a total of 6 (or 6.5) inches [15 (or 16.5) cm].
- Fold the last row in half and sew the center back seam. Attach the sides of the hood to the neck edge as necessary.
Finishing Touches
Buttonholes and Buttons
-
With the Right Side facing, place stitch markers for three buttonholes on the Right Front:
- Top hole ½ inch [1 cm] below the neck edge.
- Bottom hole 7 inches [18 cm] above the lower edge.
- The remaining hole should be centered between these two.
-
Slip stitch around the openwork spaces in the pattern for buttonholes, ¾ inch [2 cm] from the front edge, and sew on the corresponding buttons.
Sleeve/Armhole Attachment
- Insert sleeves at armholes, aligning them with rows above the markers on unworked stitches to form square armholes.
Pompom
- With B, chain 12, using the same body pattern to achieve 3 inches [7.5 cm] in length.
- Fasten off, leaving a long end. Gather the edges, insert stuffing, and sew to the point of the hood.
Conclusion
The Elfin Crochet Cardigan is not only a beautiful project for crochet enthusiasts, but it also results in a delightful wearable piece that is perfect for various occasions. Whether you’re a beginner or a seasoned crocheter, this pattern provides clear instructions and guidance to enhance your skills while crafting something special. Happy crocheting!