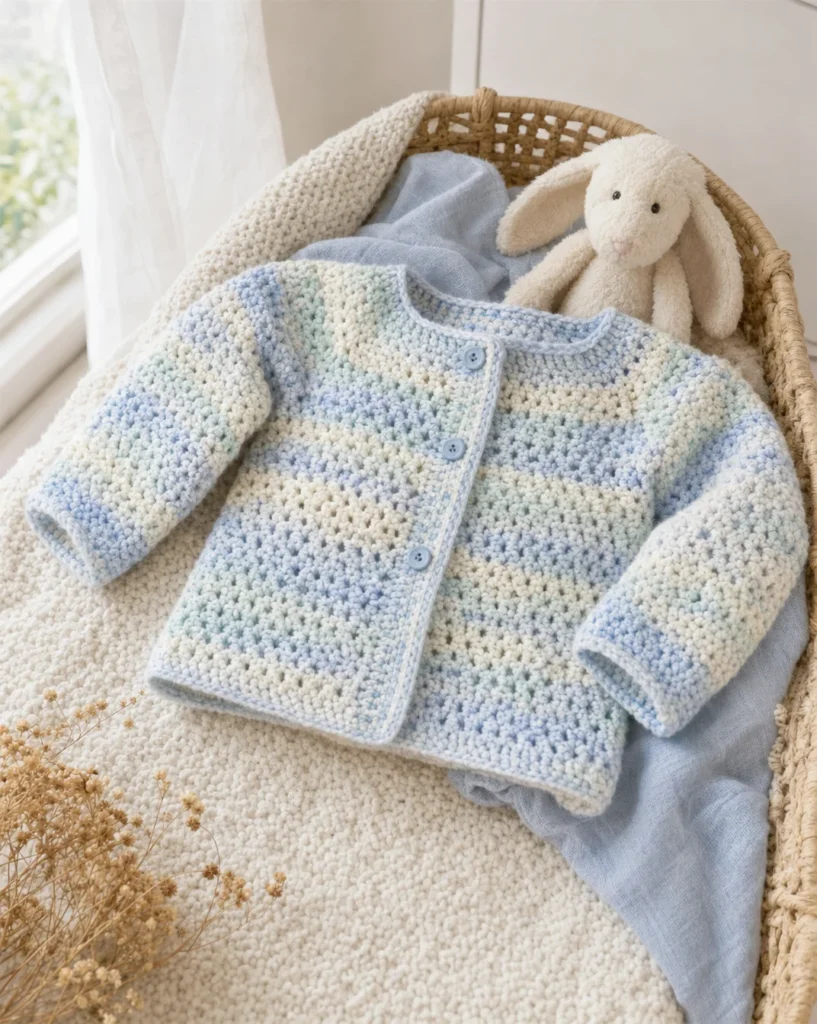
Baby’s First Crochet Cardigan Pattern: A Step-by-Step Guide
Creating your child’s first cardigan is an exciting and rewarding project, and the Baby’s First Crochet Cardigan Pattern is perfect for beginners and seasoned crocheters alike. With its adorable design, this cardigan will keep your little one cozy and stylish. In this article, we’ll explore the required materials, detailed instructions, and some tips for making this delightful garment.

Materials Needed
To crochet this lovely cardigan, you will need the following supplies:
- Bernat® Baby Sport™ yarn (Ombres: 9.8 oz/280 g; 893 yds/816 m)
- Cool Blue Ombre (24129): 1 ball (Sizes 6/12 and 18/24 mos)
- Crochet hook: U.S. G/6 (4 mm) crochet hook, or size needed to obtain gauge
- Stitch markers: 4
- Buttons: 3 (for girl’s version), 4 (for boy’s version)
Pattern Instructions
Back
-
Chain (Ch) 50 (58).
-
1st Row (RS): Insert 1 single crochet (sc) in the 2nd chain from the hook.
- *Ch 1. Skip the next chain. 1 sc in the next chain. Repeat from * to the end of the chain. Turn.
- You will have 49 (57) stitches at the end of this row.
-
2nd Row: Ch 1. 1 sc in the first sc.
- *1 sc in the next ch-1 space. Ch 1. Skip the next sc. Repeat from * until the last ch-1 space and sc.
- Finish with 1 sc in the last ch-1 space and the last sc. Turn.
-
3rd Row: Ch 1. 1 sc in the first sc.
- *Ch 1. Skip the next sc. 1 sc in the next ch-1 space. Repeat from * until you reach the last two sc.
- Ch 1, skip the next sc, and 1 sc in the last sc. Turn.
Continue this pattern until your work from the beginning measures 12 (15½)” [30.5 (39.5) cm], ending with the 3rd row. Fasten off.
Right and Left Fronts (Make 2 pieces alike)
- Ch 26 (30).
- Work according to the back instructions.
- You will have 25 (29) stitches at the end of this row. Fasten off.
Sleeves
- Ch 48 (54).
- Work from the back instructions.
- You will have 47 (53) stitches at the end of this row.
- Continue in pattern until your work from the beginning measures 8 (9)” [20.5 (23) cm], ending with the 3rd row. Fasten off.
Finishing (Assembly)
- Place markers 2¾ (3¼)” [7 (8.5) cm] from the side edges along the last row for shoulders on the back and fronts.
- Sew the shoulder seams together.
- Place markers 5 (5½)” [12.5 (14) cm] down from the shoulders on both the front and back for the sleeves.
- Sew in the sleeves between the markers.
- Sew the side and sleeve seams.
Button and Buttonhole Edging
For the button and buttonhole edging, note the following:
- Place the top marker 5” [12.5 cm] down from the top edge, the bottom marker 1” [2.5 cm] up from the bottom edge, and the remaining 1 (2) markers spaced evenly between.
Left Front Edging (RS)
- Join yarn with a slip stitch (sl st) to the top corner of the Left Front. Ch 1.
- Work 51 (66) sc evenly down the Left Front. Turn.
- For the 2nd row, ch 1 and work 1 sc in each sc to the end of the row. Turn.
- In the 3rd row: Ch 1 and 1 sc in each sc to the marked sc.
- (Ch 2. Skip the next 2 sc. 1 sc in each sc to the next marked sc) 2 (3) times.
- Ch 2, skip the next 2 sc, and 1 sc in each sc to the end of the row. Turn.
- 4th row: Ch 1. 1 sc in each sc to the end of the row. Fasten off.
Finally, sew buttons over the buttonholes on the Left Front for the girl’s version and on the Right Front for the boy’s version.
Tips for Success
- Check Gauge: Before starting, make sure your gauge matches the pattern to ensure the correct fit.
- Use Stitch Markers: Employing stitch markers can help keep track of your progress and differentiate between rows.
- Experiment with Colors: While this pattern features a lovely ombre effect, don’t hesitate to try out different color combinations for a unique touch.
Enjoy making this delightful Baby’s First Crochet Cardigan. It’s not just a piece of clothing; it’s a cherished memory in the making. Happy crocheting!