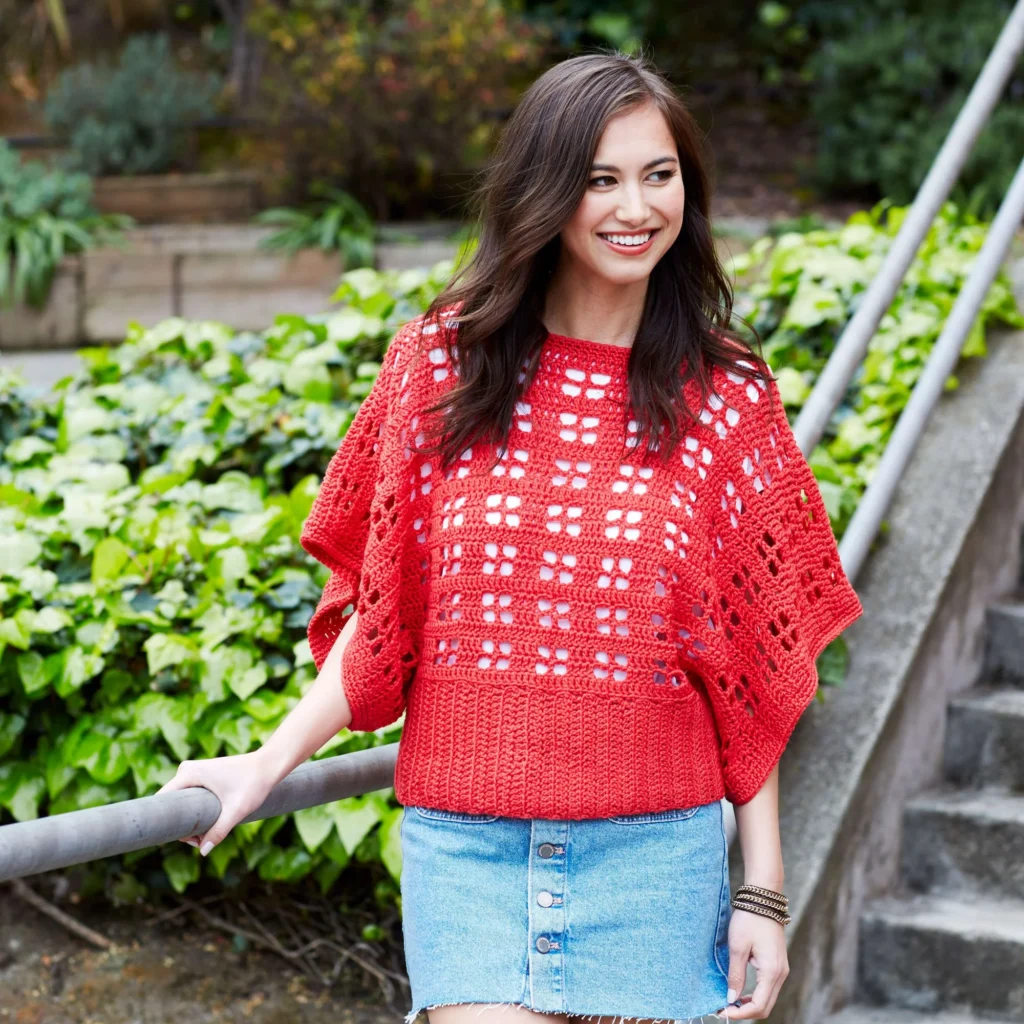
Crochet Pattern: Clementine Chic Sweater
The Clementine Chic Sweater is a beautiful, versatile piece perfect for layering. This pattern is designed for crocheters who enjoy working with medium-weight yarn and want to create a stylish, comfortable sweater. Below is a comprehensive overview of the materials you’ll need, instructions for construction, and details for the neck and sleeve edging. Let’s dive in!

Materials Needed
To complete the Clementine Chic Sweater, you will need the following materials:
-
Yarn: RED HEART® Chic Sheep™ by Marly Bird™ (Art. R170) — 100% Merino Wool, 3.5 oz (100 g), 200 yards (183 m) per ball
- Quantity:
- Small (XS, S): 4 balls
- Medium (M, L): 5 balls
- Large (L/XL, 2X): 6-7 balls
- Extra Large (3X, 4X/5X): 7-8 balls
- Quantity:
-
Main Crochet Hook: 5.5 mm (US I-9)
-
Notions:
- Yarn needle
- Stitch markers
Construction Overview
FRONT PANEL: Worked from the bottom up, followed by neck separation and shaping.
OPPOSITE NECK OPENING: Worked across to form the opposite side.
BACK: Joined at the neck opening, then worked from top down, continuing from the front neck shaping.
FINISHING: Weave in ends, block the piece, seam the sleeves, and add edging to the neck, sleeves, and lower body.
Instructions
Front Panel (All Sizes)
-
Row 1 (RS):
- Leave a long tail of at least 18 in (46 cm) before starting.
- Fdc 94 (103, 112, 121, 130, 139, 148).
- Place a marker in the 20th dc from either end to mark the sleeves.
- Turn — (number of dc as per size).
-
Row 2:
- Stacked dc in the first dc, dc in next 3 dc,
- *ch 2, skip 2 dc, dc in next dc, ch 2, skip 2 dc, dc in next 4 dc; repeat from * across.
- Turn.
-
Row 3:
- Similar to Row 2 but skip ch-2 spaces.
-
Row 4:
- Stacked dc in the first dc, dc in each stitch across.
- Turn.
-
Rows 5–19:
- Repeat Rows 2–4.
- On the last row, place a marker in 58 (64, 73, etc.) dc for the neck opening.
Neck Opening for Sizes XS (L/XL, 3X)
- Row 1:
- Stacked dc in first dc, dc in next 3 dc,
- ch 2, skip 2 dc, dc in next dc, ch 2, skip 2 dc, dc in next 4 dc 3 (4, 5) times,
- ch 2, skip 2 dc, dc in next dc twice, leave remaining sts unworked.
- Turn — 37 (46, 55) sts.
(Continue with additional rows as specified in the original pattern)
Back Panel
- Row 1: Join yarn to the last row of the neck opening with a slip stitch, stacked dc in the same st, dc in each st across for the back.
- Fdc 20 (23, 32, etc.) for the back panel, dc across opposite neck opening.
- Turn — 94 (103, 112, etc.) dc.
(Continue following the instructions until completion)
Finishing Touches
After assembling the sweater and completing the required rows, it’s time to finish off your work neatly:
- Weave in all loose ends.
- Lay your project out to the schematic size and spray with water for blocking.
- Use the mattress stitch to seam the underarm sleeves.
Neck Edging
- Join yarn into the marked dc for the neck opening.
- Sc along neck edges, ensuring to sc across the back neck as well.
- Then follow the directed rows that shape the neck edging.
Sleeve and Lower Body Edging
- For the sleeves, join yarn at underarm seam, sc in each dc around, and repeat to create a finished look.
- For lower body edging, join at underarm seam, chain 20, and continue with stacks and slip stitches as outlined.
Conclusion
The Clementine Chic Sweater pattern provides an amazing project for crocheters of various skill levels. With its flexible sizing and stylish design, this sweater will be a fantastic addition to your wardrobe. Enjoy your crocheting, and don’t forget to share your finished projects!
For detailed guidance and help, check out Red Heart for tips and community support. Happy crocheting!