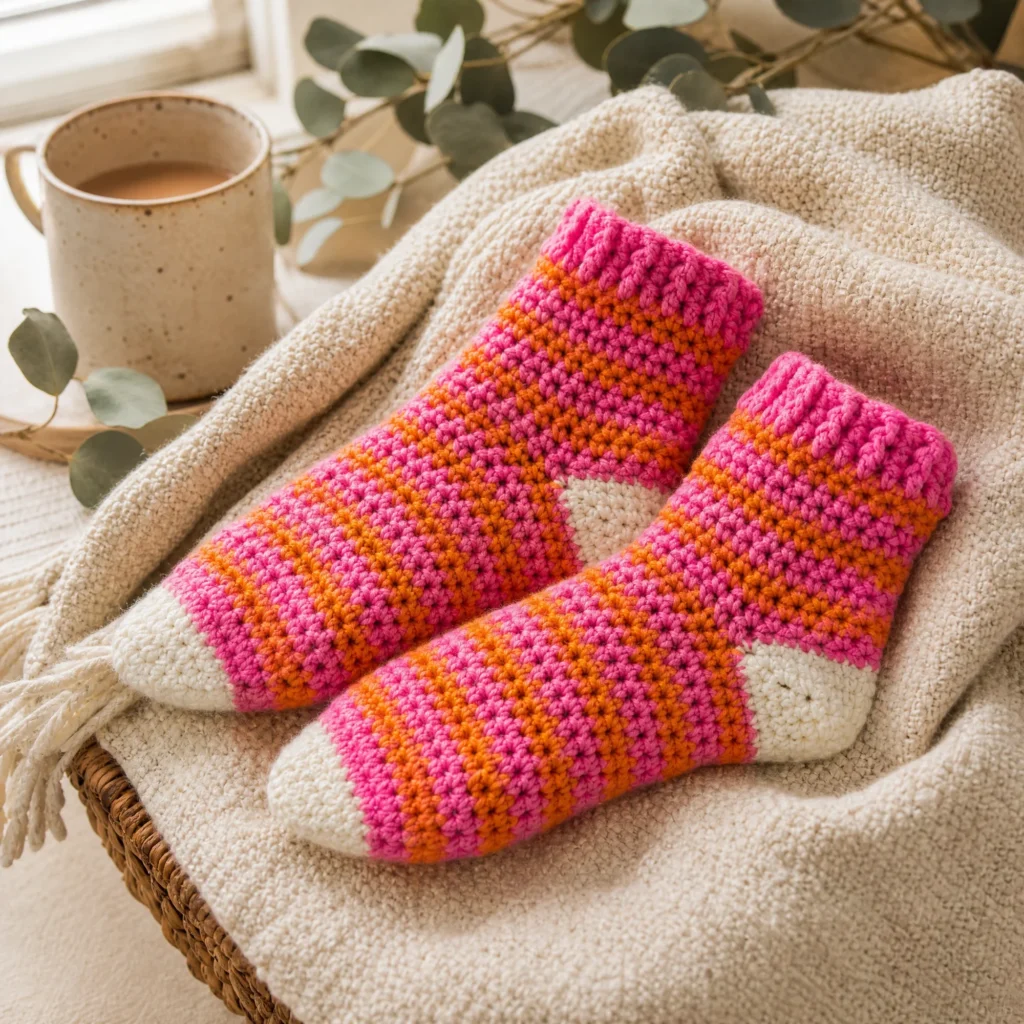
Cozy At Home Crochet Socks Pattern
Crocheting cozy socks is one of the most delightful ways to cultivate warmth and comfort during chillier months. The Cozy At Home Crochet Socks Pattern is designed for intermediate crocheters looking to create a soft and vibrant pair of slip-on socks that not only provide warmth but also showcase your crochet skills. This project utilizes colorful yarn and a variety of crochet stitches, making it a fun and rewarding endeavor.
About the Crochet Project
In this project, you will be working with different yarn colors to create a stunning pair of socks using the slip stitch and front post double crochet techniques. The result is a practical accessory that is perfect for snuggling on the couch or wearing around the house.
The pattern includes detailed instructions for creating socks that not only fit comfortably but also ensure that your feet stay toasty. You’ll work both socks simultaneously to ensure they match perfectly in size and stitch pattern.
Materials

To get started on your cozy crochet socks, you will need the following materials:
Yarn
- RED HEART® With Love®
- 1 skein 1703 Candy Pink A
- 1 skein 1252 Mango B
- 1 skein 1303 Aran C
Crochet Hook
- Susan Bates® Crochet Hooks:
- 5.0 mm [H-8 US]
- 5.5 mm [I-9 US]
Notions
- Stitch markers in different colors
- Yarn needle
Crochet Abbreviations
Understanding crochet abbreviations is essential for following this pattern:
- ch = chain
- sc = single crochet
- dc = double crochet
- FPdc = front post double crochet
- st = stitch
Technical Notes
Before diving into the pattern, keep these important notes in mind:
- Working in Pairs: To ensure that the socks match, work on two socks at once.
- Sizing: The finished socks will be snug to ensure they stay on your feet.
- Continuous Rounds: Work in continuous spirals and only join rounds when indicated.
- Stitch Markers: Use stitch markers to keep track of your rounds and parties as instructed.
Cozy At Home Crochet Socks
Skill Level: Intermediate
Pattern: Slipper Socks (make 2)
Toe (Make 2)
- With C and smaller hook, ch 5 (7, 9).
Round 1
- Sc in 2nd ch from hook and in each ch.
- Place marker in the last st to mark the 1st side.
- Working across the opposite side of the foundation ch: sc in each ch.
- Place a stitch marker of a different color in the last st to mark the 2nd side.
- Stitch count: 8 (12, 16) sc
Rounds 2 and 3
- Work 2 sc in first st.
- Sc in each st to sc before the 1st marked st, 2 sc in next sc, sc in marked st.
- 2 sc in next sc, sc in each st to sc before 2nd marked st.
- 2 sc in next sc, sc in marked st.
- Stitch count: 16 (20, 24) sc
Round 4
- Sc in each sc.
Rounds 5 and 6
- Repeat Rounds 3 and 4.
- Change to A and larger hook at the end of Round 6.
- Stitch count: 20 (24, 28) sc.
- Remove markers and place a marker in the first st.
Foot (after toe; continue in continuous spirals)
Foot Rounds 1 and 2:
- Sc in each sc; change to B at the end of Round 2.
Foot Rounds 3 and 4:
- Sc in each sc; change to A at the end of Round 2.
Heel
- Lay the sock so the toe is flat at Round 1.
- On the side facing up, place markers at the sides of Round 20 (22, 24) so that there are 8 (10, 12) stitches between the markers.
- Continue working in rows.
Row 1 (right side)
- With the right side facing, join C with sc in 1st marked stitch.
- Sc in each st to next marked st.
- Sc in marked st and turn.
- Stitch count: 10 (12, 14) sc
- Remove markers.
Row 2
- Ch 1, sc in each sc, turn.
Rows 3-8
- Ch 1, sc in each sc to the last sc; leave the last sc unworked, turn.
- Stitch count at end of Row 8: 4 (6, 8) sc
Rows 9 to 14
- Follow the specific instructions for each row to complete the heel.
- Remember to adjust the stitch counts as noted for your sizes.
Leg
Note:
Continue working in spirals, do not join at the end of rounds.
Round 1
- With the right side facing, join A (B, A) with sc at the edge of the heel.
- Sc in next 19 (23, 27) sc around heel and foot.
- Stitch count: 20 (24, 28) sc.
- Place a marker in the first st.
Round 2
- Sc in each sc; change to B (A, B) at the end of the round.
Rounds 3 and 4
- Sc in each sc; change to A (B, A).
Cuff
Round 1
- Ch 3 (counts as the 1st dc here and throughout).
- Dc in each st.
- Join with a slip st to the top of the beginning ch-3.
Round 2
- Ch 3.
- FPdc around the next dc.
- *Dc in the next dc, FPdc around the next dc; repeat from * around.
- Join with a slip st in the 3rd ch of the beginning ch-3.
- Stitch counts (written): 10 (12, 14) FPdc and 10 (12, 14) dc.
Round 3
- Ch 3.
- FPdc around the next FPdc.
- *Dc in the next dc, FPdc around the next FPdc; repeat from * around.
- Join with a slip st in the 3rd ch of the beginning ch-3.
- Stitch counts (written): 10 (12, 14) FPdc and 10 (12, 14) dc.
- Fasten off.
Finishing
- Weave in all ends.
- Block if necessary.
Frequently Asked Questions
What crochet hook is used for this pattern?
You will need a Susan Bates® Crochet Hook in sizes 5.0 mm [H-8 US] and 5.5 mm [I-9 US].
Is this project worked in rows or rounds?
The pattern is primarily worked in rounds, specifically for the toe, foot, heel, and leg sections.
How long does it take to complete these socks?
The time to complete the socks varies based on your crochet speed, but as an intermediate project, expect to spend several hours crafting them.
Can this pattern be adjusted for different sizes?
Yes, the stitch counts and instructions provide variations for Small, Medium, and Large sizes, allowing for a tailored fit.
Do I need to sew any pieces together?
No, these socks are crocheted completely in the round and do not require assembly.
Conclusion
The Cozy At Home Crochet Socks Pattern is a fantastic project for those looking to make warm, stylish socks that bring comfort to any chilly day. With vibrant colors and a variety of techniques, these socks not only help you hone your crochet skills but also create a lovely accessory that you can enjoy wearing or gift to someone special. Enjoy the process of creating your new cozy companions! Happy crocheting!