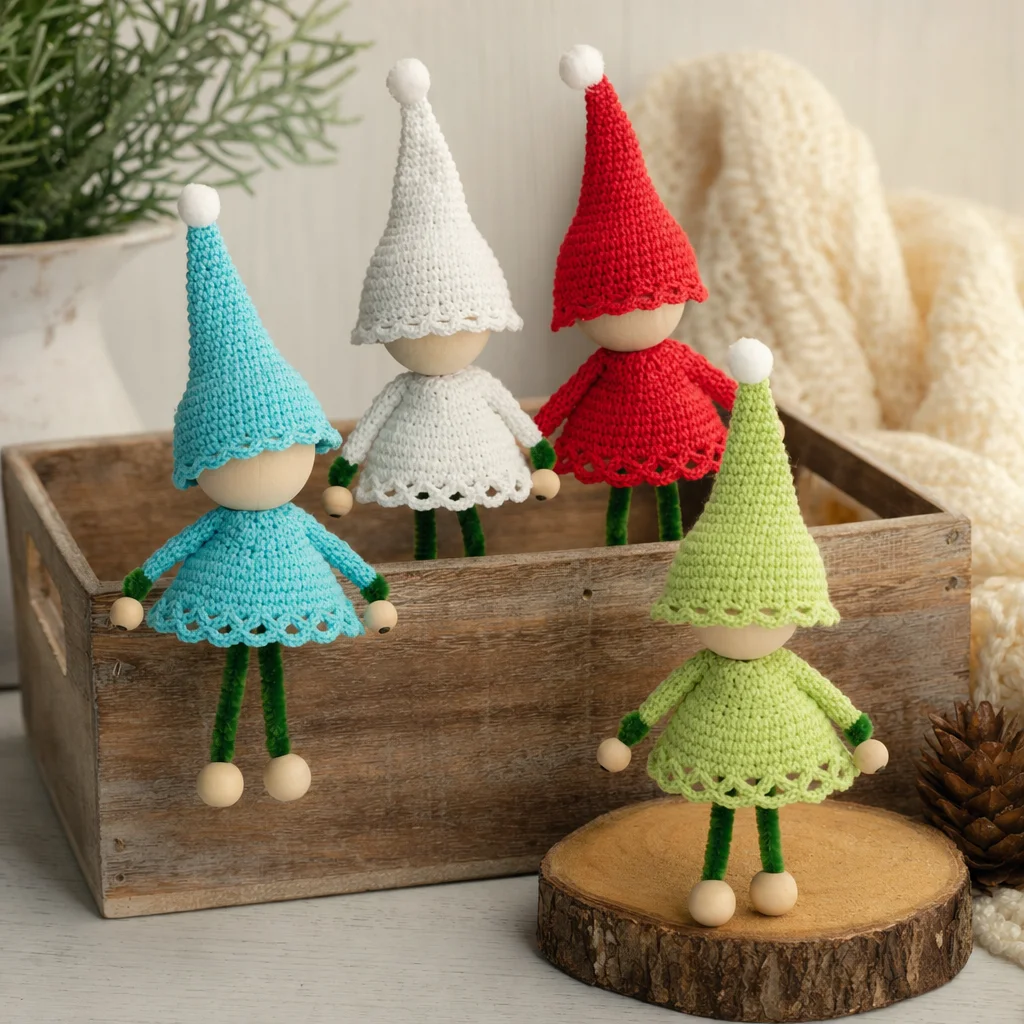
Aunt Lydia Crochet Tree Elves Pattern
Creating seasonal decorations is an exciting way to add charm to your home, and these adorable Aunt Lydia Crochet Tree Elves are perfect for the holiday season. Not only do they make excellent ornaments for your Christmas tree, but they can also be used to adorn gift boxes or simply as delightful additions to your home decor. This pattern is designed for makers of various experience levels, making it a fun project for both seasoned crocheters and those looking to explore their creativity. You may also find 10 Best Halloween Crochet Patterns useful.
About the Crochet Project
This crochet project features four charming elves, each knitted with vibrant Aunt Lydia’s® Classic™ Crochet Thread, in festive colors which include White, Atom Red, Wasabi, and Aqua. The unique structure of the elves is enhanced with wooden balls, pipe cleaners, and a pom-pom, making them sturdy and delightful. If you’re inspired to expand your holiday collection, you might also be interested in exploring additional ornament patterns for a comprehensive festive decor.
Materials

Here’s a complete list of the materials you’ll need to create your crochet elves:
Yarn
- Aunt Lydia’s® Classic™ Crochet Thread size 10
- White: 400 yds / 366 m — Elf 1: 1 ball
- Atom Red (2160): 350 yds / 320 m — Elf 2: 1 ball
- Wasabi (0397): 350 yds / 320 m — Elf 3: 1 ball
- Aqua (0450): 350 yds / 320 m — Elf 4: 1 ball
Note: One ball of each color will make approximately 10 elves.
Hooks
- U.S. B/1 (2.25 mm) Susan Bates® Silvalume® crochet hook for Elf’s Poncho
- U.S. 7 (1.5 mm) Susan Bates® Steelite® crochet hook for Elf’s Hat or size needed to obtain gauge
Other Materials
- Pipe cleaner: 12″ [30.5 cm] long per elf
- Wooden balls:
- 1 medium wooden ball for Head: 2¼” [5.5 cm] diameter
- 4 small wooden balls for Hands & Feet
- Small purchased pom-pom
- Hot Glue Gun
Note: These decorations contain small parts and are not suitable for children under 8 years of age.
Understanding the Crochet Construction
The structure of your elves comprises both a top and a hat, defined through rounds and rows of crochet stitches. This layered approach allows for distinctive shapes and provides a whimsical appearance to each elf. The assembly incorporates practical materials such as pipe cleaners and wooden balls, resulting in a delightful contrast of textures and bold colors.
Elf’s Top
Let’s start with the top of your elves, which serves as the main body.
Working in rounds, this piece begins with a magic loop, making it easy to adjust as you crochet:
Instructions for Elf’s Top:
-
With U.S. B/1 (2.25 mm) crochet hook, make Magic Loop.
Rounds
- 1st rnd: Ch 3. 11 dc in magic loop. Join. PM on top of first dc for beg of rnd. 12 dc.
- 2nd rnd: Ch 3. 1 dc in same sp as sl st. 2 dc in each dc around. Join. 24 dc.
- 3rd rnd: Ch 3. 1 dc in same sp as sl st. 1 dc in next dc. *2 dc in next dc. 1 dc in next dc. Rep from * around. Join. 36 dc.
- 4th rnd: Ch 3. 1 dc in same sp as sl st. 1 dc in each of next 2 dc. *2 dc in next dc. 1 dc in each of next 2 dc. Rep from * around. Join. 48 dc.
- 5th rnd: Ch 3. 1 dc in same sp as sl st. 1 dc in each of next 3 dc. *2 dc in next dc. 1 dc in each of next 3 dc. Rep from * around. Join. 60 dc.
- 6th rnd: Ch 5 (counts as ch 2 and 1 dc). 1 dc in same sp as sl st. *Skip next dc. (1 dc. Ch 2. 1 dc) in next dc. Rep from * around. Skip last dc. Join with sl st to 3rd ch of ch-5. Fasten off.
Elf’s Hat
Next, we will create the hat of the elf, which adds a charming touch to the overall design.
Instructions for Elf’s Hat:
-
With U.S. 7 (1.5 mm) crochet hook, ch 23.
Rows
- 1st row: 1 sc in 2nd ch from hook and each ch to end of chain. Turn. 22 sc.
- 2nd row: Ch 1. Sc2tog. 1 sc in each sc to last 2 sts. Sc2tog. Turn. 20 sts.
- Rep last row until 4 sts rem.
- Next row: Ch 1. (Sc2tog) twice. Turn.
- Next row: Ch 1. Sc2tog. Fasten off. Weave in ends.
Finishing Touches
Once you have your top and hat ready, you can start assembling your elf. The finishing steps employ pipe cleaners for structure, as follows:
- Cut the pipe cleaner as follows:
- 3″ [7.5 cm] for Body
- 4″ [10 cm] for Arms
- 5″ [12.5 cm] for Legs
Assembly Steps
- Fold Leg pipe cleaner in half.
- Fold up the lower end of the Body pipe cleaner approx ½” [3 mm] to form a “U”.
- Place Legs in the “U” and twist closed.
- Insert top of Body through the hole in the center of Elf’s Top and push Elf’s Top down approx 1½” [4 cm].
- Place Head wooden ball on top of Body pipe cleaner. Twist Body pipe cleaner end at the top of the wooden ball in a knot. Make sure it does not pull back through the hole.
- Fold Arm pipe cleaner in half and wrap it around Body pipe cleaner approx ½” [3 mm] below Elf’s Top.
- Slide Feet wooden balls onto Leg pipe cleaner and secure end. Repeat for 2nd leg.
- Insert the arm through V-stitch edge of Elf’s Top and attach hand wooden ball to Arm pipe cleaner. Secure end. Repeat for 2nd Arm.
- Sew back hat seam. Attach pom-pom to tip of Hat.
- Glue Hat to Head wooden ball, keeping seam at back.
- Insert an ornament hook through 2 sts at the top of Hat to hang Tree Elf on Christmas Tree, gift box, or bottle.
Frequently Asked Questions
What crochet hook is used for this pattern?
The pattern utilizes a U.S. B/1 (2.25 mm) Susan Bates® Silvalume® crochet hook for the elf’s top and a U.S. 7 (1.5 mm) Susan Bates® Steelite® crochet hook for the elf’s hat.
Is this project worked in rows or rounds?
The elf top is worked in rounds, while the elf hat is constructed in rows.
Does this crochet project require assembly?
Yes, the project requires assembly using pipe cleaners and wooden balls to create the structure of the elves.
In conclusion, the Aunt Lydia Crochet Tree Elves Pattern offers an engaging project that not only brightens your holiday season but also gives you the chance to express your creativity. These charming elves can serve as delightful ornaments or gifts, making them a wonderful addition to your festive celebrations. Happy crocheting!