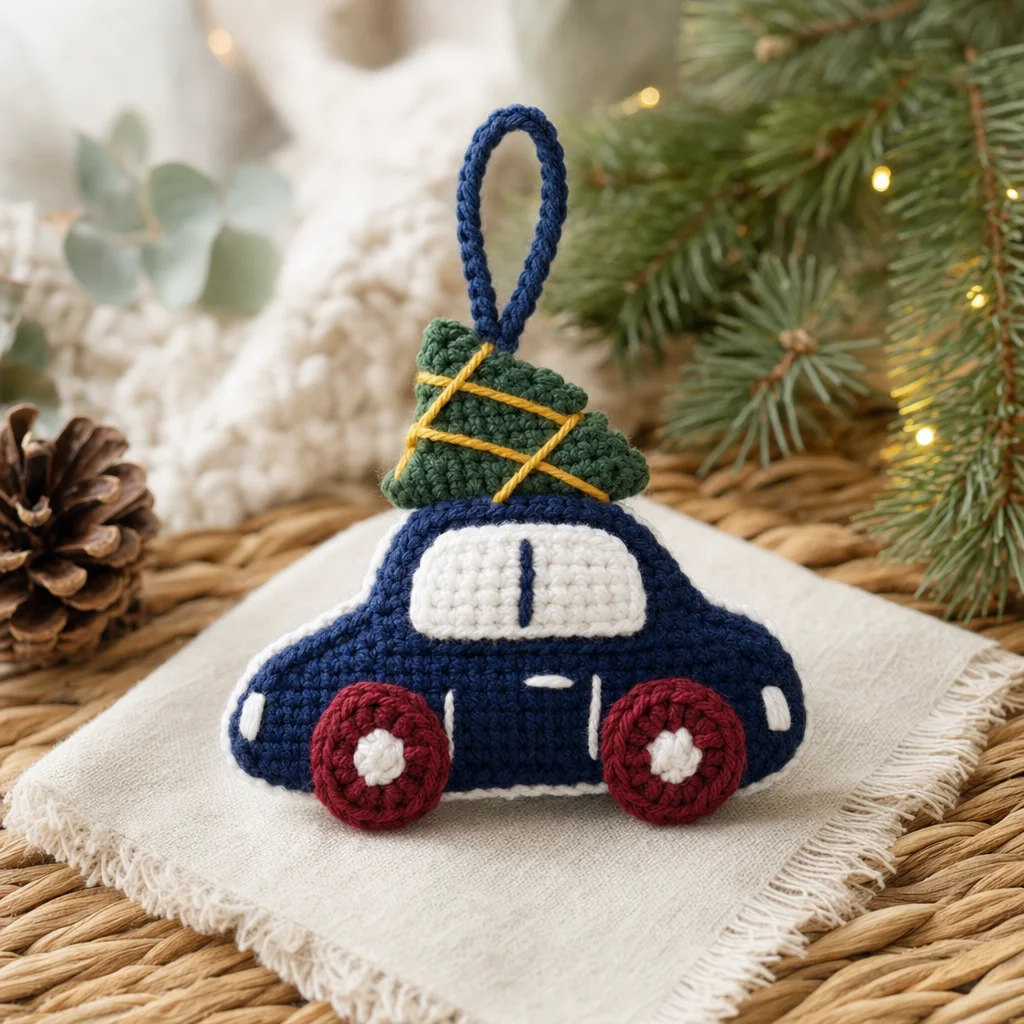
Driving Home for Christmas Crochet Ornament Pattern
The holiday season is a time for joyous celebrations, cherished memories, and, of course, crafting! One of the most delightful projects to ignite your festive spirit is the Driving Home for Christmas Crochet Ornament. This charming ornament showcases a whimsical car adorned with a Christmas tree and makes for a perfect handmade keepsake or gift. In this guide, we will explore the materials needed, provide detailed instructions, and highlight tips that will help you create this festive decoration to hang on your tree.

About the Crochet Project
The Driving Home for Christmas ornament project is not only a fun crochet endeavor but also a meaningful decoration that encapsulates the warmth of the season. This ornament is designed using vibrant colors, evoking the classic feel of holiday travel. With a combination of simple crochet techniques, including the satin stitch and standard single crochet stitches, this project is perfect for those who enjoy working with yarn to create seasonal treasures.
Materials
To get started on your ornament, gather the following supplies:
Yarn
- Red Heart® Super Saver® (7 oz/198 g; 364 yds/333 m) (base yarn)
- Contrast A Soft Navy (0387): 1 ball
- Contrast B Soft White (0316): 1 ball
- Contrast C Hunter Green (0389): 1 ball
- Contrast D Burgundy (0376): 1 ball
- Contrast E Gold (0321): 1 ball
Crochet Hook
- Size U.S. H/8 (5 mm) crochet hook (or size needed to obtain gauge)
Notions
- Yarn needle
Crochet Abbreviations
Here are some common abbreviations used in the pattern:
- ch = chain
- sc = single crochet
- sc2tog = single crochet two together
- RS = right side
- WS = wrong side
Stitch Key
Before diving into the pattern, familiarize yourself with the satin stitch used in this design:
- Satin Stitch: The satin stitch is worked as single crochet 2 together (sc2tog) and is worked in the back loop only.
Pattern Structure
The ornament consists of several components, which includes the car body, window, wheels, tree, and all decorative details. Let’s break down these components:
Car Body (make 2)
Begin with Color A.
- With A, ch 17.
- 1st row (RS): 1 sc in 2nd ch from hook. 1 sc in each ch to end of chain. Turn. (16 sc)
- 2nd row: Ch 1. 1 sc in each sc to end of row. Turn. (16 sc)
- 3rd row: Ch 1. sc2tog. 1 sc in each sc to last 2 sc. Sc2tog. Turn. (14 sc)
- 4th row: As 3rd row. (12 sc)
- 5th row: Ch 1. sc2tog. 1 sc in each of next 7 sc. Turn. (8 sc)
- 6th row: Ch 1. 1 sc in each sc to end of row. Turn. (8 sc)
- 7th row: Ch 1. sc2tog. 1 sc in each sc to last 2 sc. Sc2tog. Fasten off.
Edging (join Car Body)
-
Holding WS together, join B with sl st at any point around Car Body. Working through both thicknesses, proceed as follows:
1st rnd: Ch 1. Work sc evenly around Car Body. Join. Fasten off.
Window
- With B, ch 8.
- 1st row: 1 sc in 2nd ch from hook. 1 sc in each ch to end of chain. Turn. (7 sc)
- 2nd row: Ch 1. sc2tog. 1 sc in each sc to last 2 sc. Sc2tog. Fasten off. (5 sc)
Sew Window to Car Body, and using A, embroider a line in the middle of the Window.
Wheels (make 2)
- With B, ch 2.
- 1st rnd: 6 sc in 2nd ch from hook. Break B. Join with D. 6 sc.
- 2nd rnd: With D, ch 1. 2 sc in each sc around. Join. Fasten off.
Sew Wheels to Car Body.
Tree
- With C, ch 10.
- 1st row: 1 sc in 2nd ch from hook. 1 sc in each ch to end of chain. Turn. (9 sc)
- 2nd row: Ch 1. Working in back loops only, 1 sc in each of next 3 sc. Sc3tog. 1 sc in each sc to end of row. Turn. (7 sc)
- 3rd and alt rows: Ch 1. Working in back loops only, 1 sc in each st to end of row. Turn.
- 4th row: Ch 1. Working in back loops only, 1 sc in each of next 2 sc. Sc3tog. 1 sc in each sc to end of row. Turn. (5 sc)
- 6th row: Ch 1. Working in back loops only, 1 sc in next sc. Sc3tog. 1 sc in last sc. Turn. (3 sc)
- 8th row: Ch 1. Working in back loops only, Sc3tog. Fasten off.
Sew Tree to top of Car Body and using a length of E, wrap and embroider yarn around the Tree.
Car Lights and Door Details
Using B, embroider Car Lights with satin stitch and using the same length, embroider door details.
Hanging Loop
- With A, ch 12.
- Fasten off. Sew Hanging Loop to Car Body.
Project Completion
Now that you have constructed all parts of the Driving Home for Christmas ornament, it’s time to display it or gift it to someone special! This handmade ornament will not only enhance your holiday decorations but will also serve as a memorable keepsake for years to come.
For additional inspiration, check out these delightful crochet ornaments:
- Explore some festive designs in these 10 free crochet Christmas ornament patterns.
- Get creative with unique decorations by checking out these 11 crochet Christmas wind spinner patterns.
Frequently Asked Questions
What crochet hook is used for this pattern?
This pattern employs a size U.S. H/8 (5 mm) crochet hook, although you may use a different size if it helps you achieve the correct gauge.
Does this project require assembly?
Yes, after crocheting the components, you will need to sew the parts together, including the wheels, window, and tree to the car body.
Is there a specific yarn suggested for this ornament?
The pattern uses Red Heart® Super Saver® yarn in various colors, which provides durability and a vibrant finish.
Conclusion
The Driving Home for Christmas Crochet Ornament is a whimsical addition to any holiday décor. This project allows you to combine creativity and crochet skills, resulting in a charming ornament that captures the heartwarming essence of the season. Gather your materials, follow the pattern, and enjoy the joy of crafting this holiday treasure!