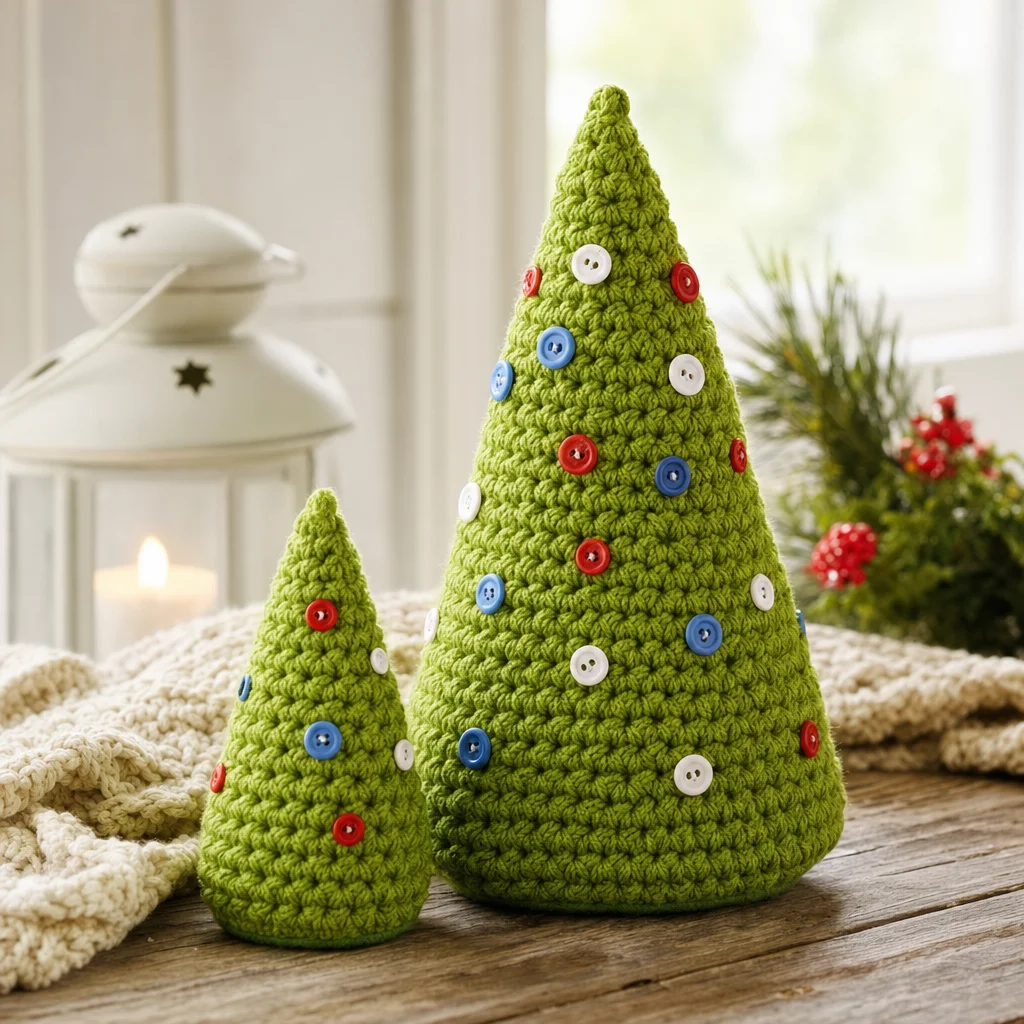
Christmas Trees Pattern
As the festive season approaches, it’s the perfect time to create handmade decorations that bring warmth and charm to your home. Crocheted Christmas trees are an excellent way to spread holiday cheer. These delightful little trees not only serve as eye-catching ornaments, but they can also be great gifts or centerpieces. This article presents a lovely pattern using Lily® Sugar’n Cream® yarn, creating both large and small trees that are simple to make yet wonderfully festive.
About This Crochet Project
The “Christmas Trees Pattern” is an engaging crochet project ideal for crafters looking to add personalized decorations to their holiday decor. This pattern showcases two sizes of trees, allowing you to mix and match based on your style and available space.
It’s a fun project that utilizes basic crochet stitches and involves stuffing and assembly, making it suitable for those who have some crochet experience. With vibrant colors and fun embellishments, your crocheted trees can take on a unique look, showcasing your creativity.
Materials

To create your charming crocheted Christmas trees, gather the following materials:
Yarn
- Lily® Sugar’n Cream® (2.5 oz/70.9 g; 120 yds/109 m) in color Hot Green (01712): 1 ball makes both large and small trees.
- Large Tree: Approximately 24 m / 27 yds
- Small Tree: Approximately 17 m / 19 yds
Crochet Hook
- Size U.S. G/6 (4 mm) crochet hook or size needed to obtain gauge.
Stuffing
- Fiberfill stuffing to add volume to your trees.
Buttons
- Various buttons for decoration; these can add a whimsical touch to your finished trees.
Base Materials
- 12″ [30.5 cm] felt for the base of the trees.
- Light cardboard to provide stability between the felt and stuffing.
Crochet Abbreviations
Understanding the abbreviations is crucial in following the crochet instructions accurately. Here are the terms you’ll encounter in your pattern:
- Ch: chain
- Sc: single crochet
- Sl st: slip stitch
- Rpt: repeat
Gauge
Since gauge is not specified in the pattern, it’s essential to measure your stitches to ensure that your trees maintain the intended proportions. If your stitches are tighter or looser, adjust your hook size accordingly.
Pattern Notes
The trees are constructed in rounds, beginning from the base and working upwards. You’ll be alternating between increasing rounds and standard single crochet rounds to form the tree’s shape. Following these instructions carefully will create uniformly shaped trees that are visually appealing.
Instructions (Crochet)
Large Version
-
Ch 2.
-
1st rnd: 6 sc in 2nd ch from hook. Join with sl st to first sc.
(Stitch count after join: 6 sc) -
2nd rnd: Ch 1. Working in back loops, 2 sc in each sc around. Join with sl st to first sc.
(12 sc) -
3rd and 4th rnds: Ch 1. 1 sc in each sc around. Join with sl st to first sc.
-
5th rnd: Ch 1. *1 sc in next sc. 2 sc in next sc. Rep from * around. Join with sl st to first sc.
(18 sc) -
6th and 7th rnds: As 3rd and 4th rnds.
-
8th rnd: Ch 1. *1 sc in each of next 2 sc. 2 sc in next sc. Rep from * around. Join with sl st to first sc.
(24 sc) -
9th and 10th rnds: As 3rd and 4th rnds.
-
11th rnd: Ch 1. *1 sc in each of next 3 sc. 2 sc in next sc. Rep from * around. Join with sl st to first sc.
(30 sc) -
12th and 13th rnds: As 3rd and 4th rnds.
-
14th rnd: Ch 1. *1 sc in each of next 4 sc. 2 sc in next sc. Rep from * around. Join with sl st to first sc.
(36 sc) -
15th and 16th rnds: As 3rd and 4th rnds.
-
Continue as established: Increase 6 sts on next and every following 3rd rnd, until there are 66 sc.
-
Next 2 rnds: Ch 1. 1 sc in each sc around. Join with sl st to first sc. Fasten off at end of last rnd.
Small Version
Work from 1st rnd to 14th rnd as given for Large Version. Fasten off.
Finishing / Assembly
Once you’ve completed the crocheted trees, it’s time to assemble and add finishing touches.
-
Cut 1 piece of felt and 1 piece of cardboard to fit the circumference of the bottom of the tree.
-
Stuff the tree with fiberfill until it’s adequately filled but retains its shape.
-
Pin the felt to the bottom of the tree, placing cardboard between the felt and stuffing to provide stability.
-
Sew the felt in position to secure it.
-
Sew on buttons as desired to decorate your tree, following your creative vision.
Frequently Asked Questions
What crochet hook is used for this pattern?
A size U.S. G/6 (4 mm) crochet hook is recommended, or you may use a size needed to obtain gauge.
Is this project worked in rows or rounds?
The project is worked in rounds, creating a seamless shape for the trees.
Does this crochet project require assembly?
Yes, the trees require assembly, including stuffing and attaching the base with felt and cardboard.
How much yarn is needed for each tree?
For the large tree, approximately 24 m (27 yds) of yarn is required, while the small tree needs about 17 m (19 yds).
Conclusion
The Christmas Trees Pattern is not only delightful to crochet but also offers endless opportunities for creativity. From choosing your buttons to varying the sizes, each tree can be personalized to fit your unique holiday style. These charming decorations can be displayed on mantels, tables, or as part of a festive centerpiece. Enjoy your crochet journey and the festive spirit that comes with creating handmade holiday treasures!