
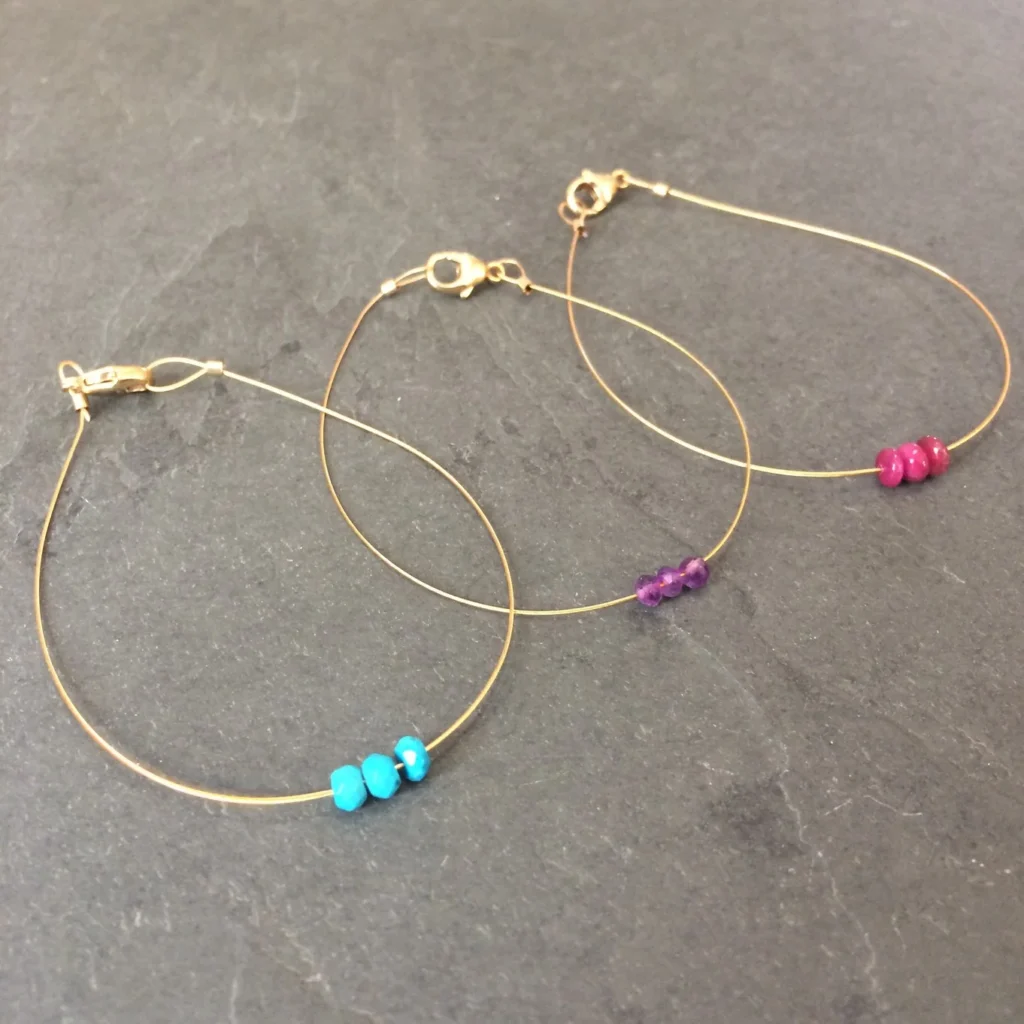
If you love simple handmade jewelry with a more polished look, this DIY gemstone friendship bracelet is a beautiful project to try. It combines delicate gemstone beads with gold-toned jewelry wire, crimps, and a small clasp to create a bracelet that feels minimal, elegant, and easy to personalize.
The design is especially nice because the gemstones remain the focal point. You can use just a few beads for a delicate bracelet, or add more for a bolder look.
This tutorial uses three ruby rondelle beads, but you can substitute your favorite gemstones to match a birthstone, favorite color, or the meaning you want the bracelet to represent.
Photo credit: Kernowcraft.com
Why You’ll Love This Gemstone Bracelet
This project is:
- simple and elegant
- easy to customize
- quick to make
- suitable for beginners
- perfect for meaningful gifts
- easy to adapt with different gemstone beads
The bracelet uses a basic crimp-and-clasp technique, so once you understand the first loop, the second side follows almost the same process.
Supplies Needed
You will need:
- gemstone beads of your choice
- 0.45 mm gold-plated jewelry wire
- small carabiner or lobster clasp
- 2 gold-filled crimps, approximately 2 x 2 mm
- snipe nose pliers or crimping pliers
- side cutters
For the example bracelet, three small ruby rondelle beads are used.
Choosing Your Gemstone Beads
You can use almost any small gemstone beads that fit comfortably on your chosen wire.
Popular choices include:
- ruby
- amethyst
- rose quartz
- turquoise
- garnet
- moonstone
- aquamarine
- citrine
You can also choose gemstones based on birth months or simply use colors you love.
How to Make a DIY Gemstone Friendship Bracelet
Step 1: Gather Your Supplies

Before you begin, lay out everything you need.
Place your:
- gemstone beads
- wire
- crimps
- clasp
- pliers
- side cutters
within easy reach.
Organizing the supplies first makes the project much easier and prevents you from searching for small findings halfway through the bracelet.
Step 2: Measure and Cut the Wire

Wrap the jewelry wire around your wrist to estimate the bracelet length.
Leave a few extra centimeters of wire for making the loops and attaching the clasp.
Cut the wire using side cutters.
It is better to leave slightly too much wire than too little because the extra length gives you more room to work with the crimps.
Step 3: Add the Gemstone Beads

Thread your chosen gemstone beads onto the jewelry wire.
The example uses three ruby rondelle beads.
You can use:
- one gemstone bead
- three gemstone beads
- five gemstones
- or as many as you like
For a minimalist bracelet, three small beads in the center creates a clean, balanced look.
Step 4: Center the Beads and Add the First Crimp

Slide the gemstone beads to the middle of the wire.
Once they are centered, thread one crimp onto one end of the wire.
Move the crimp down the wire, leaving several centimeters of working space at the end.
Do not close the crimp yet.
Step 5: Create the First Loop

Take the end of the wire and bend it back toward the crimp.
Pass the wire end back through the crimp.
This creates a loop.
At first, the loop may be larger than you want.
Gently pull the wire tail to reduce the size.
Make sure the loop is still large enough to connect easily to the clasp.
Step 6: Secure the First Crimp

Once the loop is the correct size, use snipe nose pliers or crimping pliers to close the crimp.
Pinch it firmly around the wire.
The crimp should hold the loop securely in place.
Check that the loop does not slip before moving to the next step.
Step 7: Trim the Excess Wire

Use your side cutters to remove the extra wire extending beyond the crimp.
Trim carefully and as close to the crimp as practical.
Your first end is now finished.
Step 8: Add the Second Crimp and Clasp

Move to the opposite end of the bracelet.
Thread the second crimp onto the wire.
Then add your small clasp.
A lobster or carabiner-style clasp works well for this design.
Keep both pieces close to the end of the wire while you prepare the second loop.
Step 9: Create the Second Loop

Bend the wire back toward the crimp.
Pass the wire end through the crimp again, just as you did on the first side.
This forms another loop.
The clasp should sit inside this loop.
Do not tighten the crimp yet.
Step 10: Adjust and Close the Second Loop

Adjust the loop until it is the right size.
You want it snug enough to look tidy but loose enough for the clasp to move comfortably.
Use snipe nose pliers or crimping pliers to close the crimp securely.
Check that the clasp is held firmly in place.
Step 11: Trim the Remaining Wire

Use side cutters to trim away the remaining wire tail.
Cut carefully so you do not damage the clasp or crimp.
Your bracelet is now complete.
Finished Gemstone Friendship Bracelet
Your DIY gemstone friendship bracelet is ready to wear.
The finished bracelet should have:
- a small gemstone section centered on the wire
- a neat loop on one side
- a clasp on the other
- securely closed crimps
- no sharp wire ends
This minimalist design is easy to wear alone or stacked with other bracelets.
Gemstone Bracelet Color Ideas
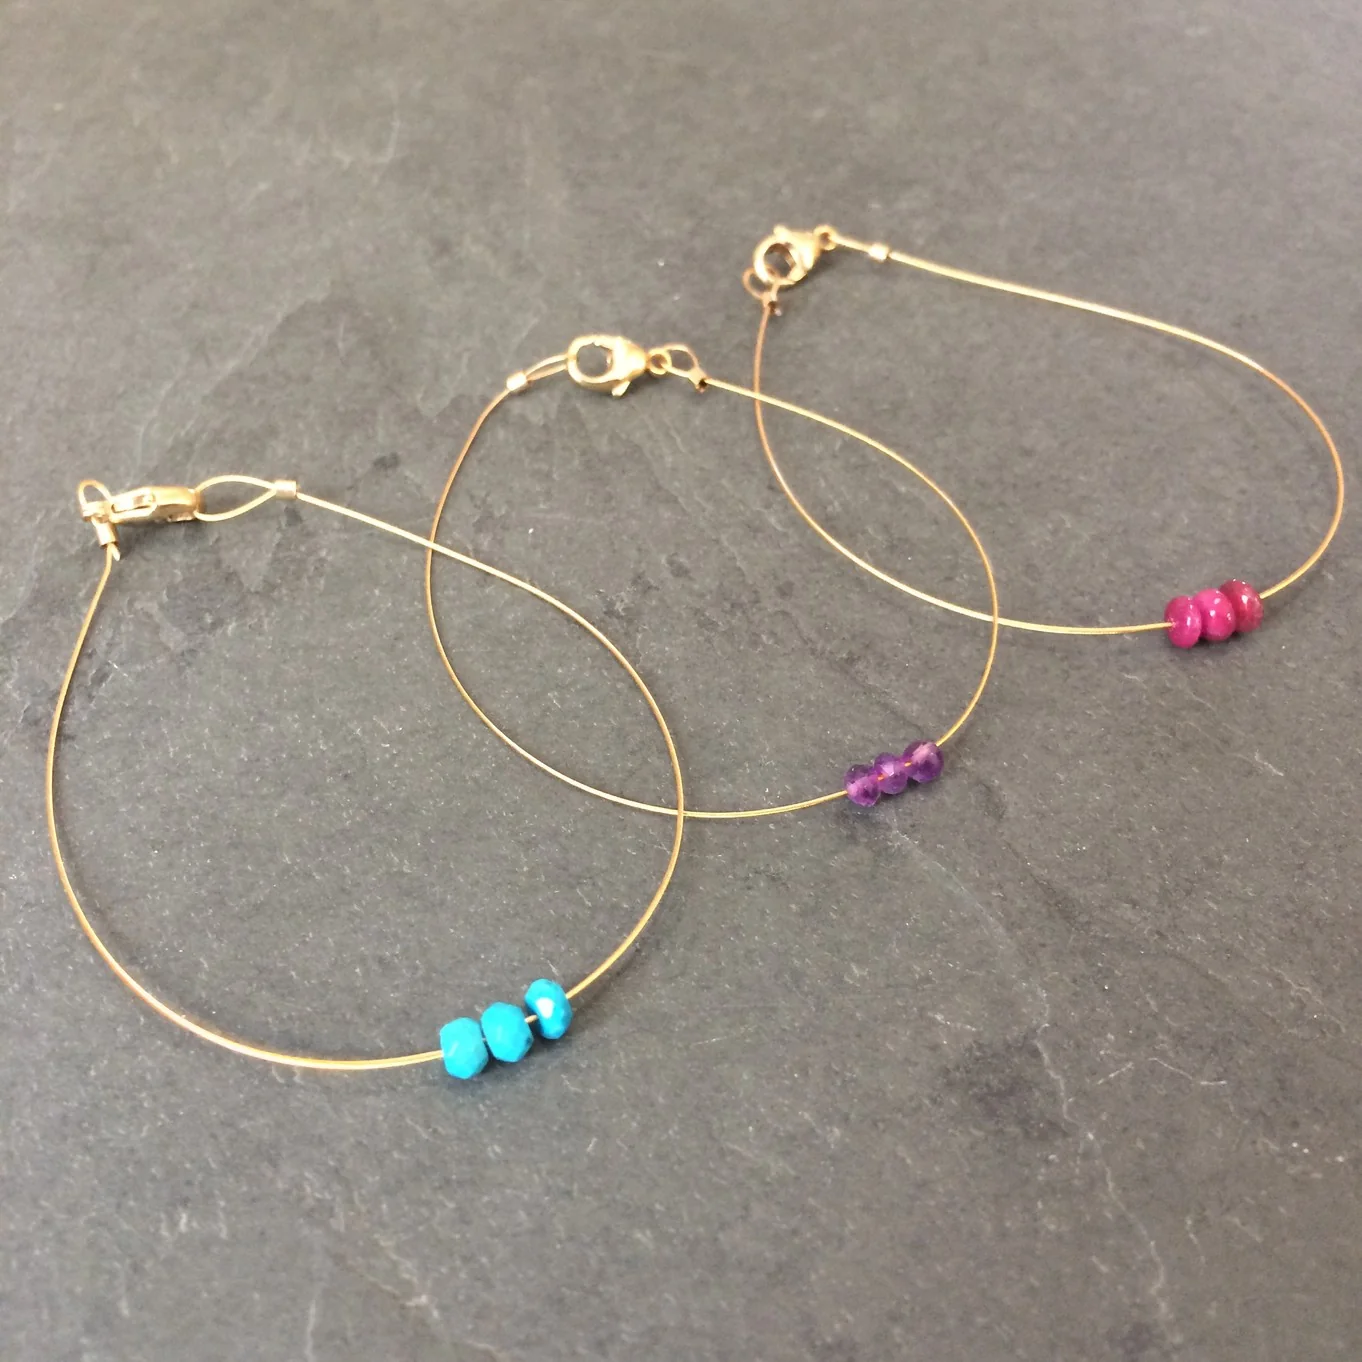
You can create many different versions of this bracelet by changing the gemstones.
Ruby Bracelet
Ruby gives the bracelet a rich red accent.
It works well with gold-toned wire for a warm, elegant finish.
Rose Quartz Bracelet
Soft pink rose quartz creates a delicate, romantic look.
Amethyst Bracelet
Purple amethyst adds a colorful accent and pairs nicely with either gold or silver findings.
Turquoise Bracelet
Turquoise creates a brighter, more casual friendship bracelet style.
Mixed Gemstone Bracelet
You can also combine different gemstones.
For example:
- ruby + moonstone
- amethyst + rose quartz
- turquoise + citrine
Just make sure the beads are similar in size so the bracelet remains balanced.
Tips for a Neat Gemstone Bracelet
Measure Before Cutting
Leave extra wire when cutting.
You can always trim excess later, but you cannot add length once the wire is too short.
Center the Beads Before Crimping
Before closing the first crimp, make sure your gemstone beads are positioned where you want them.
Once both ends are finished, adjusting the center section becomes much more difficult.
Keep the Loops Small and Neat
The loops should be large enough for the clasp to move freely but not so large that they look oversized.
Close the Crimps Firmly
The crimps are what hold the bracelet together.
Make sure they are fully closed around the wire.
Trim Sharp Ends Carefully
Inspect both ends of the bracelet after trimming.
There should be no sharp wire ends sticking out.
Frequently Asked Questions
Is this gemstone bracelet beginner-friendly?
Yes. This is a simple jewelry project because it only requires basic stringing, looping, crimping, and trimming.
How many gemstone beads should I use?
The example uses three gemstone beads, but you can use as many as you like.
For a minimalist bracelet, one to five beads works especially well.
What wire should I use?
The original project uses 0.45 mm flexible jewelry wire.
Choose a wire that is strong enough for bracelet making and flexible enough to work through crimps.
Do I need crimping pliers?
Crimping pliers are ideal, but snipe nose pliers can also be used to close the crimps.
Can I use different clasps?
Yes.
A small lobster or carabiner clasp works well, but other jewelry clasps can be used if they fit the wire loop.
Can I make this bracelet with silver findings?
Yes.
You can substitute silver-toned wire, crimps, and clasps for a cooler-toned version.
Quick Gemstone Friendship Bracelet Summary
- Gather all supplies.
- Measure the jewelry wire around your wrist.
- Leave extra wire and cut.
- Thread the gemstone beads.
- Center the beads.
- Add the first crimp.
- Form a loop.
- Close the crimp.
- Trim the excess wire.
- Add the second crimp and clasp.
- Form the second loop.
- Close the second crimp.
- Trim the remaining wire.
- Check the bracelet for sharp ends.
- Test the clasp.
- Wear and enjoy your finished bracelet.
Make Your Own DIY Gemstone Friendship Bracelet
This DIY gemstone friendship bracelet is a simple way to create handmade jewelry that feels personal and polished.
The design is easy to customize with different gemstones, metal colors, and bead counts, making it ideal for birthstone bracelets, friendship gifts, or everyday jewelry.
Once you learn how to create the crimped loops and attach the clasp, you can use the same basic technique for many other gemstone and wire bracelet designs.
Photos credit: Kernowcraft.com
