
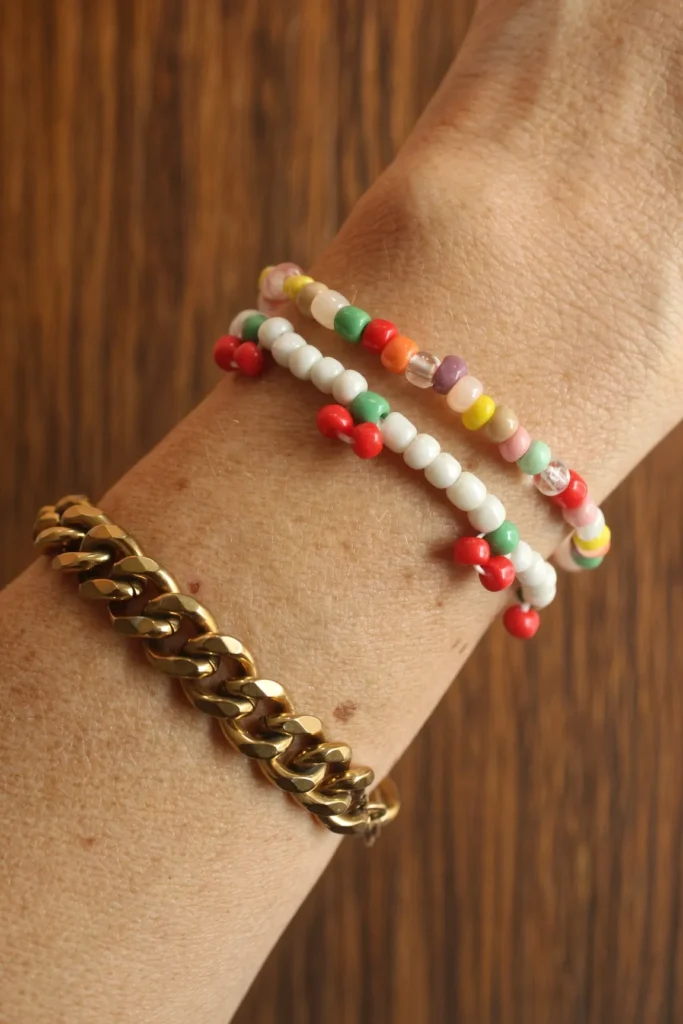
If you love colorful handmade jewelry, these fruit seed bead bracelets are a fun and easy project to try. This design uses small seed beads to create tiny cherry motifs separated by simple spacer beads, giving the bracelet a playful summer look.
The pattern is beginner-friendly and only requires a few basic jewelry-making supplies. Once you understand how the cherry section is formed, you can repeat it around the bracelet and customize the colors however you like.
You can make these as friendship bracelets, party favors, handmade gifts, or a quick weekend craft.
Why You’ll Love This Seed Bead Bracelet
This project is:
- easy to customize
- beginner-friendly
- colorful and lightweight
- quick to make
- perfect for friendship bracelets
- easy to adapt into different fruit colors
The cherry pattern is especially simple because it only uses three beads for each fruit section: one green bead and two red beads.
Supplies Needed to Make Fruit Seed Bead Bracelets
You will need:
- seed beads
- jewelry cord
- beading needle
- jewelry glue
- scissors
A lighter-weight cord may work better for forming the cherry details, especially if a thicker bracelet cord feels difficult to pass through the beads more than once.
Choosing Seed Beads
You can use one main color for the spacer beads and separate colors for the fruit motif.
For a cherry bracelet, use:
- red beads for the cherries
- green beads for the leaves or stem area
- any color you like for spacer beads
Good spacer colors include:
- white
- pink
- clear
- pale yellow
- light blue
- cream
How to Make a Fruit Seed Bead Bracelet
Step 1: Cut the Jewelry Cord
Cut a piece of jewelry cord that is about 3 to 5 inches longer than the amount you would normally use for a bracelet.
The extra length gives you room to knot the bracelet and work comfortably.
String one bead near the end of the cord and tie it off temporarily.
This helps prevent the remaining beads from sliding off while you work.
Step 2: Add the Spacer Beads

Thread the jewelry cord through your needle.
String on your first group of spacer beads.
A good starting point is around 5 to 7 spacer beads.
These beads create space between each fruit motif.
You can use the same number each time for a consistent pattern.
Step 3: Add the Cherry Beads
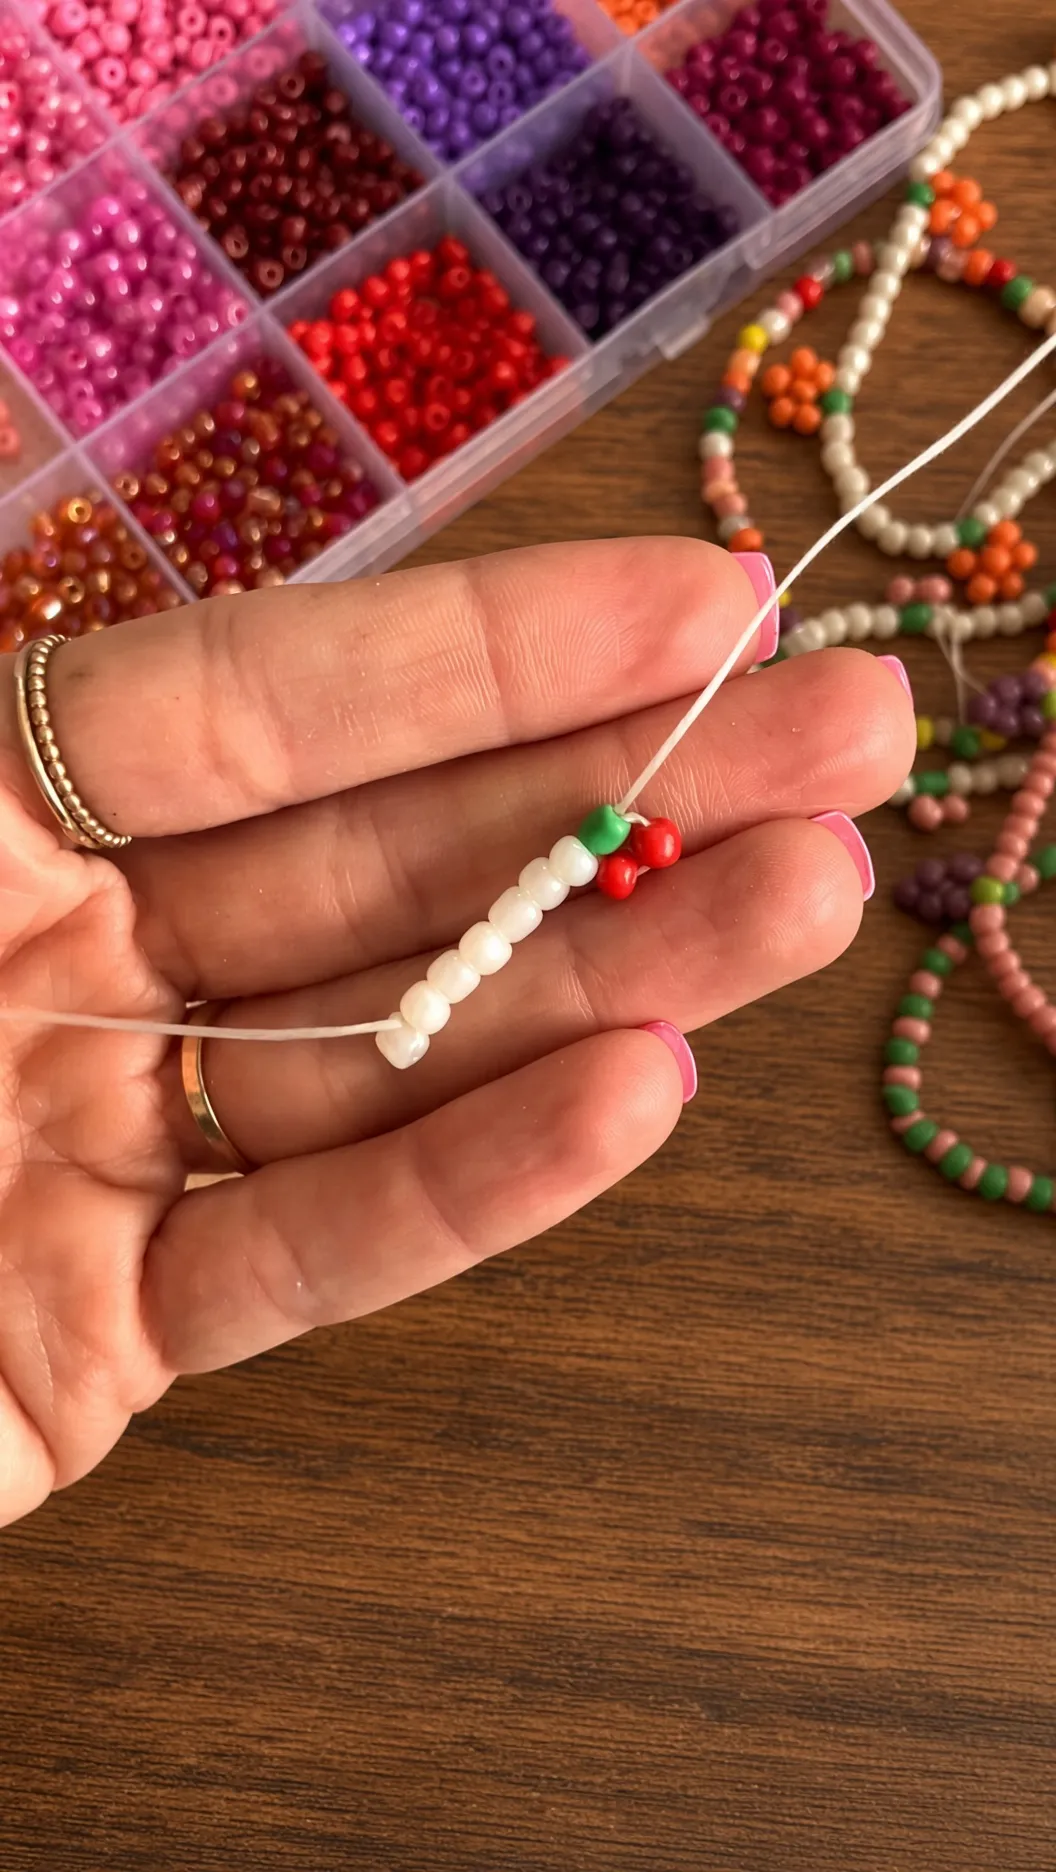
After the spacer beads, string on:
- 1 green bead
- 2 red beads
These three beads will form the small cherry detail.
Keep them close together before moving to the next step.
Step 4: Create the Cherry Shape
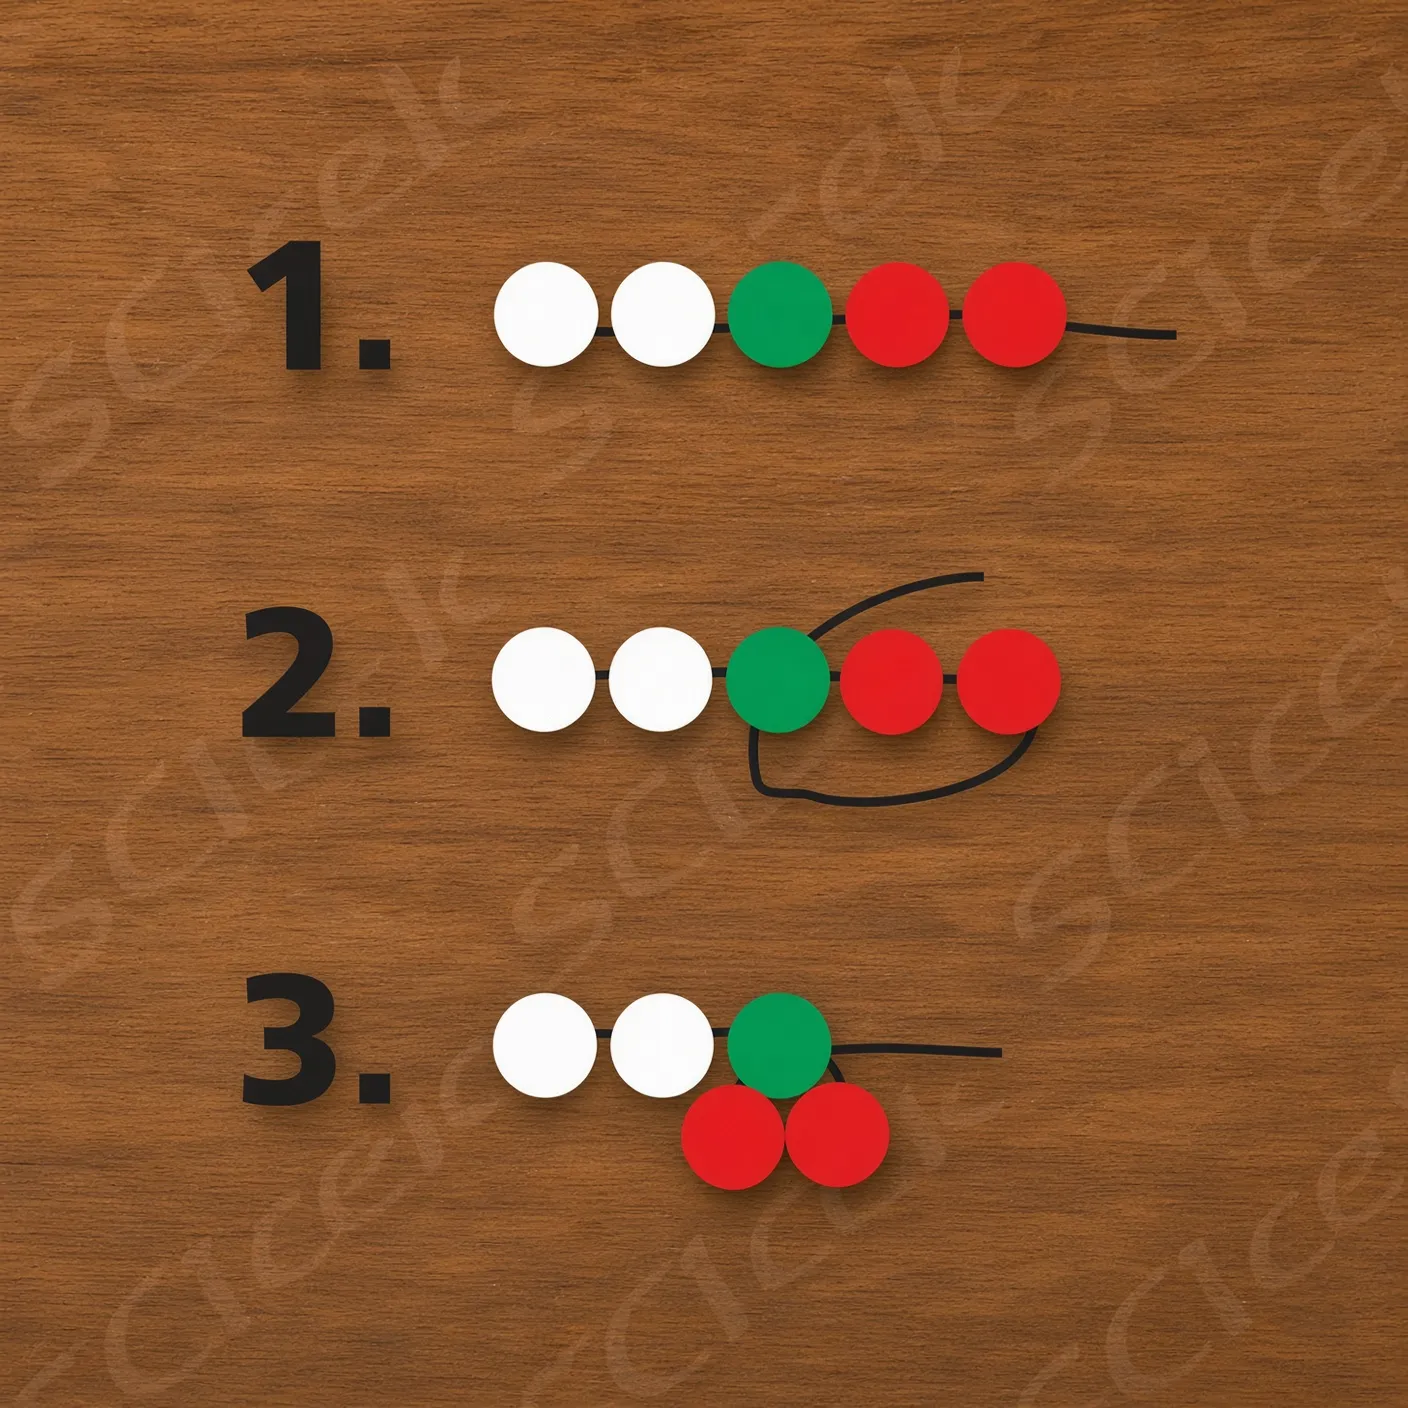
Take the needle and thread it back through the green bead.
Do not pass it back through the two red beads.
Pull the needle and cord through until the thread becomes taut.
As you tighten, the two red beads should sit together beneath the green bead, forming a small cherry-like cluster.
Adjust the beads gently with your fingers if needed.
This is the key step that creates the fruit shape.
Step 5: Repeat the Pattern
Add another group of 5 to 7 spacer beads.
Then repeat the cherry sequence:
- add 1 green bead
- add 2 red beads
- pass the needle back through the green bead
- pull the cord snug
Continue alternating:
spacer beads → cherry motif → spacer beads → cherry motif
Repeat until the bracelet reaches the desired length.
Check the fit around your wrist as you work.
Step 6: Tie and Finish the Bracelet
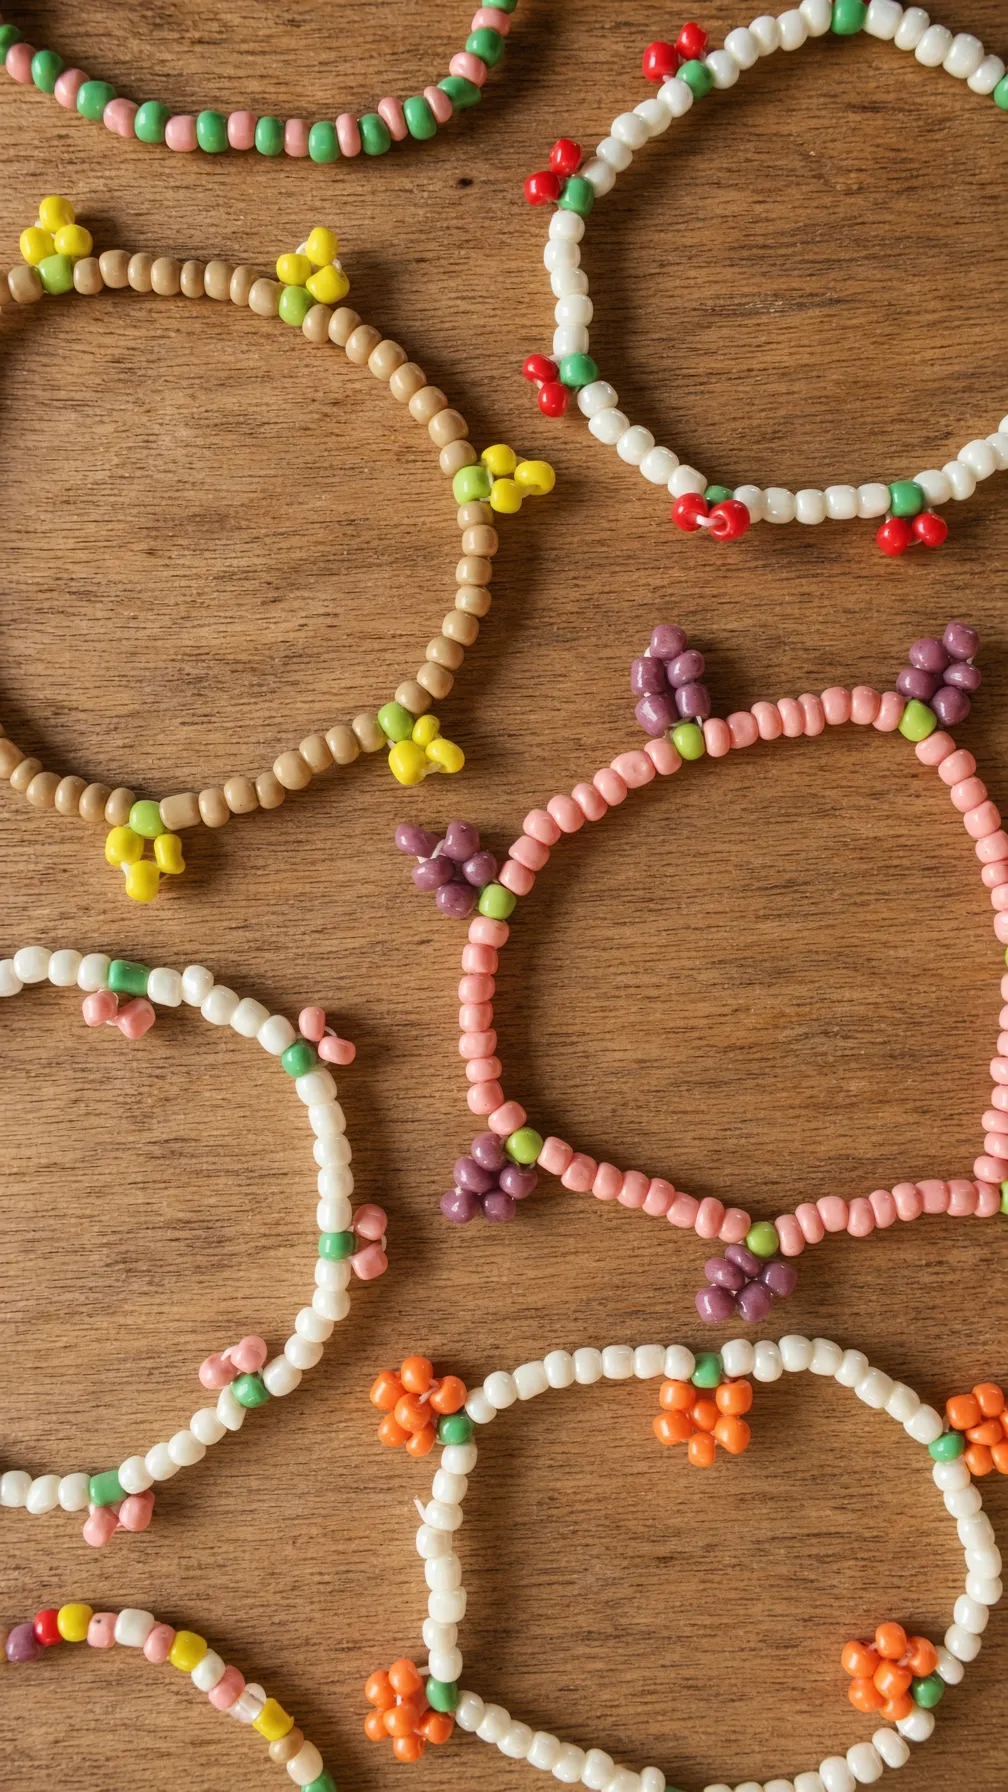
Once the bracelet is long enough, bring the two cord ends together.
Tie them securely using a double knot.
Apply a small amount of jewelry glue or clear nail polish to the knot to help keep it from slipping.
Allow it to dry.
Then trim the excess cord with scissors.
Your fruit seed bead bracelet is finished.
How the Cherry Pattern Works
The cherry motif is made from:
- one green bead
- two red beads
The two red beads are added first after the green bead.
Then the needle passes back through the green bead.
When the cord is tightened, the green bead sits above the two red beads, making the cluster look like a tiny pair of cherries.
This small repeated detail is what gives the bracelet its fruit theme.
Seed Bead Bracelet Color Ideas
You do not have to stick with red and green.
You can adapt the same basic structure into different fruit-inspired combinations.
Strawberry-Inspired
Try:
- red
- green
- white spacer beads
Lemon-Inspired
Use:
- yellow
- green
- white or clear spacer beads
Blueberry-Inspired
Try:
- blue
- green
- pale purple spacers
Watermelon-Inspired
Use:
- pink
- green
- black accent beads
The basic bracelet structure stays the same.
How Many Spacer Beads Should You Use?
The original method uses about 5 to 7 spacer beads between each fruit motif.
Using fewer spacer beads creates:
- more fruit motifs
- a busier bracelet
- a denser pattern
Using more spacer beads creates:
- more breathing room
- fewer fruit motifs
- a simpler appearance
For a balanced design, 5 to 7 spacers works well.
Tips for a Neat Seed Bead Bracelet
Keep the Cord Tension Even
Pull the cord snug enough that the cherry motif keeps its shape, but not so tight that the bracelet begins to curl.
Check the Fit Often
Seed bead bracelets can grow quickly.
Wrap the bracelet around your wrist occasionally so you do not make it too long.
Use a Fine Enough Needle
The needle must be able to pass through the seed beads comfortably.
It also needs to fit through the green bead more than once when forming the cherry cluster.
Keep the Knot Secure
A double knot plus a small amount of jewelry glue or clear nail polish helps prevent the bracelet from coming undone.
Frequently Asked Questions
What size seed beads are best for bracelets?
Good seed bead sizes for bracelets include 6/0, 8/0, and 11/0.
For beginners, 6/0 or 8/0 beads are often easier to handle because they are larger and easier to thread.
11/0 seed beads are smaller and better for more delicate or detailed designs.
For fruit seed bead bracelets, larger beads can make the pattern easier to see.
What string should I use for seed bead bracelets?
A jewelry cord that is strong enough for bracelet use works well.
For easy on-and-off bracelets, stretch cord in the approximate 0.5 mm to 0.8 mm range can be a practical choice.
If you are making detailed fruit shapes, a lighter cord may be easier to pass through small beads multiple times.
How do you keep seed bead bracelets from coming undone?
Tie the ends in a secure double knot.
Then add a small amount of jewelry glue or clear nail polish to the knot.
Let it dry before trimming the cord.
Can beginners make this bracelet?
Yes.
This is a simple pattern because the main sequence repeats:
- spacer beads
- one green bead
- two red beads
- pass back through the green bead
Once you complete the first fruit motif, the rest of the bracelet follows the same method.
Can I make this bracelet without a needle?
It may be possible depending on the stiffness of your cord and the size of the bead holes, but a beading needle makes the process much easier.
Can I use different fruit colors?
Yes.
You can change the bead colors to create different fruit-inspired bracelets while keeping the same basic technique.
Quick Fruit Seed Bead Bracelet Pattern
For easy reference:
- Cut the jewelry cord 3 to 5 inches longer than your normal bracelet length.
- Secure one bead near the end.
- Add 5 to 7 spacer beads.
- Add 1 green bead.
- Add 2 red beads.
- Pass the needle back through the green bead.
- Pull the cord taut.
- Add another group of spacer beads.
- Repeat the fruit pattern.
- Continue until the bracelet fits.
- Tie the ends with a double knot.
- Add a small amount of glue or clear nail polish.
- Let it dry.
- Trim the excess cord.
Make Your Own Fruit Seed Bead Bracelet
This fruit seed bead bracelet is a simple way to turn basic beads into a playful handmade design.
The repeating cherry motif is easy to learn, and changing the spacer colors gives you plenty of ways to personalize the bracelet.
Once you understand the technique, you can experiment with different fruits, seed bead sizes, color combinations, and bracelet lengths to create your own collection of colorful beaded jewelry.
